Using QNAP Snapshot Agent to take a VMware snapshot for Application Consistency
Overview
Backup in large-capacity environments with ensured data integrity
Data centers that provide mission-critical services require their data storage to operate 24/7 without service interruption. It is also important to have a well-rounded disaster and recovery plan for mission-critical data storage. However, large data sets can be cumbersome to back up using traditional methods - often taking several hours or days to completely backup. Traditional backup methods also lack mechanisms for maintaining data integrity. Data integrity relates to the insistent state of data files; for example, files that are open or data stored in RAM or a cache. In mission-critical data services, it is common to back up data while the applications that produce/modify data are still running. When using inconsistent backup copies for system restoration, it may result in data loss or even server/application failure if these backup files consist of application data or system state information.
To avoid these situations, we require intelligent backup methods that can better protect data integrity. We provide QNAP Snapshot Agent to preserve data integrity. Along with QNAP’s Snapshot technology, it simplifies data protection and is more robust in system restoration.
QNAP Snapshot Agent Work flow
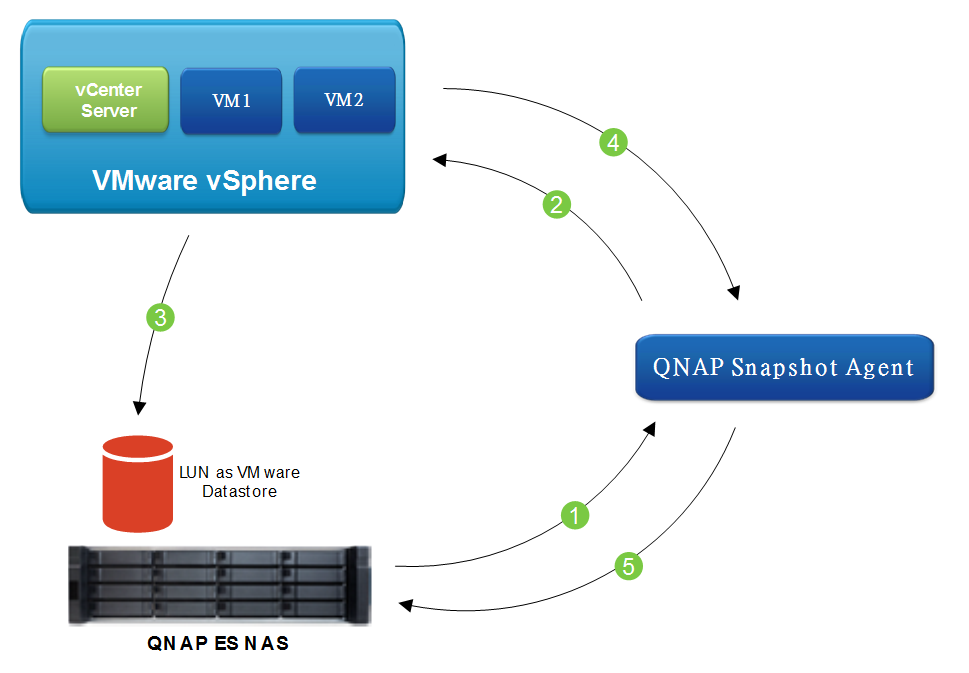
- The NAS initiates backup requests and notifies Snapshot Agent to create the snapshot.
- Snapshot Agent notifies VMware vCenter to take a Virtual Machine snapshot.
- Virtual Machine receives a snapshot request from vCenter, flushing dirty buffers from the operating system's in-memory cache to disk, or other higher-level application-specific tasks.
- VMware vCenter finishes taking the snapshot and notifies Snapshot Agent.
- Snapshot Agent notifies the NAS that the Virtual Machine has taken a snapshot. The NAS can now take a LUN snapshot.
Ready to deploy
System Requirements
Users can choose to install the QNAP Snapshot Agent directly to the Windows Server guest OS of VMware vCenter itself, or choose another Windows server.
QNAP Snapshot Agent only supports Windows Server platforms. To deploy QNAP Snapshot Agent in a VMware vCenter Server Appliance (VCSA), you must install in another Windows Server.
- Storage
- QNAP ES & TES series NAS with QES 1.1.3 (or later).
- Server environment
- Windows Server 2008 (R2), Server 2012 (R2), or Server 2016.
- The Windows environment must have .NET Framework 3.5.
- The QRemoteAPI service status must be "Running". (The status of services can be found in the Windows "Services" application.)

- Network
- QNAP Snapshot Agent listens to TCP port 11169. Ensure the NAS can access Snapshot Agent correctly.
- QNAP Snapshot Agent for VMware
- Supports VMware vSphere 4.1 / 5.0 / 5.1 / 5.5 / 6.0 / 6.5 edition.
- Snapshot Agent does not support a LUN that is mapped to a target with multiple LUNs.
- Snapshot Agent does not support a LUN that is mapped to a target with CHAP.
- During reversion, Snapshot Agent will only revert VMs that are currently registered in the vSphere Inventory. If a VM has been deleted in vSphere, Snapshot Agent will not add the VM to the inventory.
Server role and network configure list
| Server Network Settings | ||
|---|---|---|
| Role | IP | Description |
| VMware vCenter | 192.168.200.10 | VMware vCenter |
| VMware ESXi Host A | 192.168.200.1 | VMware ESXi Host A |
| Data Network A-1 | 10.1.1.1 | Data port 1 of Host A |
| Data Network A-2 | 10.1.2.1 | Data port 2 of Host A |
| VMware ESXi Host B | 192.168.200.2 | VMware ESXi Host B |
| Data Network B-1 | 10.1.1.2 | Data port 1 of Host B |
| Data Network B-2 | 10.1.2.2 | Data port 2 of Host B |
| Storage Network Settings | ||
|---|---|---|
| Setting | IP | Description |
| SCA Management IP | 192.168.101.11 | Management IP of controller A |
| SCA Ethernet1 IP | 10.1.1.11 | Data port 1 IP of controller A |
| SCA Ethernet2 IP | 10.1.2.11 | Data port 2 IP of controller A |
| SCB Management IP | 192.168.101.12 | Management IP of controller B |
| SCB Ethernet1 IP | 10.1.1.12 | Data port 1 IP of controller B |
| SCB Ethernet2 IP | 10.1.2.12 | Data port 2 IP of controller B |
Download and configure Snapshot Agent
Snapshot Agent can be downloaded from the QNAP Download Center.
For QNAP ES Series
https://www.qnap.com/en/download?model=es1640dc%20v2&category=utility
For QNAP TES Series
https://www.qnap.com/en/download?model=tes-1885u(qes)&category=utility
Install QNAP Snapshot Agent
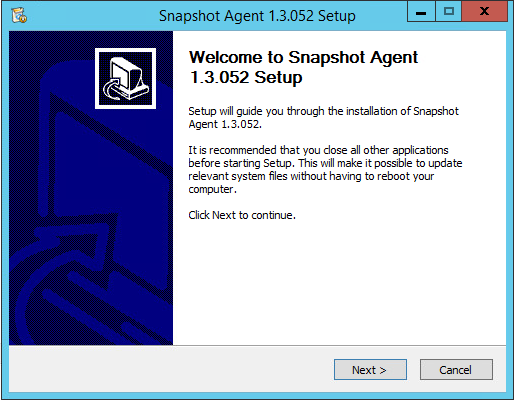
Step 1: Launch the Snapshot Agent installer and click "Next".
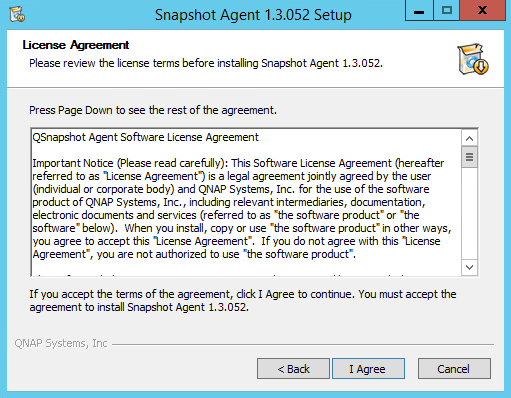
Step 2: Read and agree to the terms of the License Agreement and then follow the on-screen instructions to install the software.
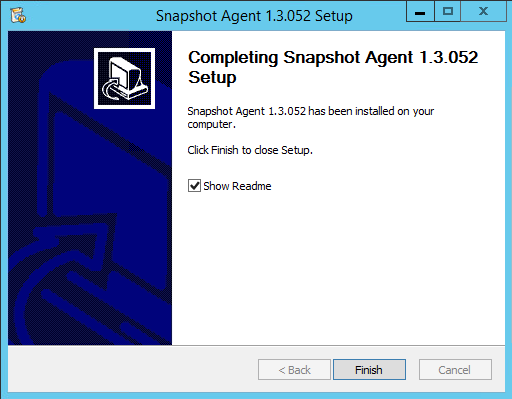
Step 3: Click "Finish".
Configure Snapshot Agent
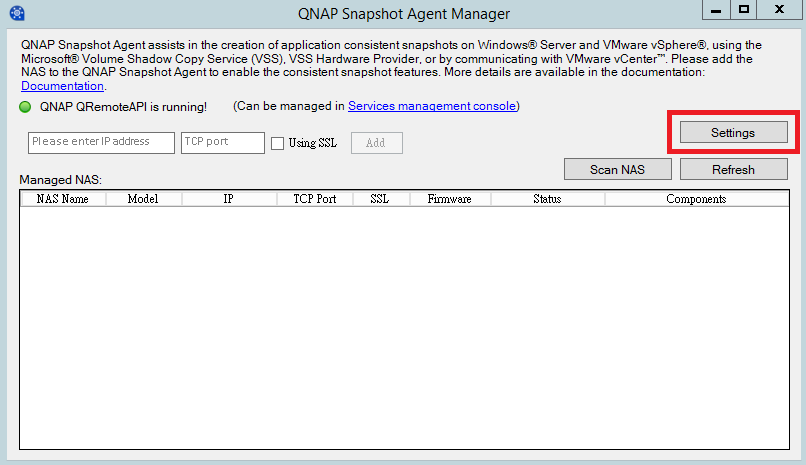
Step 1: Double-click on the desktop shortcut for "QNAP Snapshot Agent Manager".
Step 2: Click "Settings".
Step 3: In the "VMware" tab, enter the vCenter IP address and log in information (vCenter is required to use a VMware environment). Configure VMware Snapshot settings ("Snapshot virtual machine’s memory" is enabled by default) and then click "OK".
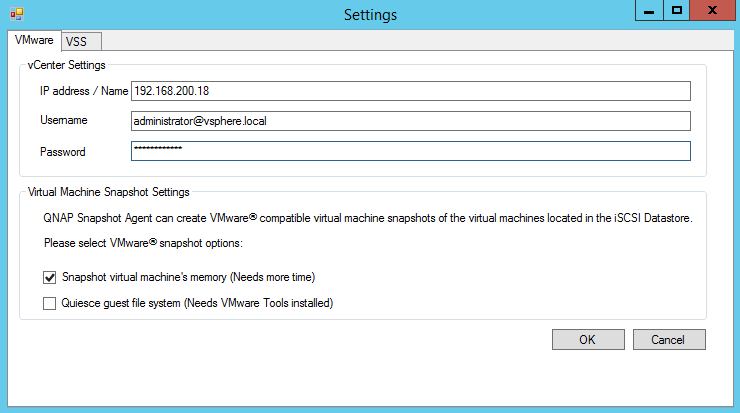
About Virtual Machine Snapshot Settings
- Snapshot virtual machine’s memory
When taking a virtual machine snapshot, the current state of the virtual machine will be preserved. The more virtual memory allocated, the longer a snapshot job will take and more storage space will be required. When enabled, after the snapshot is reverted, the virtual machine will resume the working state of when the snapshot was taken. - Quiesce guest file system
The virtual machine must have VMware Tools installed to use this setting. Quiescing a file system is a process of bringing the on-disk data of a physical or virtual computer into a state suitable for backups.
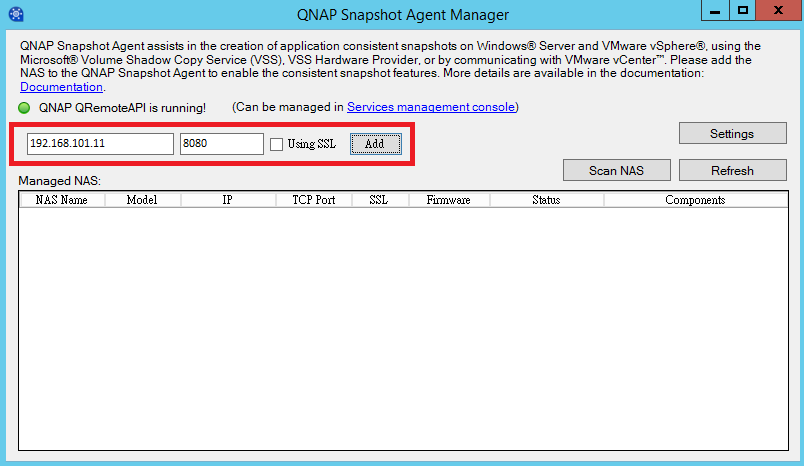
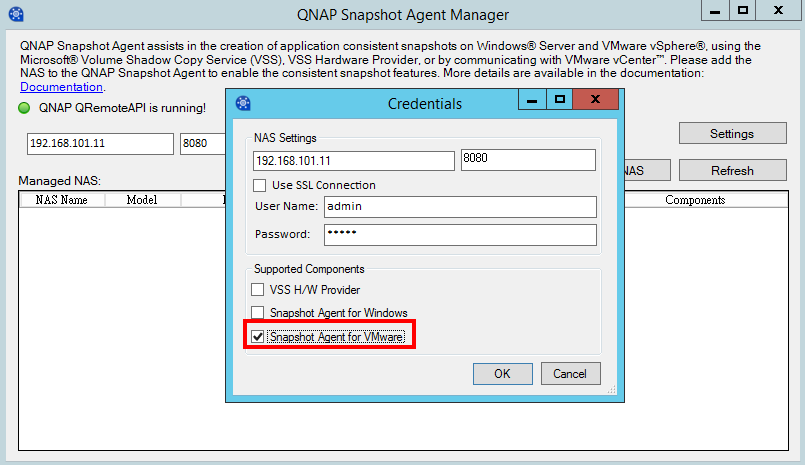
Step 4: Enter the NAS IP address and port (8080 by default) to enable management. For a secure connection, enable "Using SSL".
You can also click "Scan NAS" and QNAP Snapshot Agent Manager will find reachable QNAP NAS on your local area network. You can then select the NAS to manage it.
Step 5: Enter the log in information for the NAS. Enable "Snapshot Agent for VMware" to install the VMware Snapshot Agent component.
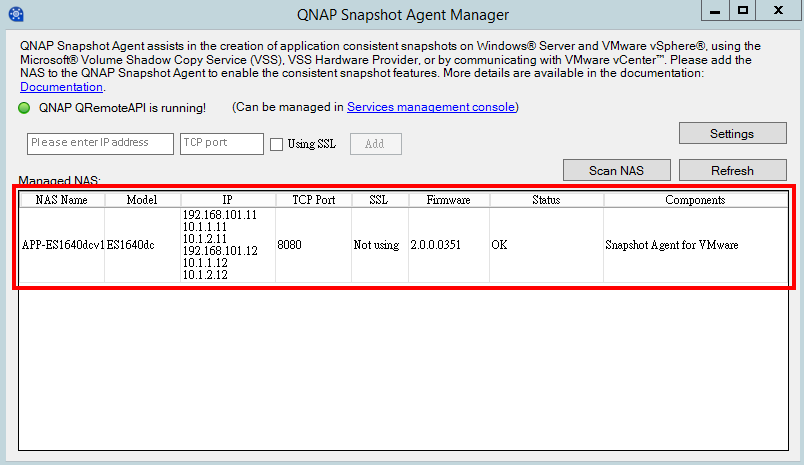
Step 6: Return to the main screen, and the NAS and components should be added to the list of Managed NAS.
TIPS: Unable to register Snapshot Agent for VMware
If you receive the "Register Snapshot Agent for VMware failed" error message when registering the NAS, check your firewall settings and ensure TCP port 11169 is allowed.
Step 7: You can check if the Snapshot Agent is connected to the ES NAS from QES.
Log into the ES NAS as an administrator, go to "Storage Manager" > "iSCSI Storage" > "Snapshot", and click "Snapshot Agent".
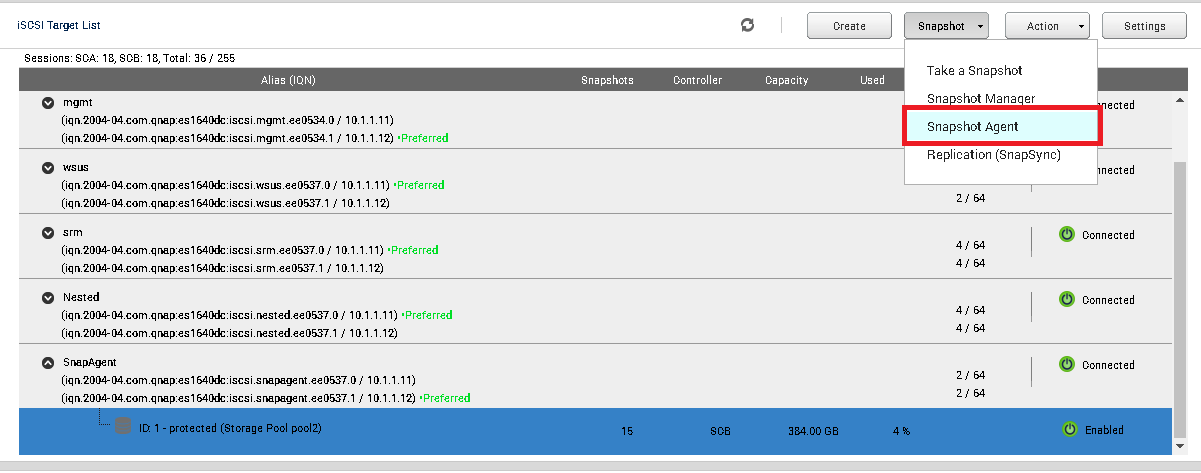
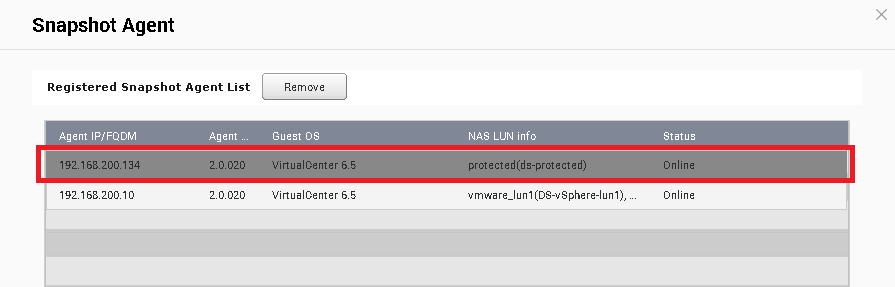
Step 8: A list of Snapshot Agents that are currently connected to the ES NAS will be displayed.
Using QNAP Snapshot Agent to create iSCSI LUN snapshot
In this chapter, we will demonstrate the Snapshot function of QNAP ES and TES series NAS, and use Snapshot Agent with VMware environment to take snapshots of virtual machines without affecting virtual machine operations.
In this example, an iSCSI LUN has been created on the QNAP ES and TES series NAS and an iSCSI Target that allows the VMware ESXi host to mount. The VMware ESXi host will add a datastore for storing virtual machines by mounting the iSCSI LUN. Then it will use VMware vCenter to deploy virtual machines into the datastore.
Create iSCSI LUN Snapshots
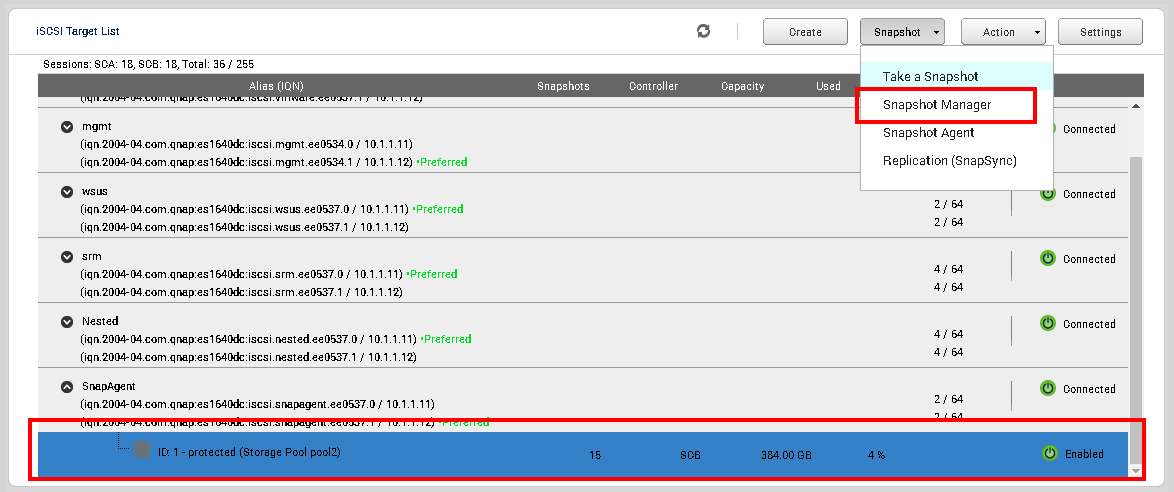
Setp 1: Log into the ES NAS as an administrator and go to "Storage Manager" > "iSCSI Storage". Select an iSCSI LUN and from the "Snapshot" drop-down menu select "Take a Snapshot".
Step 2: Enter a Snapshot Name and select the retention duration. In Snapshot Type, select "Application consistent" and click "OK".

TIPS: The difference between Crash consistent and Application consistent
| Crash consistent | Application consistent | |
| Snapshot Content | Only the data on the disk | The data from the disk, cache and memory |
| Snapshot Agent Needs | No | Yes |
| Application-Aware | No | Yes |
| Preliminary Process | No | Yes |
| Note | Unsuitable for Database backup | Suitable for Database backup |
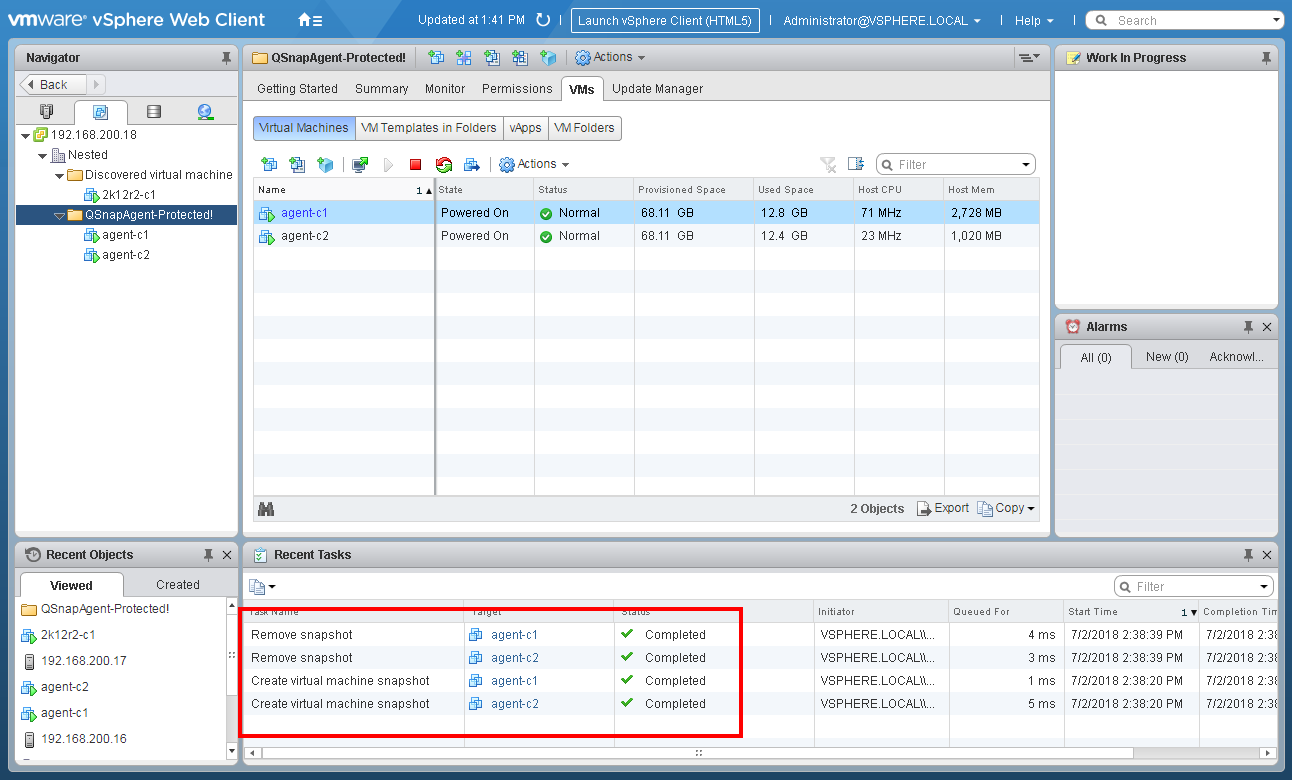
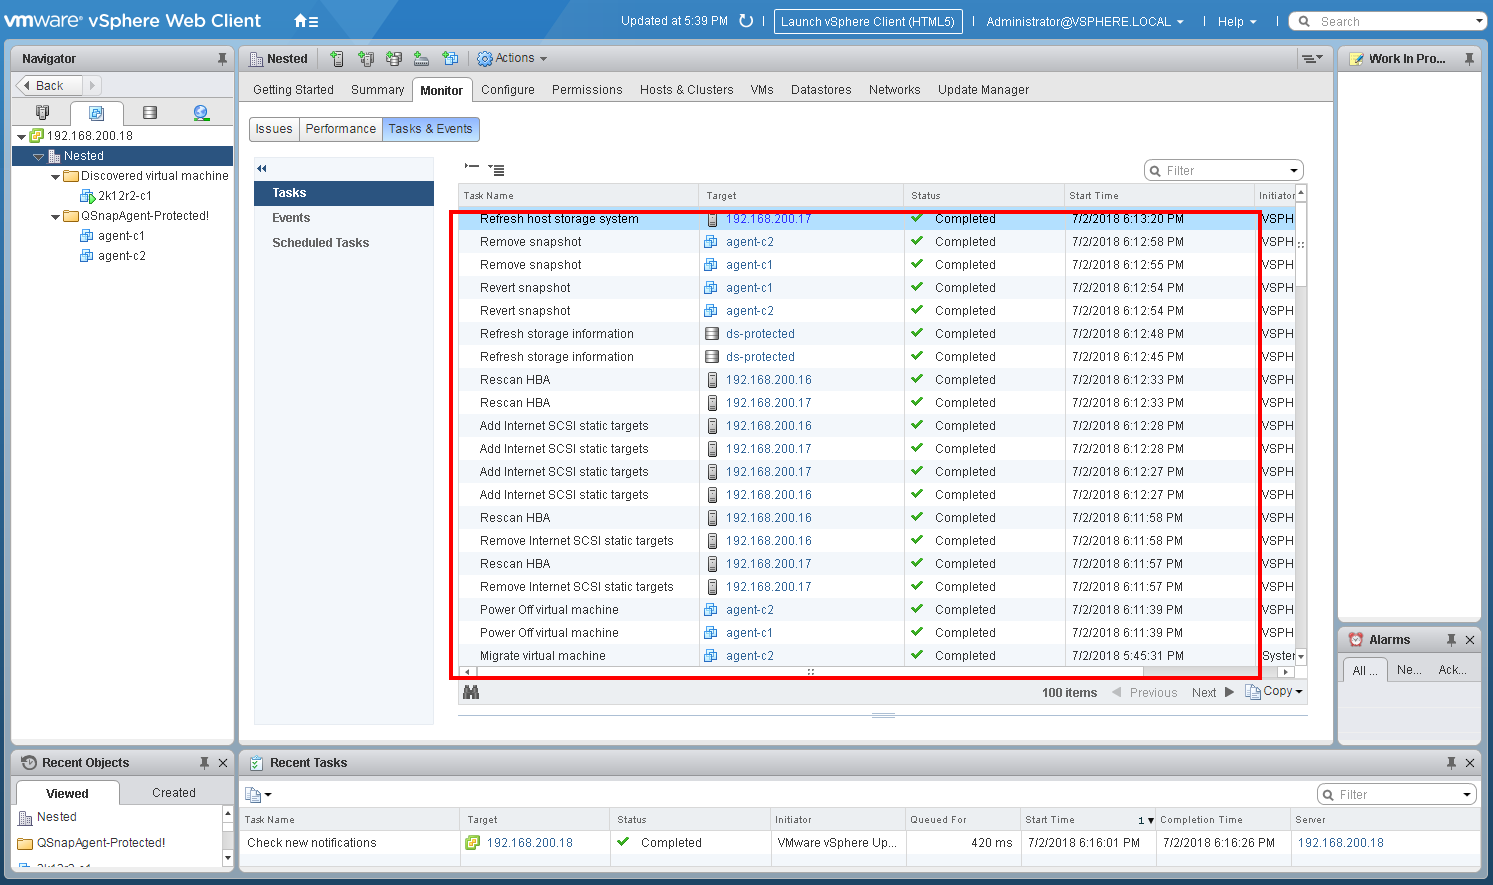
Step 3: VMware vCenter will be triggered to take snapshots for each virtual machine and will store them in the Datastore. After VMware completes the snapshot, it notifies the NAS to take the LUN snapshot. The VMware snapshots will be removed after the LUN snapshot had been taken, as the application-consistent snapshot is already included in the iSCSI LUN snapshot. The following screenshot shows how VMware vCenter creates and removes VMware snapshots for virtual machines.
Step 4: After the snapshot task completes, log into the ES NAS as an administrator and go to "Storage Manager" > "iSCSI Storage" > "Snapshot". Click "Snapshot Manager" to view the snapshot status.
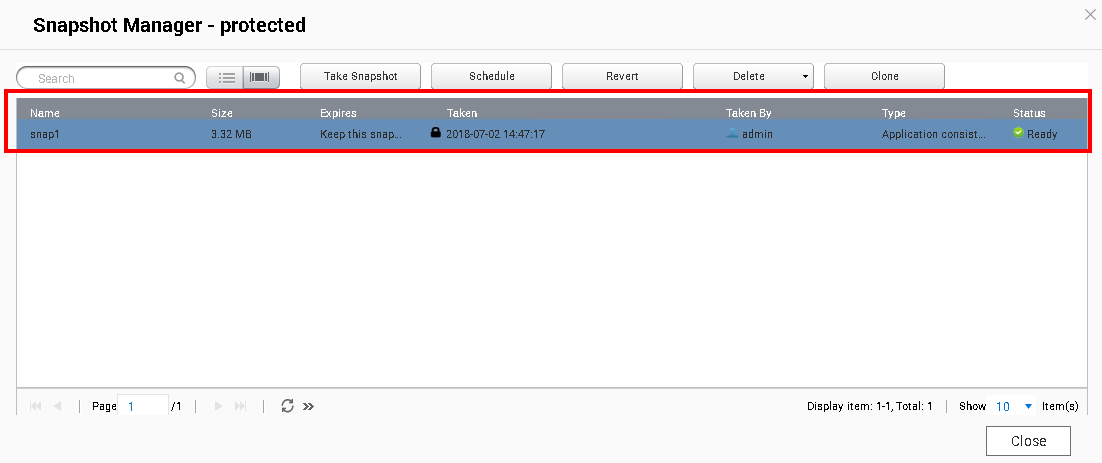
Step 5: The information of the snapshot just taken will be displayed.
Restore iSCSI LUN snapshot
You can restore VMware-connected iSCSI LUNs directly from the NAS without un-mapping the iSCSI target. Snapshot Agent will automatically detach the VMware Datastore, restore the iSCSI LUN, remount the VMware Datastore, and restore the virtual machine snapshot. If the virtual machine is deleted before restoring the LUN Snapshot, you must to manually add the virtual machine back to the inventory.
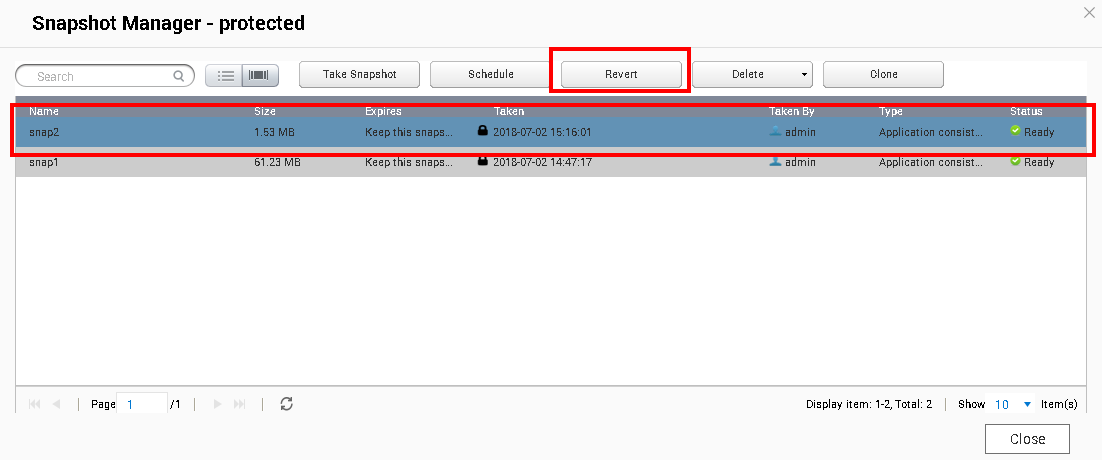
Step 1: Go to "Storage Manager" > "iSCSI Storage" > "Snapshot", and click "Snapshot Manager".
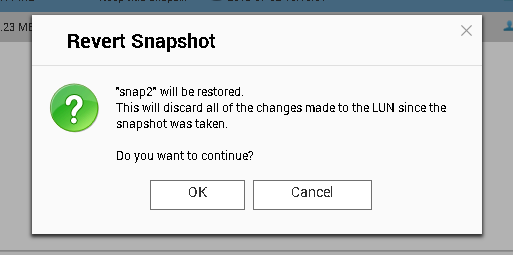
Step 2: Select the snapshot to be restored and click "Revert".
Step 3: As snapshots created after the snapshot being reverted will be deleted, and as data may be lost when reverting a snapshot, you must confirm this action. Click "OK" to confirm.
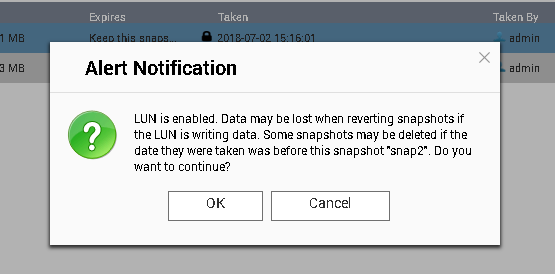
As the changes made after taking the snapshot will be discarded, you must confirm this action. Click "OK" to confirm. The virtual machine located in this LUN will be powered-off.
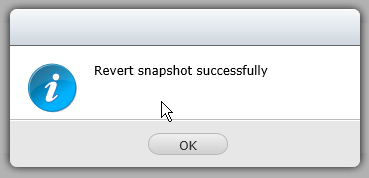
Step 4: Click "OK".
Step 5: Open VMware vCenter to check the virtual machine status. The virtual machine will be powered-off, and the datastore detached to let the NAS restore the LUN snapshot. VMware vCenter will then import the virtual machine to Inventory, and restore the virtual machine application-consistent snapshot.
If the snapshot is restored with "Snapshot virtual machine’s memory" enabled, the virtual machine will revert to the current state of the snapshot. If user enabled "Quiesce guest file system", the virtual machine will remain powered off and must be manually powered on.


