How do I set up two RAID 1 groups in TR-004?
Applicable Products
- TR-004
- QNAP External RAID Manager
Overview
The QNAP TR-004 is a 4-bay RAID expansion enclosure that supports multiple RAID configurations. When connected directly to a Windows PC or Mac OS, you can use the QNAP External RAID Manager utility to configure RAID groups. To set up two RAID 1 arrays, you must configure the device so that each pair of disks operates as a separate RAID 1 group.
Each RAID 1 array requires two disks. All data on the selected disks will be deleted during setup. The TR-004 must be set to Software Control mode to use the External RAID Manager.
Procedure
Important: Back up all important data before configuring or deleting RAID groups, as this process will erase all data on the selected disks.
- Set the TR-004 to Software Control mode.
- Ensure the mode switch on the rear of the TR-004 is set to Software Control before connecting it to your PC.
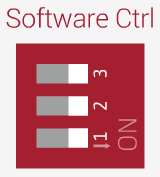
- Ensure the mode switch on the rear of the TR-004 is set to Software Control before connecting it to your PC.
- Connect the TR-004 to your Windows PC using the USB cable and power it on.
- Download and install QNAP External RAID Manager from the QNAP website.
- Launch QNAP External RAID Manager.
- Select the TR-004 device in the application interface.
- To create the first RAID 1 group:
- Click Configure RAID Group.
- Select two disks for the first RAID 1 array.
Warning: All data on the selected disks will be deleted. Unselected disks will be assigned as spare disks and cannot be used until the RAID group is deleted. - Select RAID 1 as the RAID type.
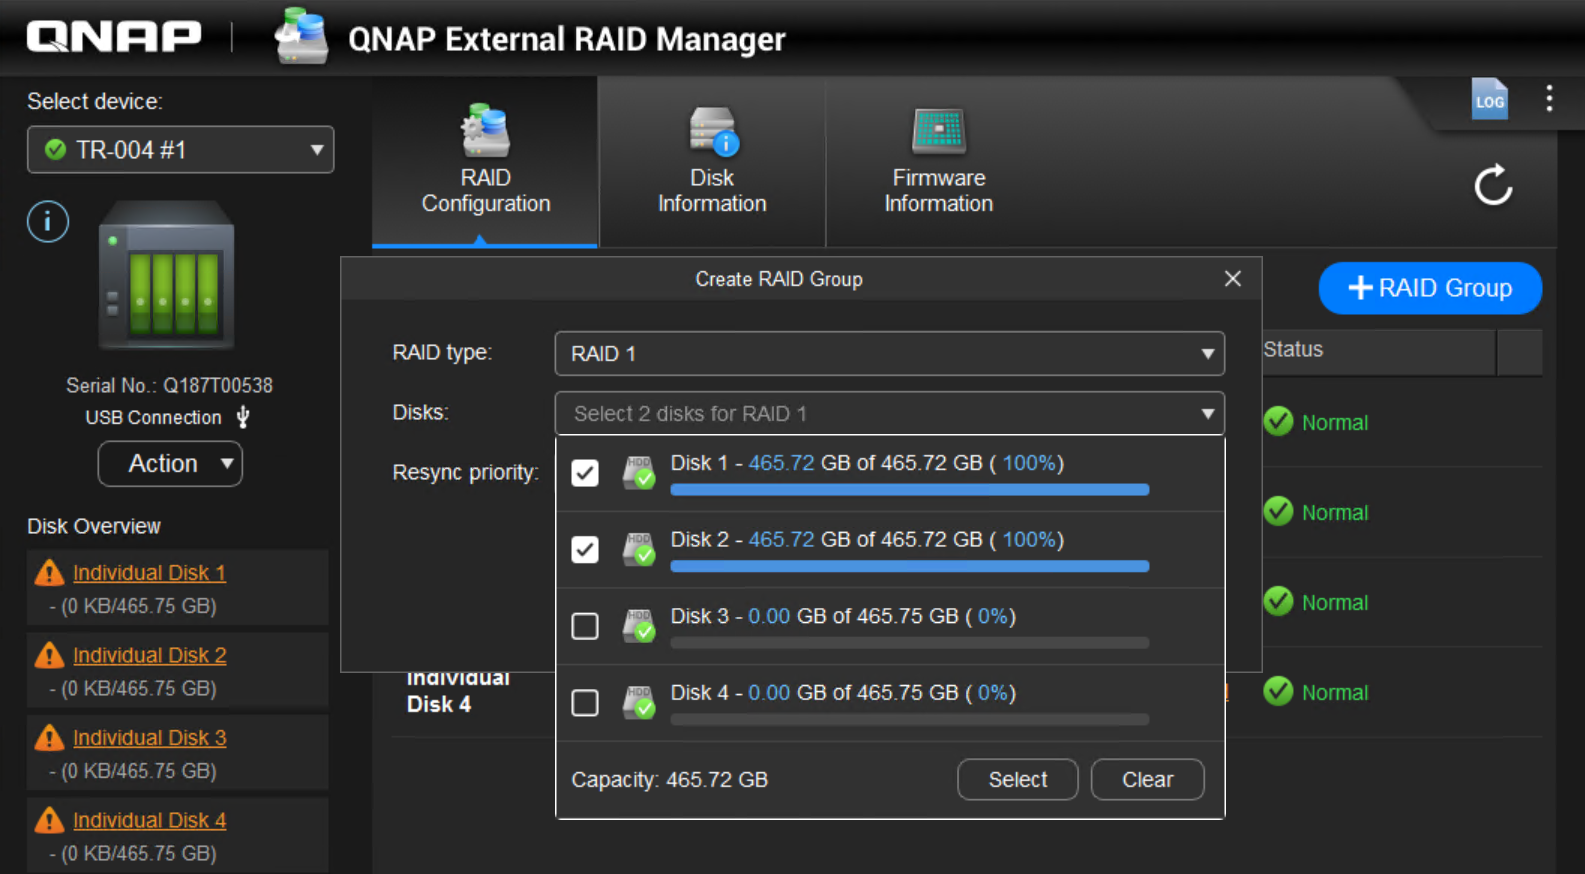
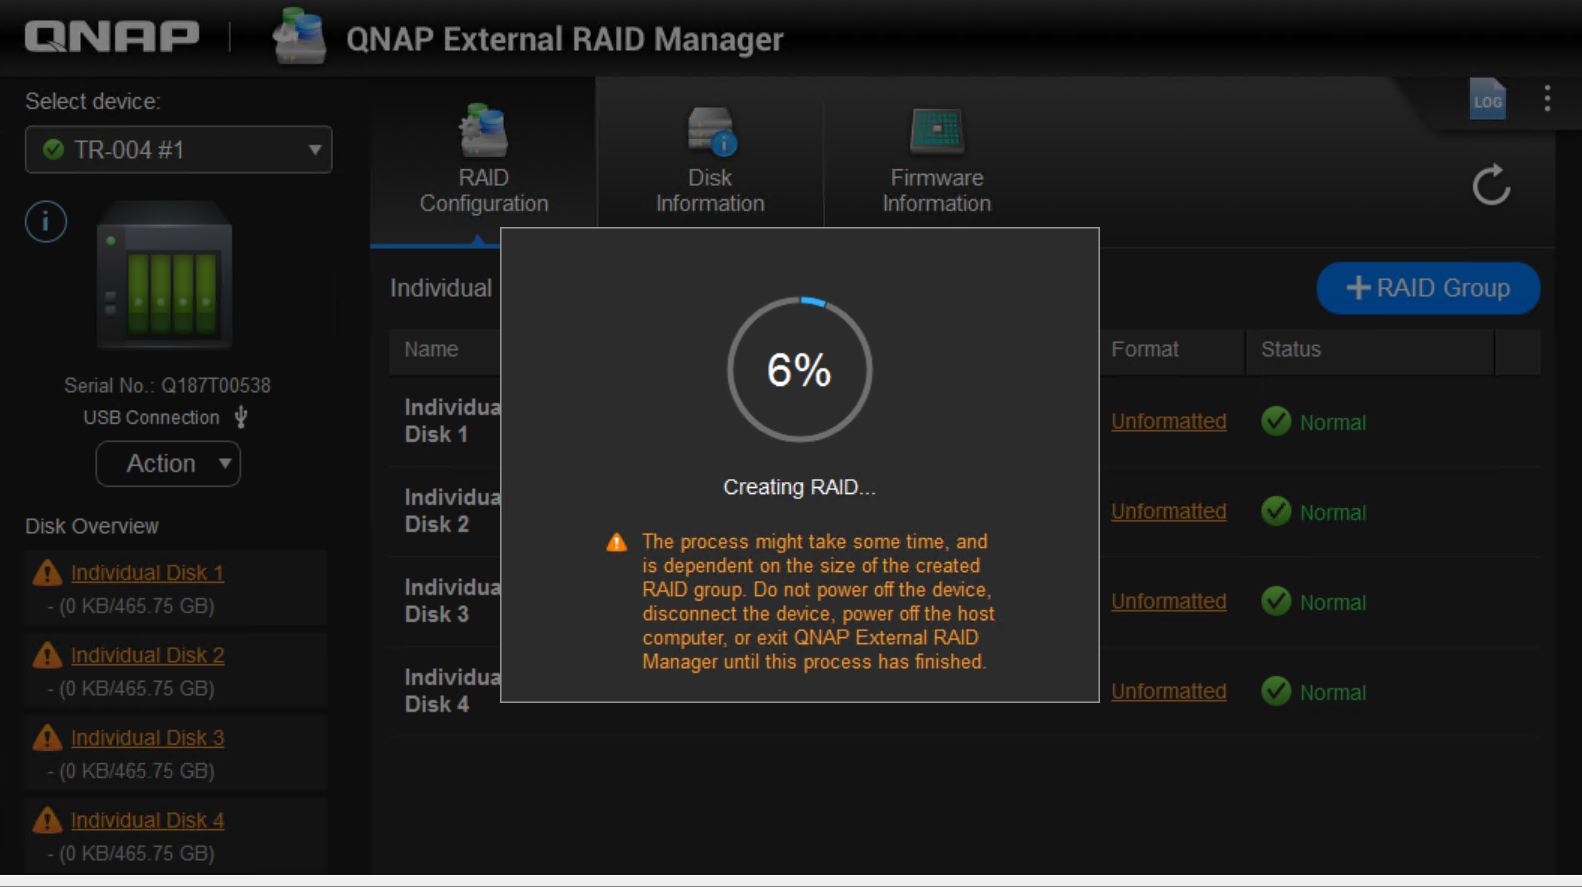
- Click Create to start the RAID creation.
- To create the second RAID 1 group:
- Repeat above steps and select remaining two disks to create second RAID 1 group.

- Click Create to start the 2nd RAID creation.

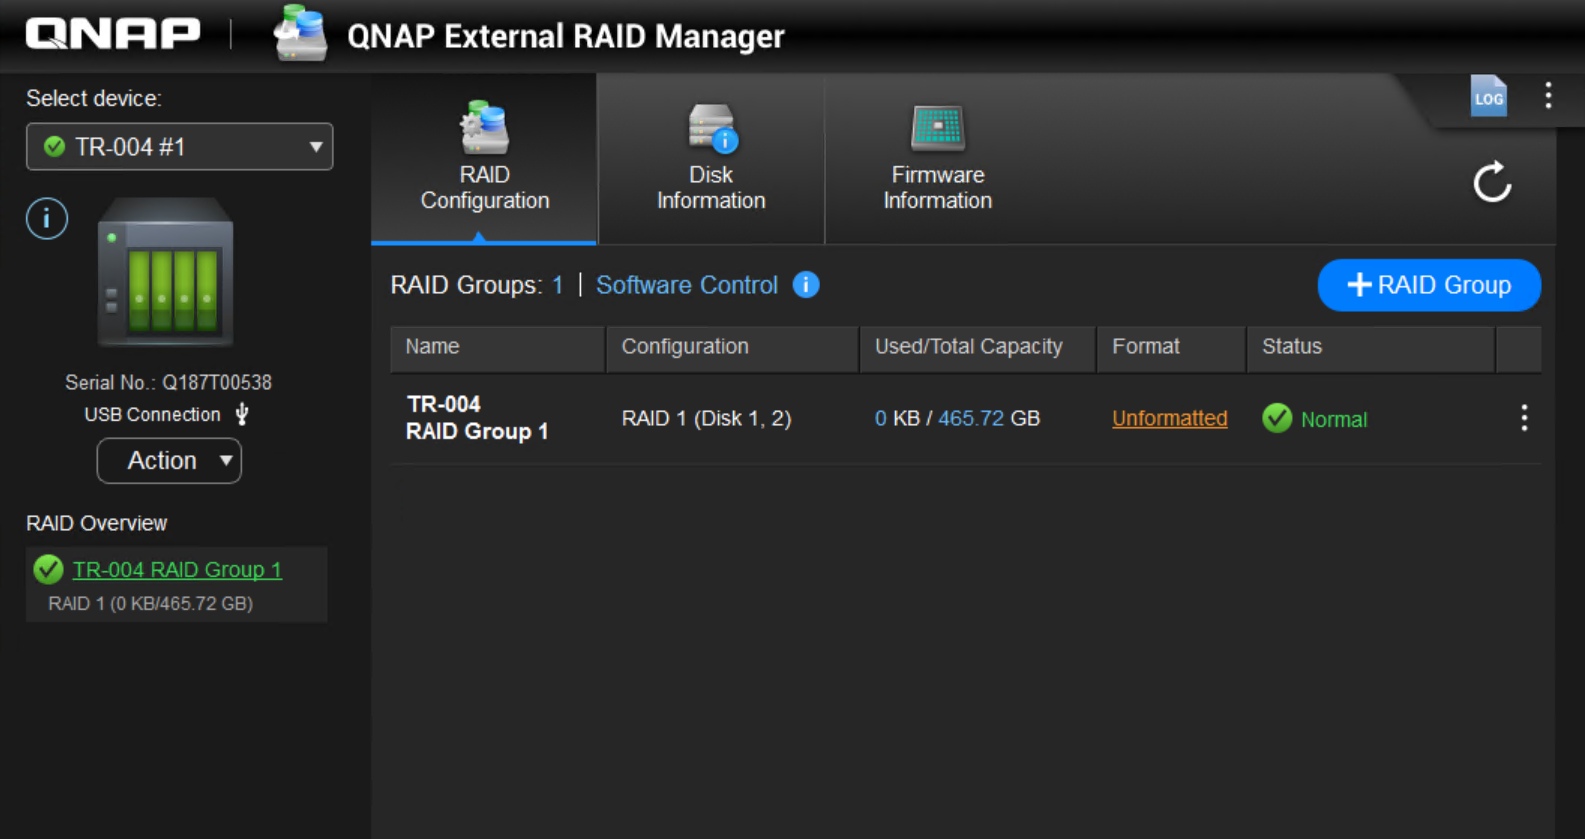
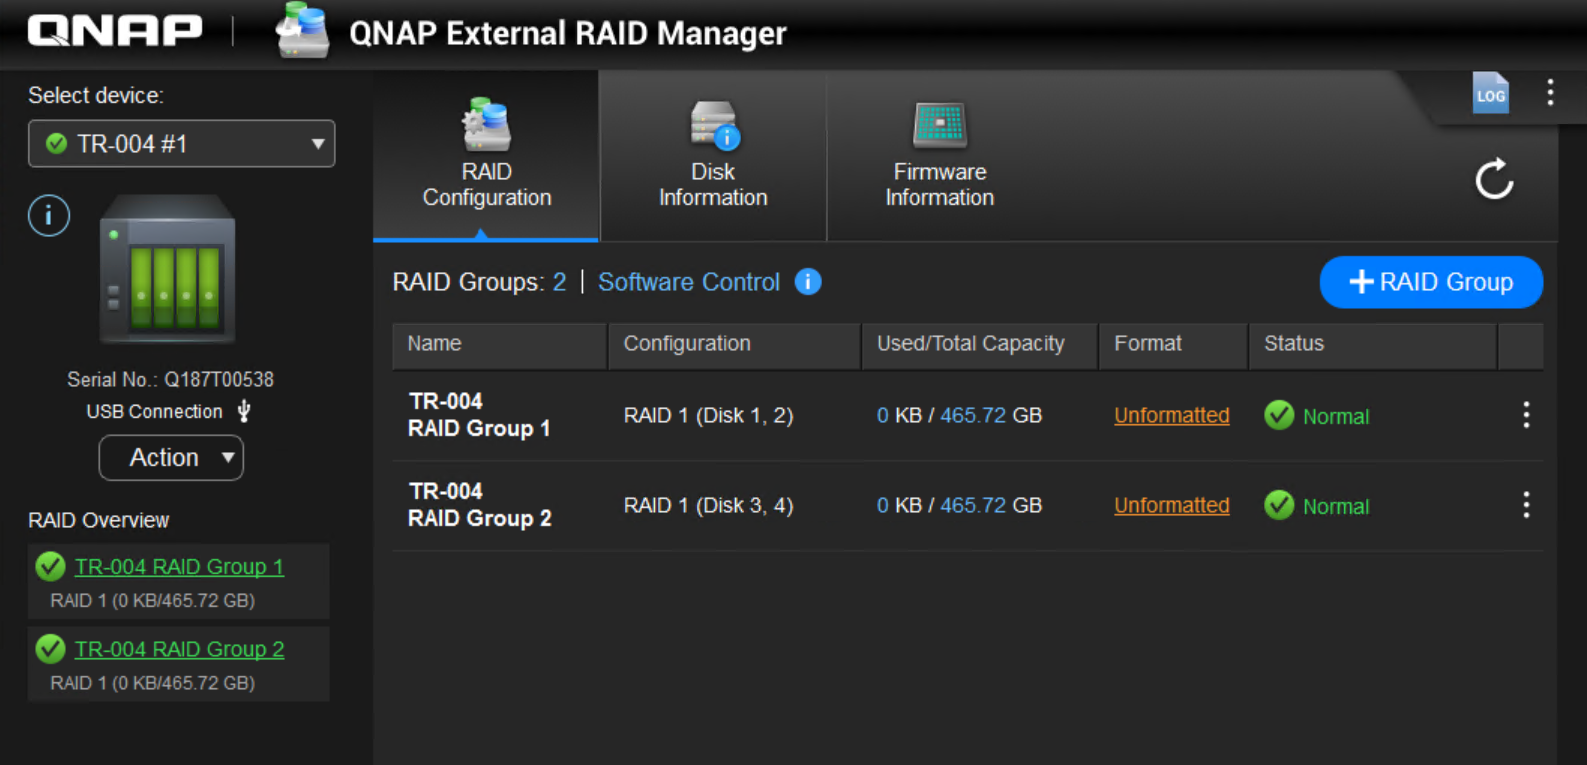
- Two RAID 1 groups are created.
- Repeat above steps and select remaining two disks to create second RAID 1 group.
- Open Disk Management(on Windows):
- Right-click the Start button and select Disk Management.
- Locate the TR-004 volume in the list of disks. It may appear as unallocated if it hasn't been formatted yet.
- Right-click the unallocated space and select New Simple Volume.
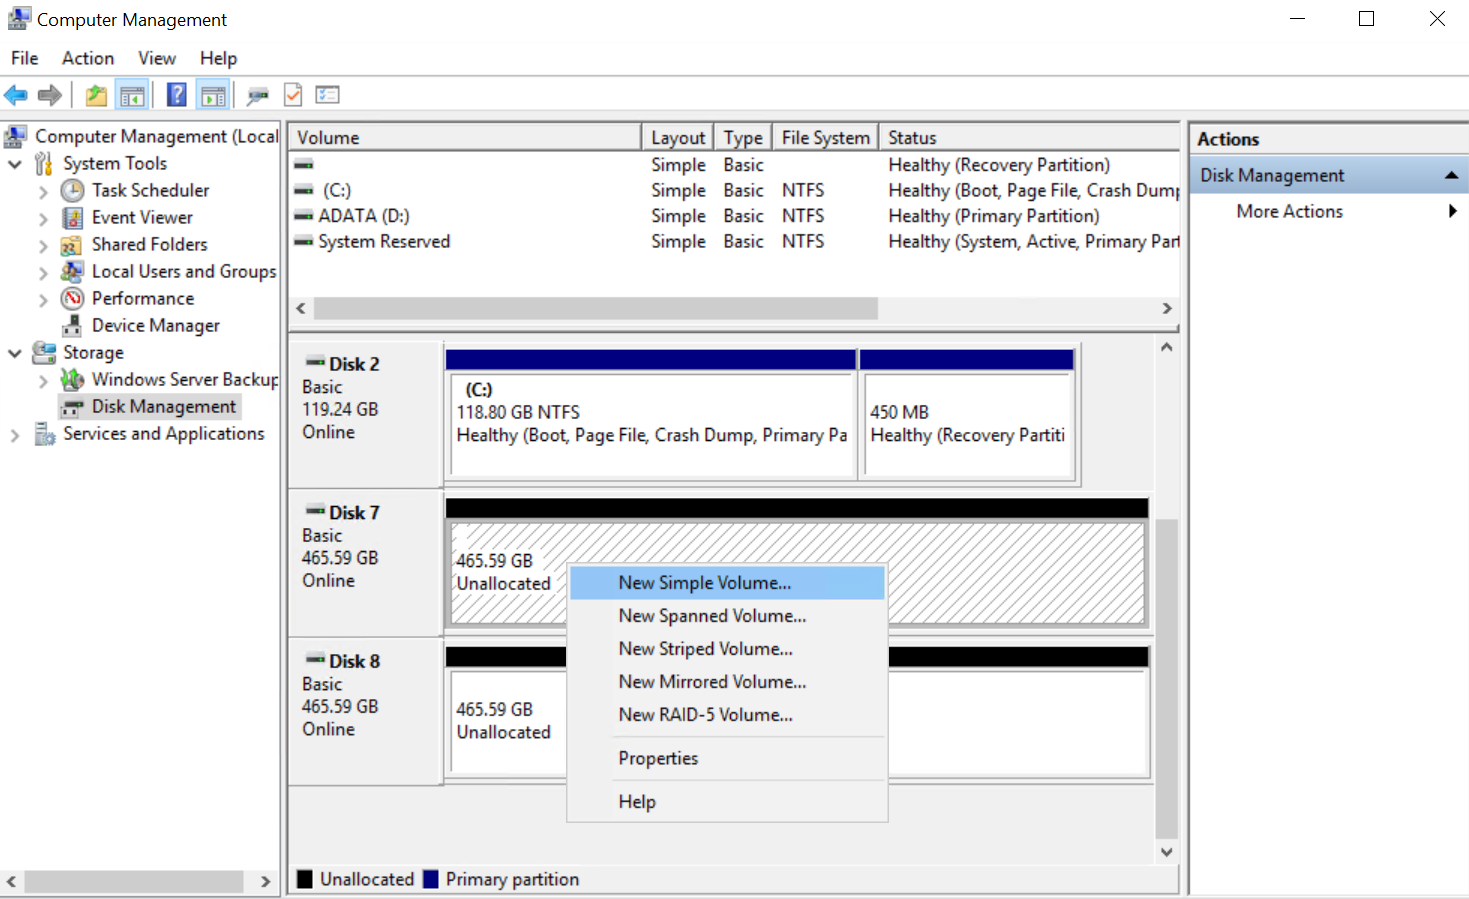
- Follow the on-screen instructions to create and format a new partition. Choose your preferred file system (for example, NTFS or exFAT) and assign a drive letter.
- Click Finish to complete the formatting process.
For macOS or Linux computers, use the built-in Disk Utility or disk management tools to format the TR-004.


