How to setup Wordpress to use HTTPS connection ?
Applicable Products:
- Wordpress
- QTS 5.0 or later
After installing WordPress in App center, HTTP connection is used by default. If you want to access WordPress via HTTPS connection, you need to manually modify the configuration file of WordPress.
-
Refer to the link below to locate the configuration files of WordPress
How do I locate the configuration files of WordPress after upgrading WordPress to 5.8.x in QTS 5.0?
Normally the configuration files are located in /share/CACHEDEV1_DATA/.qpkg/WordPress/data/web/WordPress
-
Follow the steps below to manually map WordPress folder in Shared Folder setting then edit/upload those files using File Station:
-
Log in to QTS as administrator.
-
Go to Control Panel > Privilege > Shared Folders
-
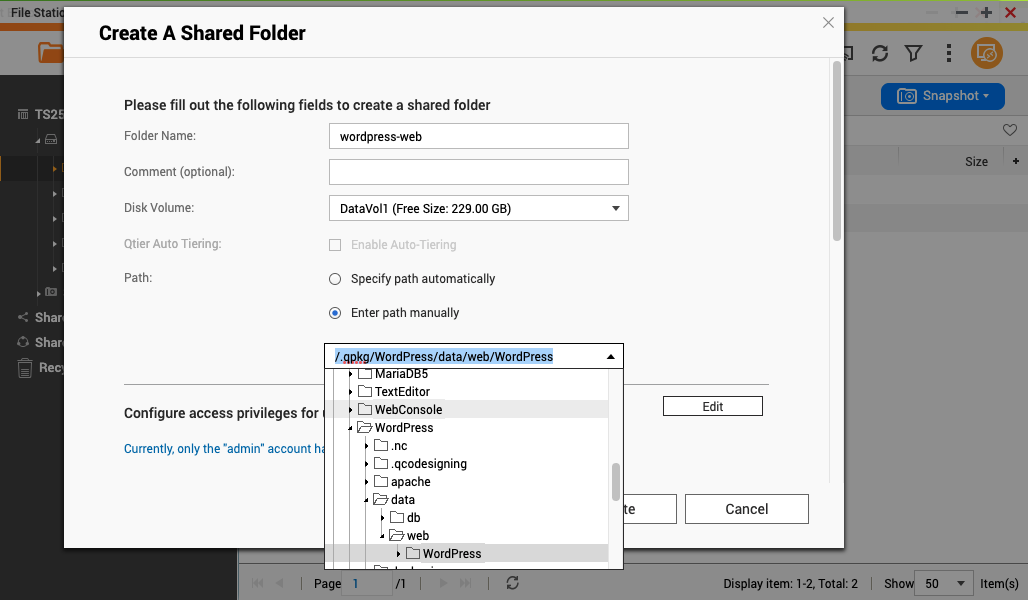
Select Create > Shared Folder.
- Choose Disk Volume (for example: DataVol1 )
- Select Enter path manually
- Click the dropdown menu and locate WordPress folder (for example: /.qpkg/WordPress/data/web/WordPress )
- Enter the Folder Name.(for example: WordPress-web)
- Select “Create” .
-
-
Edit the configuration files by Text Editor
-
Log in to QTS as administrator.
-
Open App Center, install Text Editor.
-
Open File Station
- Right-click wp-config.php in wordpress-web shared folder.
- Click Edit in Text Editor
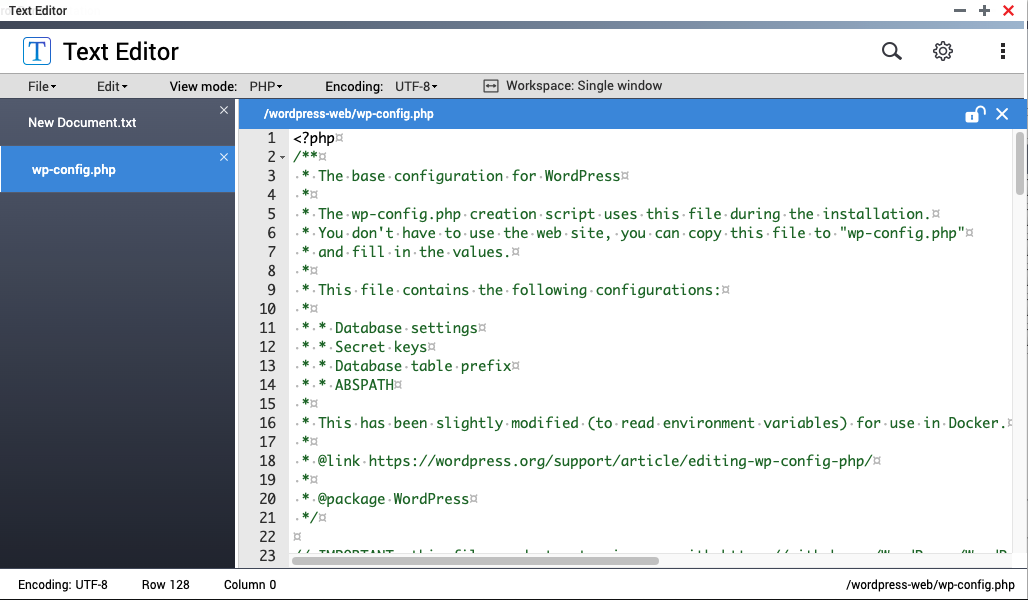
Text Editor window opens.
-
Locate the end of this file :/* That's all, stop editing! Happy publishing. */, before this line, add the following three lines of settings.
Including the content of WP_HOME and WP_SITEURL.
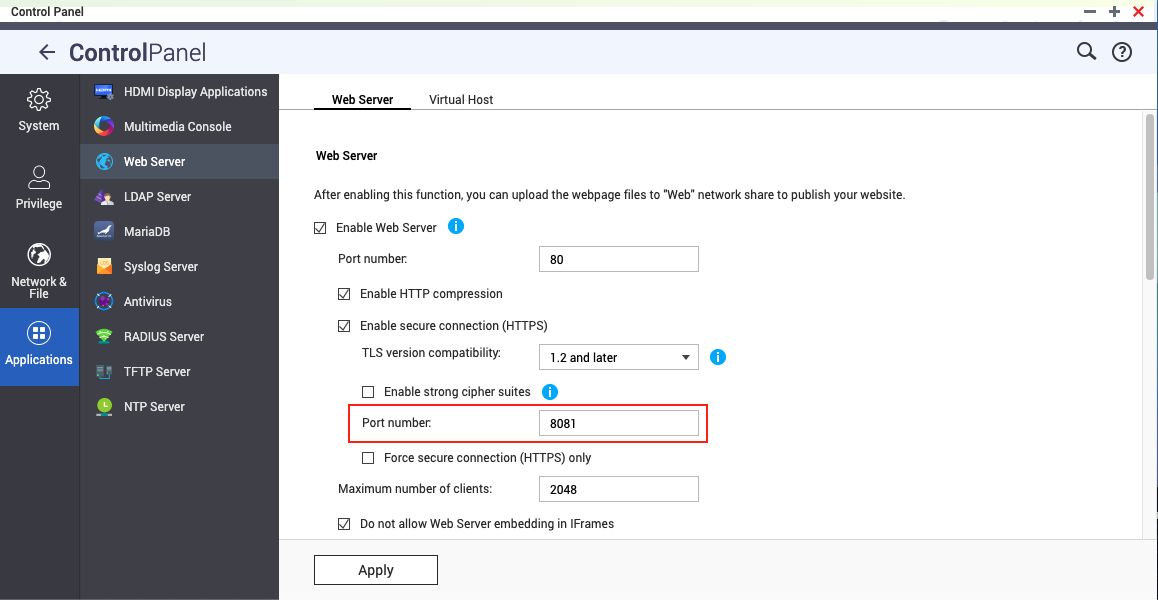
About the IP:Port Number, please adjust according to the NAS environment, the setting of QTS Web Server https port number.define('WP_HOME','https://172.17.34.50:8081/WordPress');
define('WP_SITEURL','https://172.17.34.50:8081/WordPress');
$_SERVER['HTTPS'] = 'on';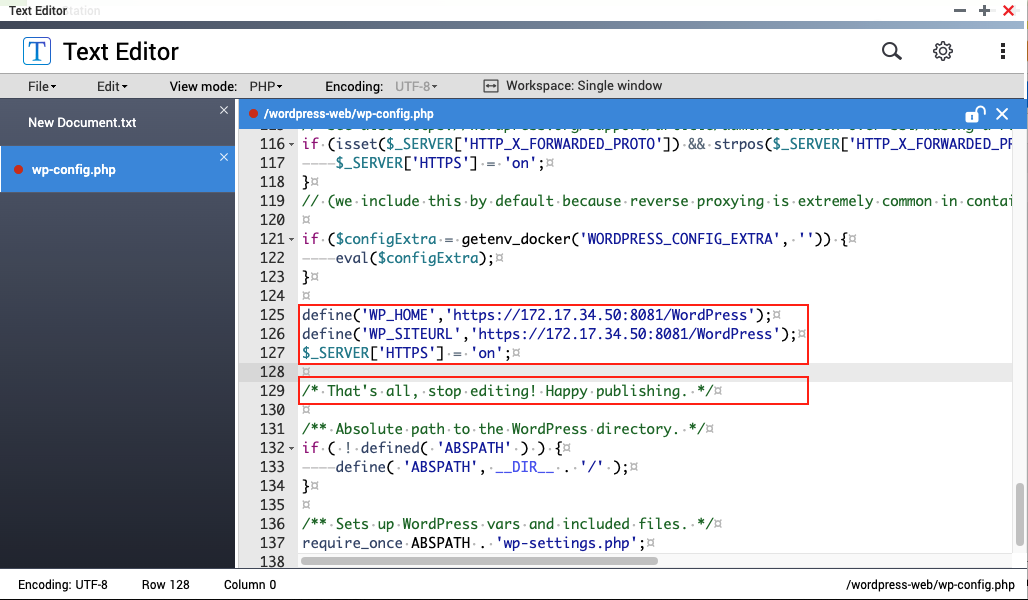
-
Save the file
-
-
Now, the Browser is able to WordPress by HTTPS connection.
Note: After applying this method, The HTTP connection to WordPress site will also be force redirect to HTTPS connection.


