How to Configure a Spare Disk?
Applied models:
-
All NAS Series
Applied Firmware:
-
4.4.1 or above
A Hot Spare Disk is used as an extra protection against data loss: when a disk fails the hot spare disk will automatically replace the faulty disk. If there are no failing disks, the spare disk remains unused and does not store any data.
There are 2 kind of spare drives:
-
RAID Group Hot Spare. The spare drive can only be used in a specific RAID Group.
-
Enclosure Spare Disk. The spare drive can be used in all RAID Groups within the same enclosure.
Notes:
-
All existing data on the new drives will be deleted (data on existing drives will not be deleted)
-
Different storage enclosures (such as expansion units) cannot share the same spare disks
-
The disk will appear as a “Spare” on the Disks/VJBOD screen.
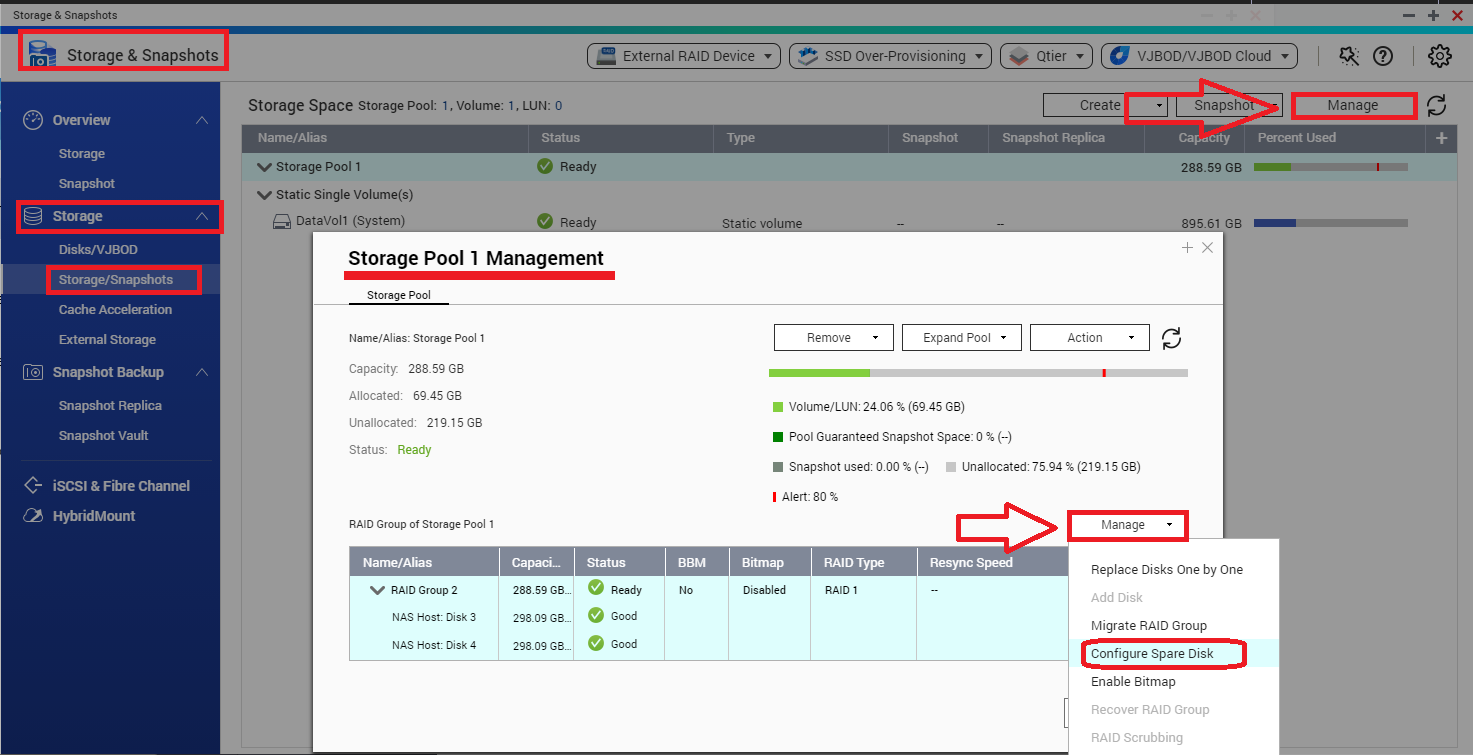
How to configure a RAID Group Hot Spare:
-
Go to Storage & Snapshots > Storage > Storage/Snapshots
-
Select a storage pool or single static volume, and click on “Manage”
-
Select a RAID Group and click on “Manage” > “Configure Spare Disk”
-
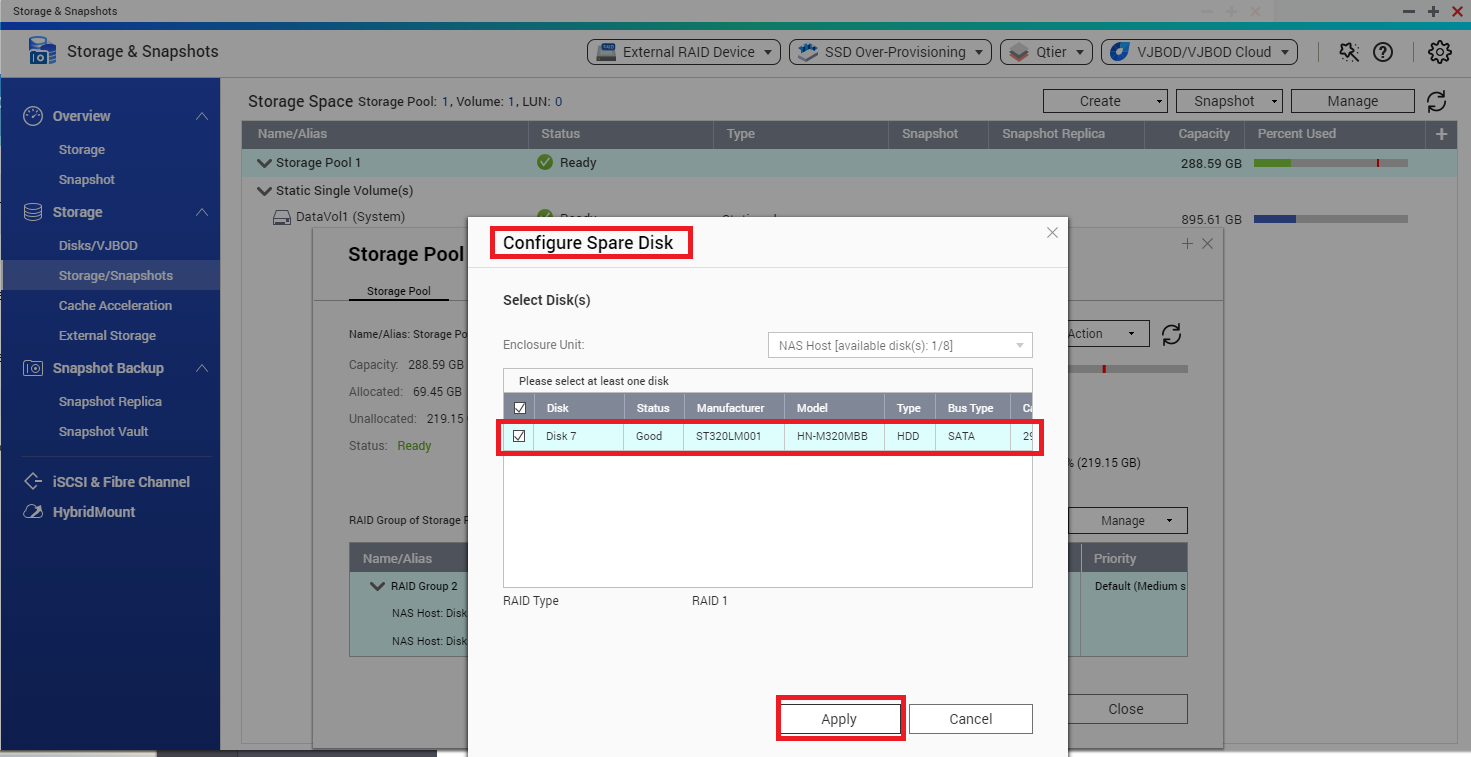
Select the drive you want to configure as spare disk
-
Click on “Apply” and confirm.
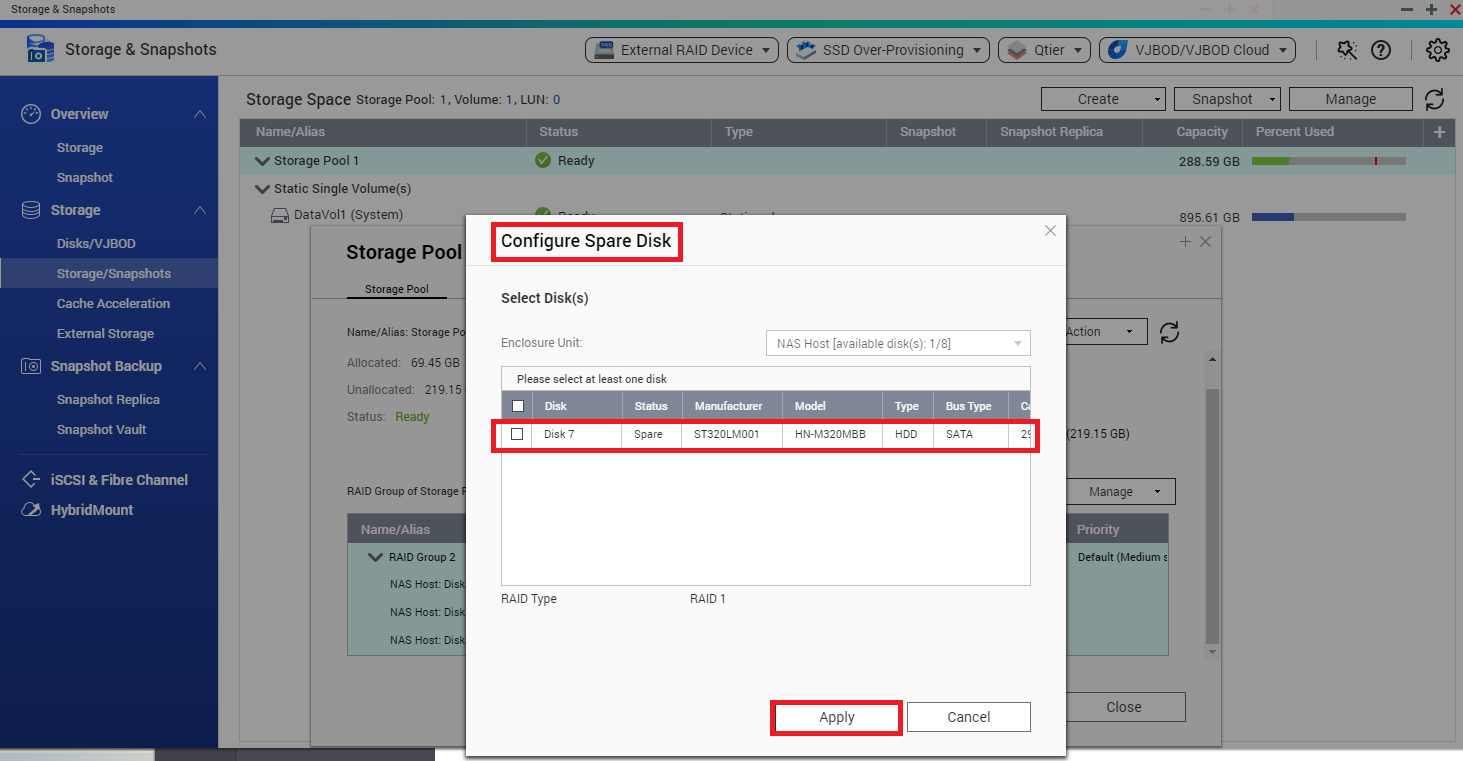
The Spare Disk can be removed similarly:
-
Go to Storage & Snapshots > Storage > Storage/Snapshots
-
Select the storage pool or single static volume containing the spare, and click on “Manage”
-
Select the RAID Group and click on “Manage” > “Configure Spare Disk”
-
Unselect the Spare Disk
-
Click on “Apply” and confirm.
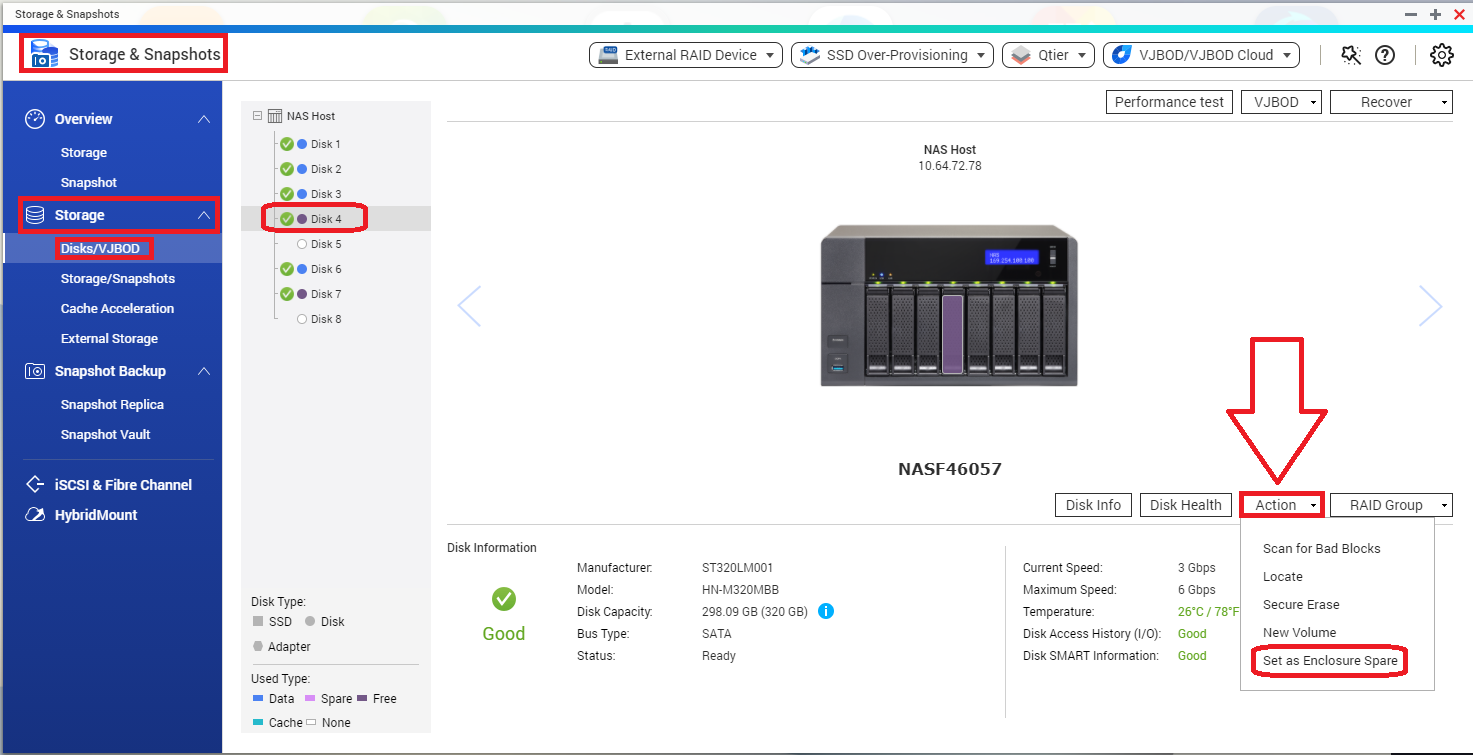
How to configure an Enclosure Spare Disk:
-
Go to Storage & Snapshots > Storage > Disks/VJBOD
-
Select a free disk
-
Click on “Action”, and then select “Set as Enclosure Spare”
-
Confirm.
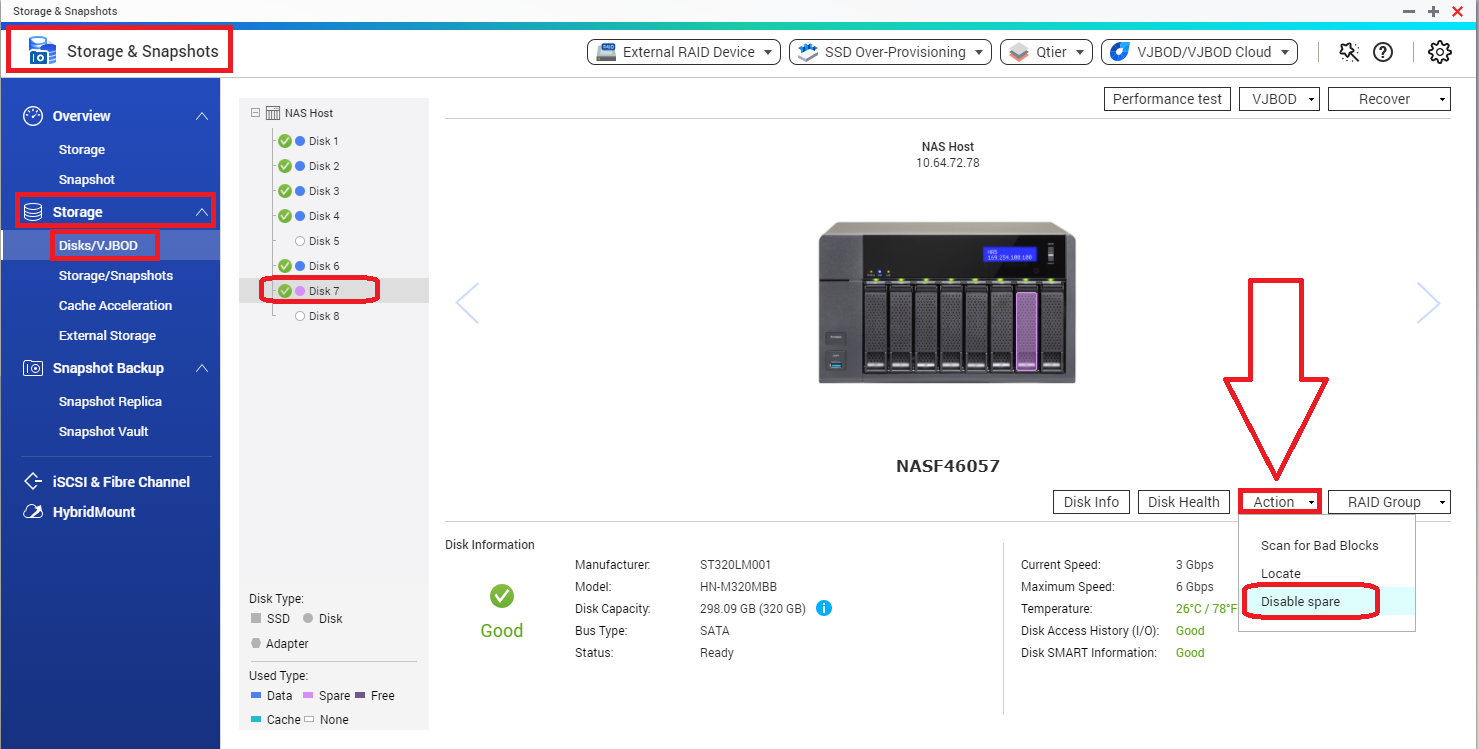
The Spare Disk can be disabled similarly:
-
Go to Storage & Snapshots > Storage > Disks/VJBOD
-
Select the spare disk
-
Click on “Action”, and then select “Disable spare”.