Using QNAP vSphere Client Plug-in (HTML) with QNAP ES NAS
Functionality Description
QNAP vSphere Client (HTML) Plug-in Introduction
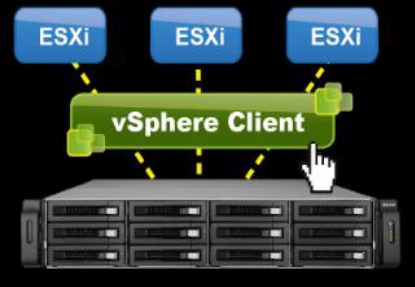
vSphere Client (HTML) Plug-in for QNAP ES NAS is an interface between ESXi and the ES NAS.
vSphere Client integration allows managing VMware datastores which reside on the QNAP ES NAS directly from the vSphere client console, and verifying the status of all QNAP ES NAS managed by QNAP vSphere client plug-in.
Benefit
- Easy creation of datastores from multiple ESXi hosts in just a few clicks.
- Easy status control of the ES NAS and datastores.
- Support for NFS or iSCSI datastores.
Creating datastores in a cluster with number of N ESXi host
| Without vSphere client Plug-in | With vSphere client Plug-in |
|---|---|
|
|
Preliminary Settings
Installation and Verifying
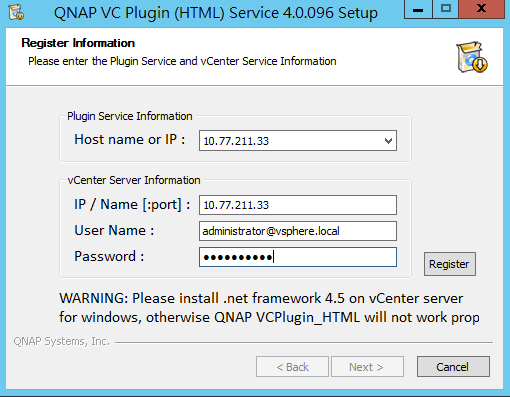
- To install the plug-in simply run the QVCPlugin_HTML.exe from the local computer. Download site: https://www.qnap.com/download
- Plug-in needs to Register to a computer which has vCenter installed:
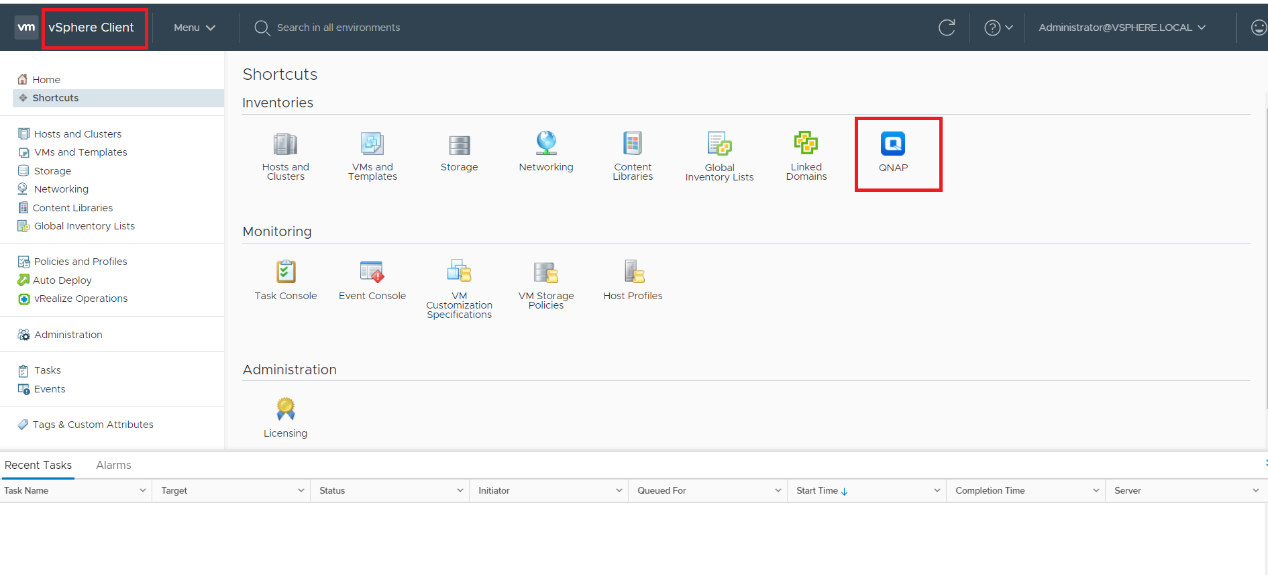
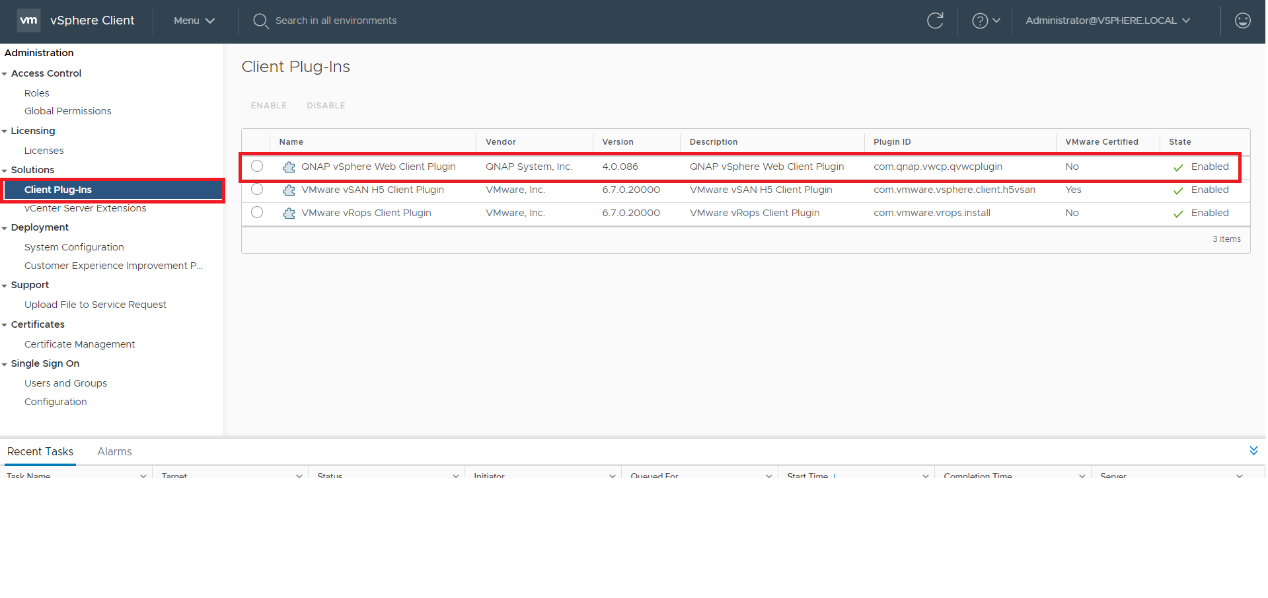
- To verify whether the plug-in is installed, or to check the plug-in version, open vSphere Client console and click “vSphere Client”.
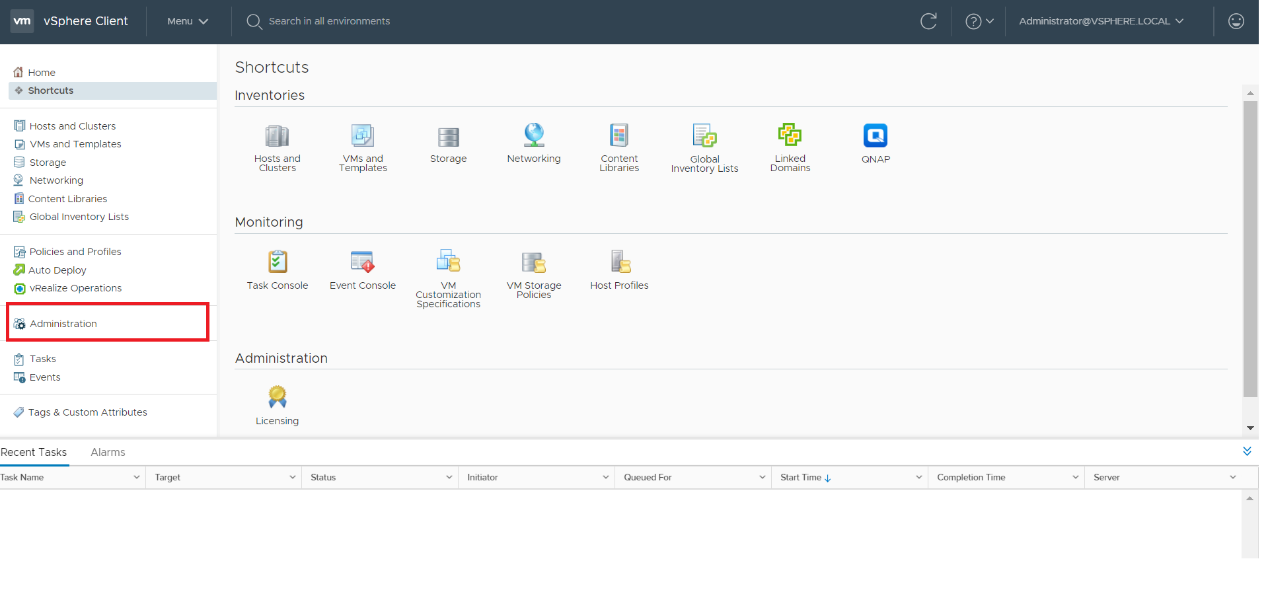
Or from the “administrator” and see the “Client Plug-Ins”
Add QNAP Storage
Once the plug-in has been installed, you can follow the steps below to add a QNAP NAS and manage it by the plug-in to create a new datastore.
- Select QNAP icon in the Inventories.
- Add QNAP NAS into “QNAP Storage” by clicking “+”. Then fill out the NAS info into the plug-in to ass the QNAP storage.
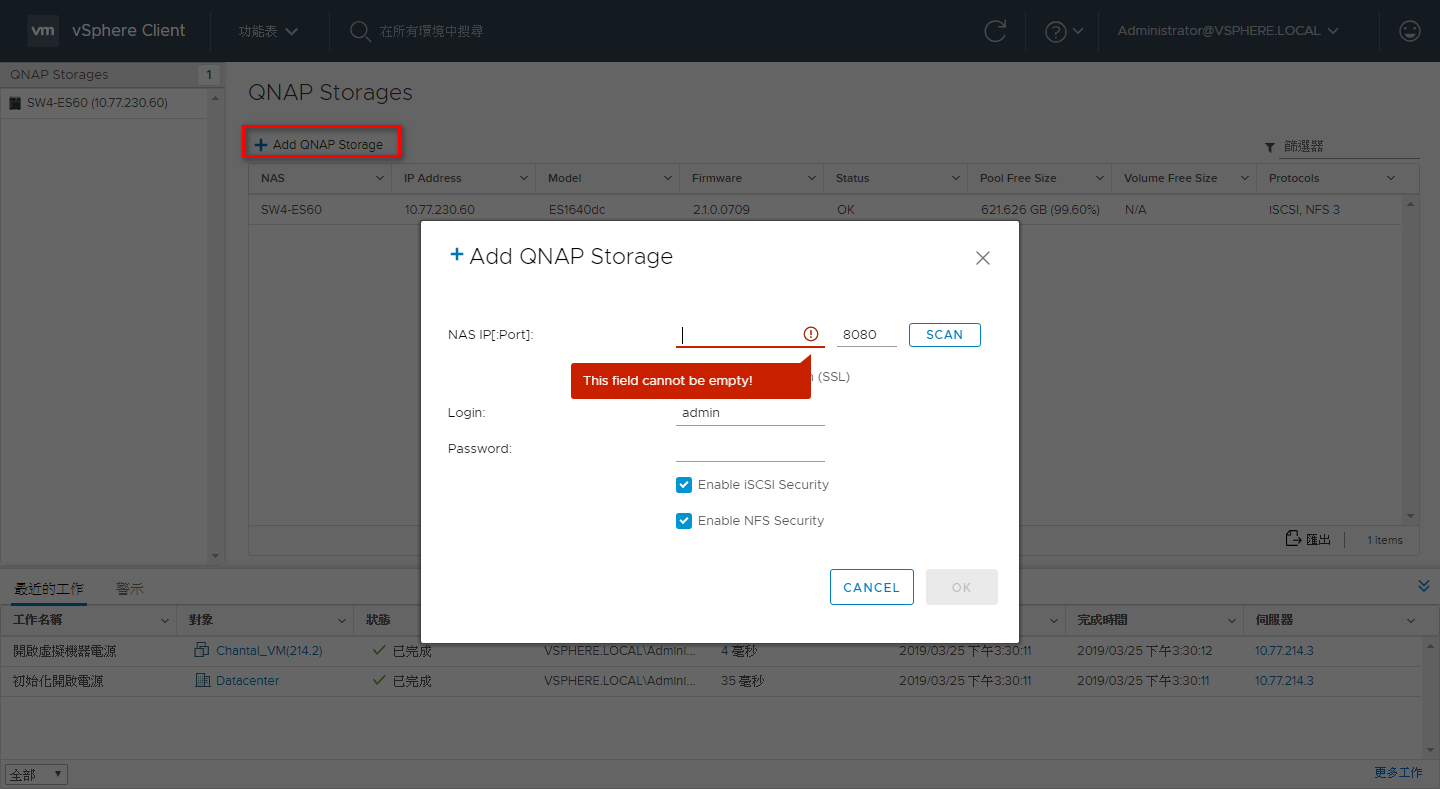
- Enable iSCSI Security:
Select this option to enable LUN masking on the QNAP ES NAS.
All the new LUN created as datastore by plug-in will be secured with LUN masking, so that only the VMware hosts with access right to the LUN can read and write data to the LUN. - Enable NFS Security:
Select this option to enable NFS host access control, and allow only the VMware hosts to connect to the NFS shares that will be used as datastore. Once one or multiple QNAP Storages have been added to the plug-in, you can create, mount, unmount, or destroy the datastores.
Datastores Management Introduction
Primary Functions
QNAP vSphere Client (HTML) Plug-in offers different components with specific features. The primary functions in the plug-in should be listed as below functionality:
- Create a datastore (NFS or iSCSI)
- Un-mount/disconnect a datastore
- Mount/connect a datastore
- Destroy a datastore
Work Scope
Based on user configuration, vSphere Client (HTML) Plug-in may support different datastore processes.
Once the ESXi is managed by vSphere HTML5 Client as a standalone host, i.e. without vCenter to centralized management its host, the plug-in will operate on the host only.
If the vSphere Client connects to a vCenter server, the plug-in will be able to operate on multiple VMware hosts to facilitate each process.
- Operations from ESXi host:
- Creation: The datastore will be created only for the selected host.
- Disconnect/connect: The datastore can be disconnected from or connected to selected host.
- Deletion: The datastore will be disconnected from all connected hosts, and will be destroyed. Besides that, all content in the datastore will be deleted.
- Operations from VMware Cluster: The datastore can be created for all selected members inside cluster.
- Creation: By default all the cluster members will be selected in order to create and connect the new datastore to all hosts. Users can unselect some hosts when the new datastore is not required on all hosts.
- Disconnect/connect: By default all the cluster members will be selected in order to disconnect a datastore from or connect it to selected hosts.
- Deletion: The datastore will be disconnected from all connected hosts, and will be destroyed and all the content will be deleted.
- Operations from the VMware Datacenter: The datastore can be created for all selected members inside the Datacenter.
- Creation: By default all the cluster members will be selected in order to create and connect the new datastore to all hosts. Users can unselect some hosts on the new datastore that are not required on all hosts.
- Disconnect/connect: By default all the cluster members will be selected in order to disconnect a datastore from or connect it to the selected hosts.
- Deletion: The datastore will be disconnected from all connected hosts, and will be destroyed and all the content will be deleted.
User Guide
Note:
- All of the instructions below should be run after (a) QNAP NAS has been added by vSphere Client (HTML) Plug-in. Please refer to “Add QNAP Storage”.
- VC plugin will be the default control panel for QNAP datastore. This is illegal to enter NAS web interface during VC plug-in status.
Create a Datastore
Creating a datastore and adding it to all of members in your Datacenter, Cluster, or standalone host.
- Login vSphere HTML5 Client.
- Select your Datacenter, Cluster, or Host.
- Right click your Datacenter, Cluster, or Host. Select “QNAP” > “Create a datastore”.
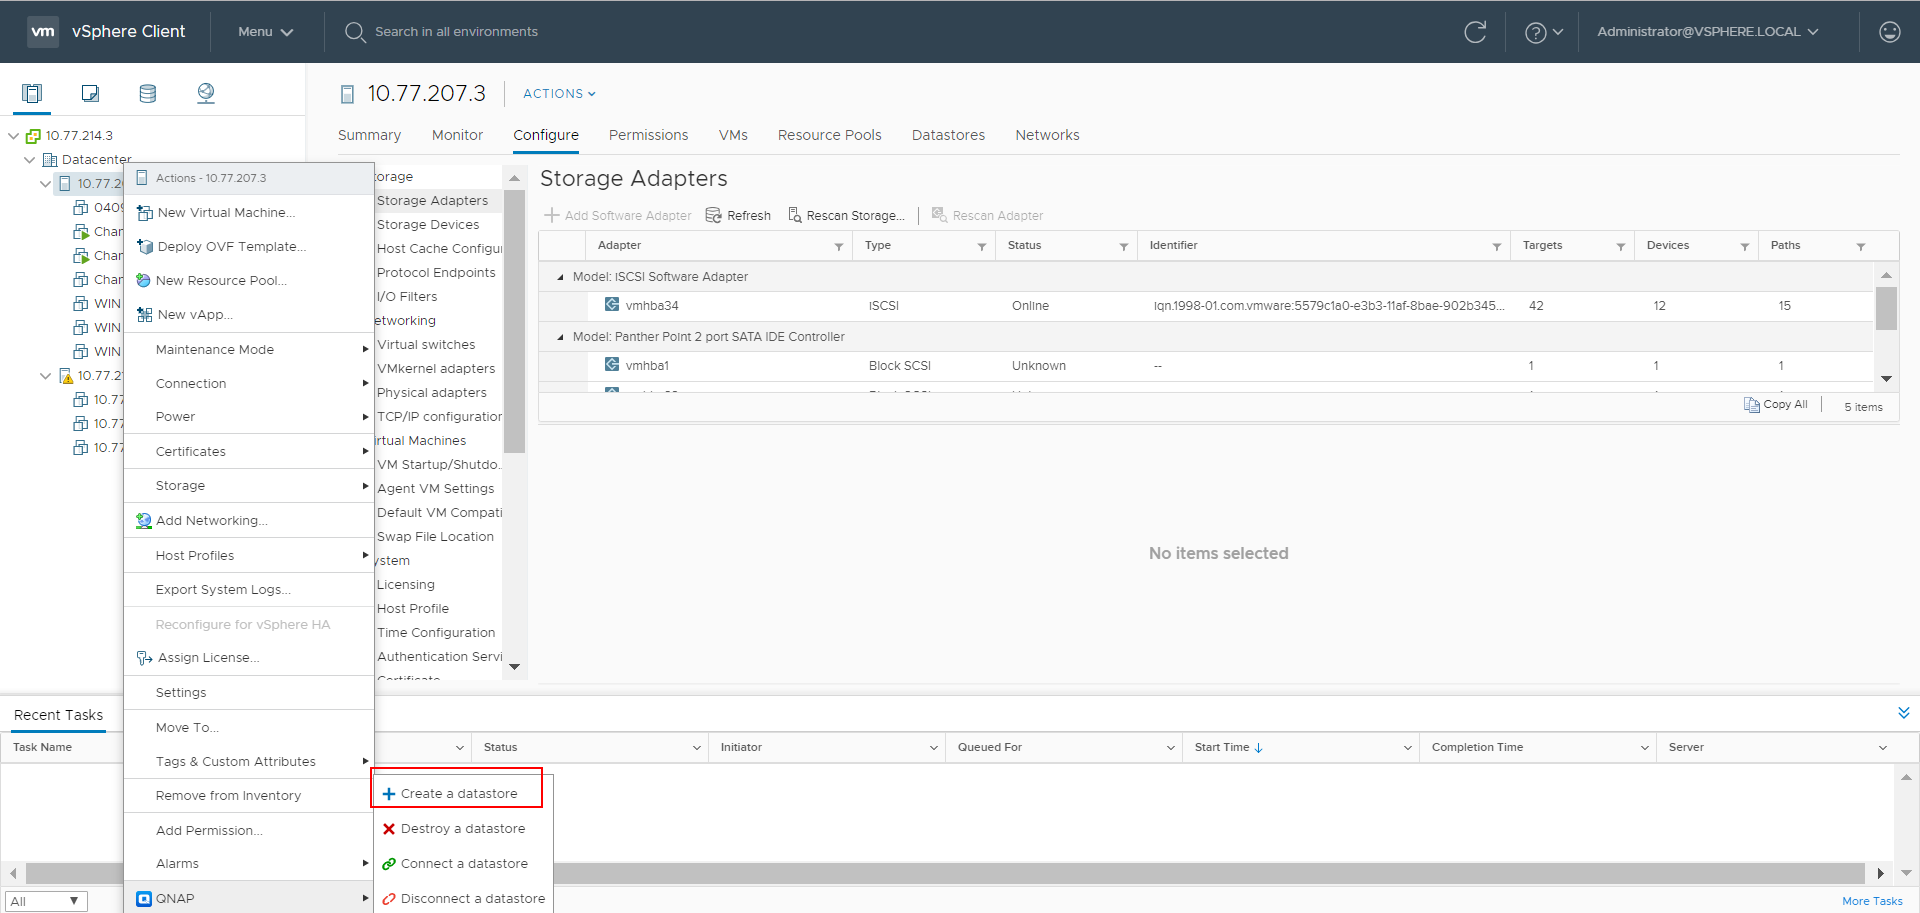
- Following the instructions from Wizard to complete a datastore creation.
QNAP vSphere Client (HTML) Plug-in will create the resources on the ES NAS, and connect all the selected hosts to the new datastore.
Disconnect/Unmount a Datastore
QNAP vSphere Client (HTML) Plug-in allows disconnecting (unmount) the datastores from multiple ESXi hosts and re-connecting (mount) the datastore to multiple ESXi hosts.
- Login vSphere Client (HTML).
- Select your Datacenter, Cluster, or Host.
- Right click your Datacenter, Cluster, or Host, and select “QNAP” > “Disconnect a datastore”.
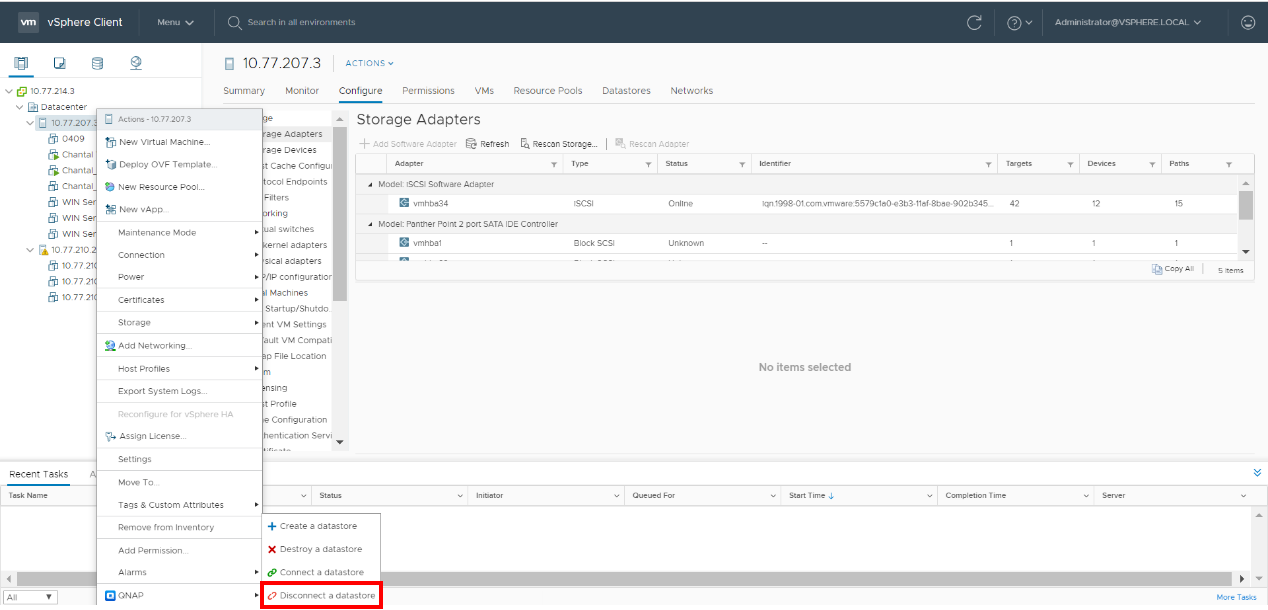
- Following the instructions to disconnect/unmount a datastore from the selected hosts.
Datastore Reconnection
QNAP vSphere Client (HTML) Plug-in allows users to reconnect a previously disconnect/unmounted datastore to some selected hosts.
- Login vSphere HTML5 Client.
- Select your Datacenter, Cluster, or Host.
- Right click your Datacenter, Cluster, or Host, and select “QNAP” > “Connect a datastore”.
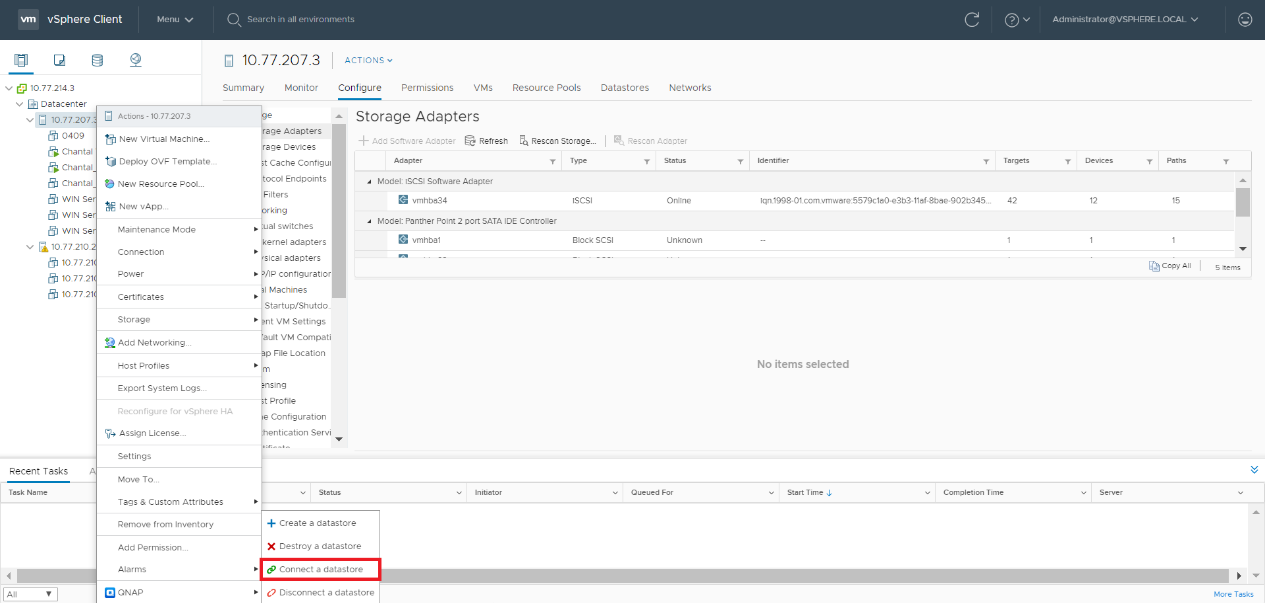
- All existing datastores that can be connected to the selected host will be listed.
- Follow the wizard instructions to reconnect a datastore to one or multiple hosts.
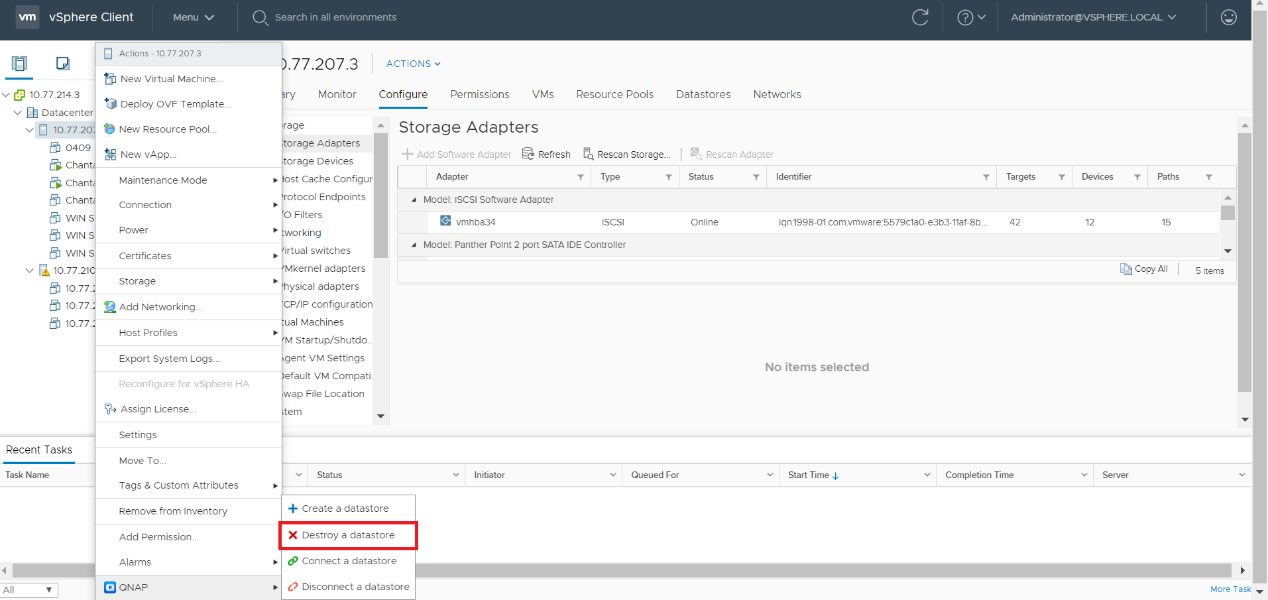
Destroy a Datastore
QNAP vSphere Client (HTML) Plug-in allows users to destroy a datastore.
- Login vSphere HTML5 Client.
- Select your Datacenter, Cluster, or Host.
- Right click your Datacenter, Cluster, or Host, and select “QNAP” > “Destroy a datastore”.
Note: The “destroy” process will follow below VMware behavior.
- iSCSI:
All the data contained in the datastore will be irremediably deleted without any possible recovery. - NFS:
The datastore will be disconnected from the ESXi hosts. All references to the NFS datastore will be destroyed. The data contained in the NFS datastore will remain.
Status Monitor
QNAP vSphere Client (HTML) Plug-in supports status monitor for each ES NAS added into the plug-in, connected datastores, and the datastore disconnected by the plug-in previously.
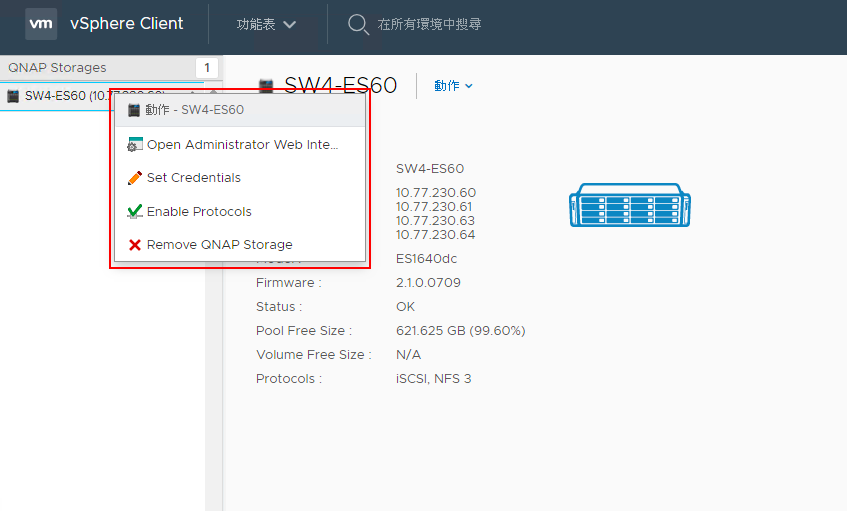
Monitor QNAP Storage
- Select your Datacenter, Cluster, or Host.
- Navigate to “QNAP” icon.
- It will display all QNAP NAS added to the plug-in, including the information of NAS status, firmware version, and free capacity and so on in QNAP storages.
- Right click an item to list the menu options:
- Set the NAS credentials if they have been changed.
- Remove the NAS from the plug-in. All existing datastores will remain connected to their existing hosts.
- Quickly open the NAS web administration page.
- Enable storage protocols (NFS and/or iSCSI).
Remove QNAP vSphere Client (HTML) Plug-in
Step 1: Go to “C:\Program Files (x86)\QNAP VWC Plugin Service”.
Step 2: Run “uninst.exe”.
Step 3: Log into vCenter and verify that the plug-in is uninstalled.
If the plug-in was not uninstalled successfully, then you need to disable the vCenter service first:
Step 1: Log in as an administrator to the server that is running vCenter Server or Platform Services Controller.
Step 2: Open an administrative command prompt.
Step 3: Change to the vCenter Server or Platform Services Controller installation directory by running the following command:
cd C:\Program Files\VMware\vCenter Server\bin
Step 4: Stop the vSphere HTML5 Client service by running the following command.
service-control --stop vsphere-ui
Step 5: On the server that is running vCenter Server or Platform Services Controller, restart the vCenter Service by running the following command.
service-control --start vsphere-ui
Step 6: Log into vCenter and verify that the plug-in is uninstalled.


