Windows – Configuring Shared Folder Permissions to QNAP QES
Category
- Windows Host:
Server 2019, 2016, 2012R2, Windows 10 Pro - Storage device:
QES version 2.1.1, 2.1.0, 2.0.0, 1.1.4 - NAS model:
ES2486dc, ES1686dc, ES1640dc v2, ES1640dc
Overview
Samba is a function built into the QNAP QES operating system. Users can use Window's SMB/CIFS protocol to connect, mount, and use a file-level shared folder on an QES NAS. This document explains the process of joining an QES NAS to Microsoft Active Directory (AD), and assigning permissions to shared folders. For information on creating a shared folder in QES, refer to "Network and Storage Settings of QES NAS High-Availability Network Storage Services".
Infrastructure Diagram
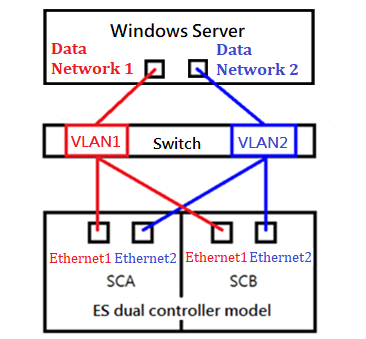
Network Settings Table
| Server Network Settings | ||
|---|---|---|
| Role | IP | Description |
| Windows Server | 192.168.1.102 | Windows Server 2016 (1GbE) |
| Data Network 1 | 8.8.1.6 | Data port 1 in Windows Server (10GbE) |
| Data Network 2 | 8.8.2.6 | Data port 2 in Windows Server (10GbE) |
| NAS Network Settings | ||
|---|---|---|
| Role | IP | Description |
| SCA Management IP | 192.168.1.12 | Management port 1 in NAS SCA (1GbE) |
| SCA Ethernet1 IP | 8.8.1.12 | Data port 1 in NAS SCA (10GbE) |
| SCA Ethernet2 IP | 8.8.2.12 | Data port 2 in NAS SCA (10GbE) |
| SCB Management IP | 192.168.1.13 | Management port 1 in NAS SCA (1GbE) |
| SCB Ethernet1 IP | 8.8.1.13 | Data port 1 in NAS SCB (10GbE) |
| SCB Ethernet2 IP | 8.8.2.13 | Data port 2 in NAS SCB (10GbE) |
| Shared Folder (Permissiondemo) | Shared Folder in NAS SCA Pool1 Shared Path: \\8.8.1.12\Permissiondemo |
|
Adding the NAS to the domain
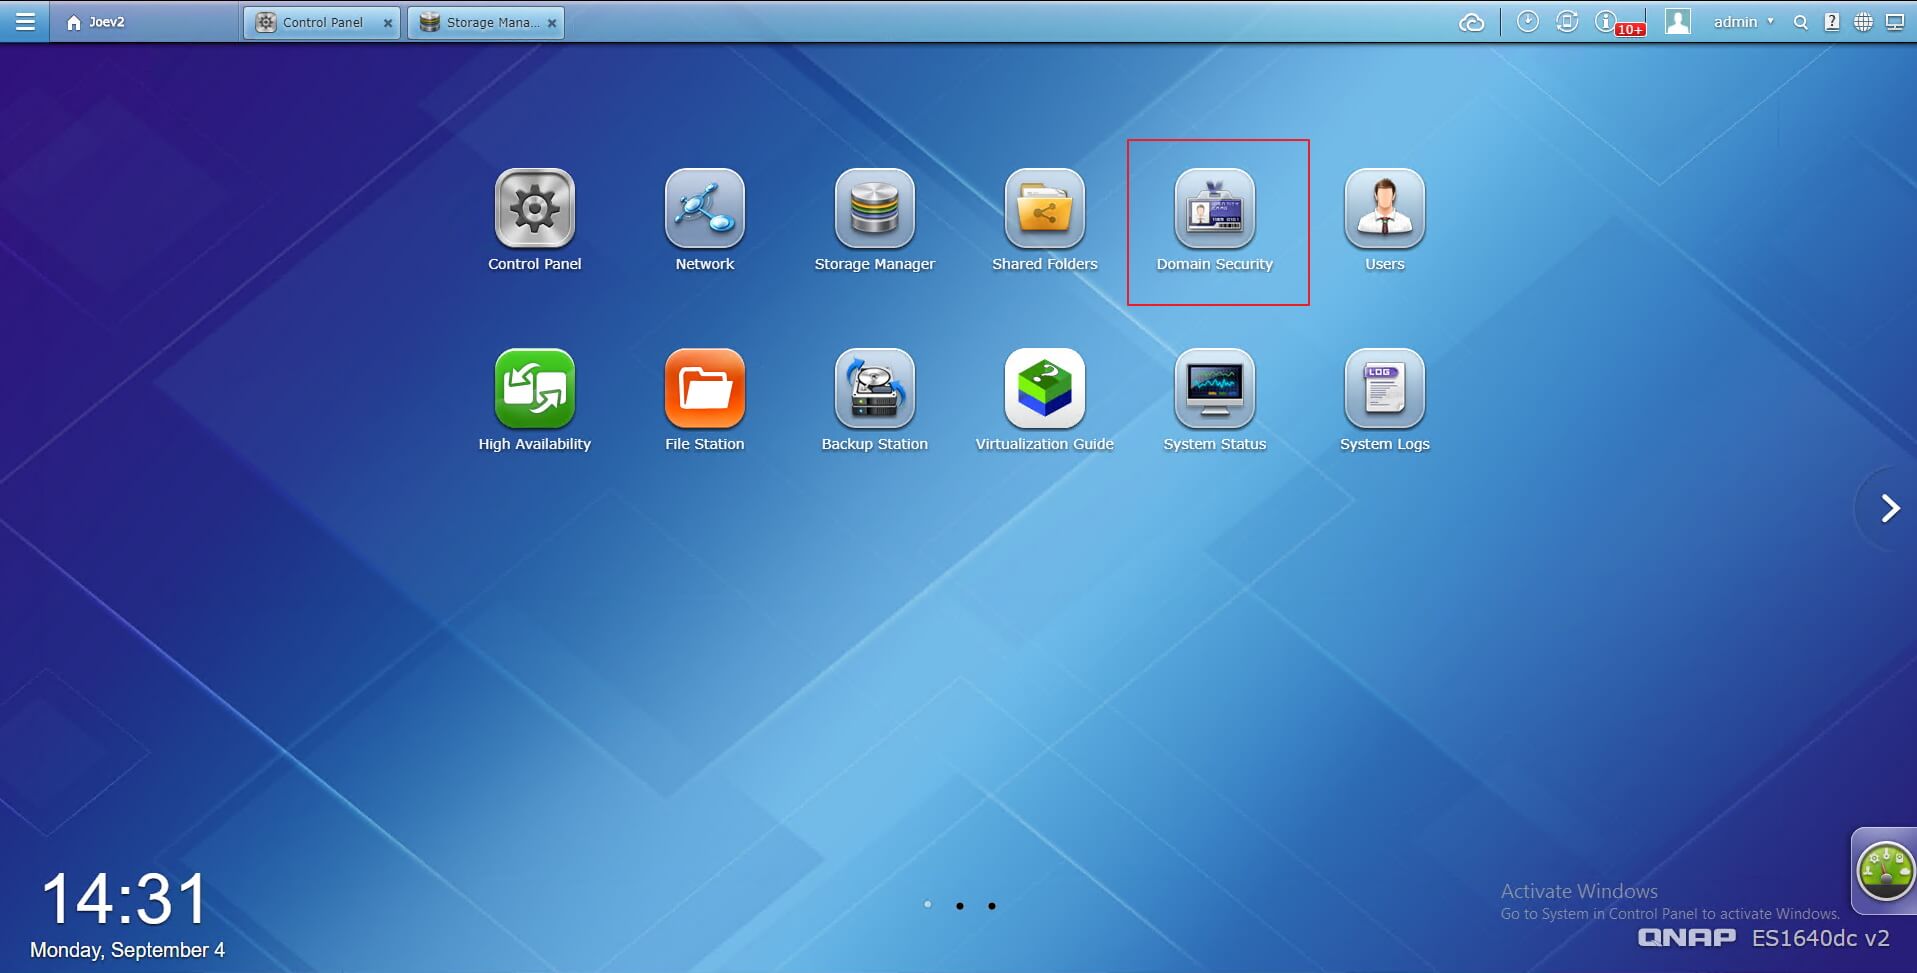
Step 1: Click "Domain Security" on the QES Desktop.
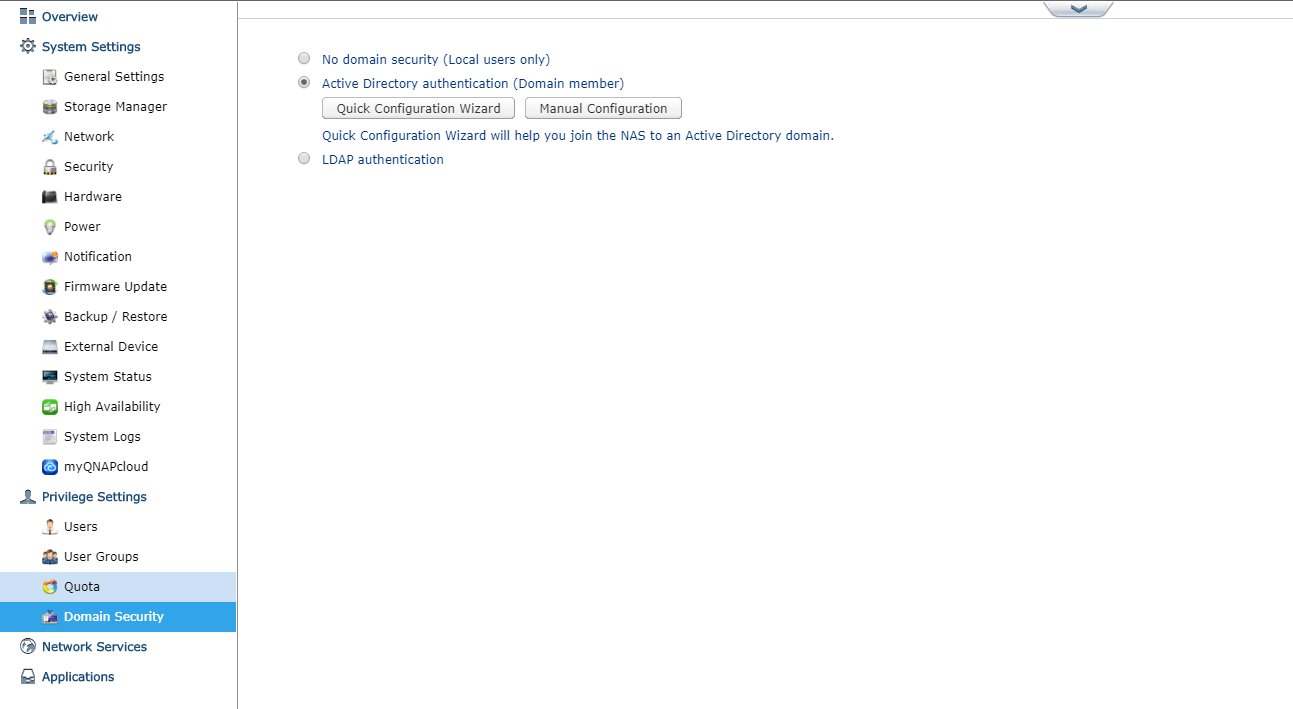
Step 2: Select "Active Directory authentication (Domain member)" > "Quick Configuration Wizard".
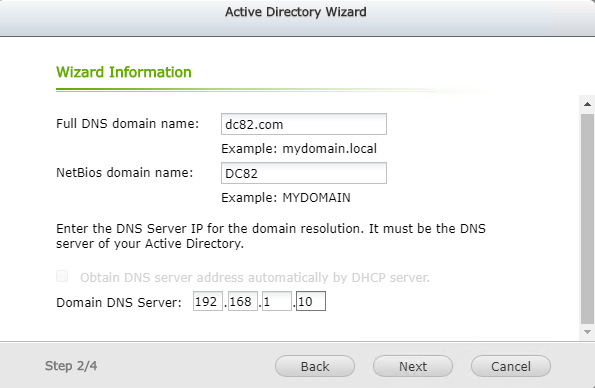
Step 3: Enter domain information, then click "Next".
Step 4: Specify the domain administrator username and password, then click "Next".
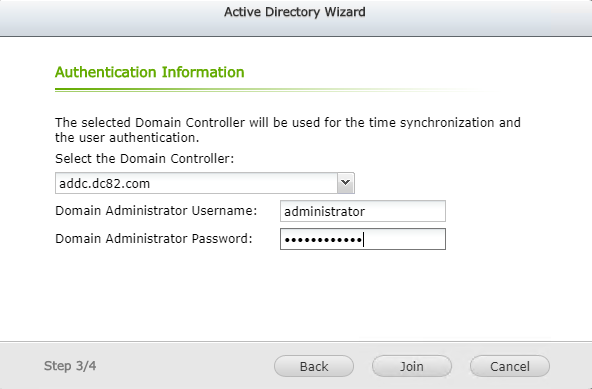
Step 5: Click "Join".
The NAS joins the domain.
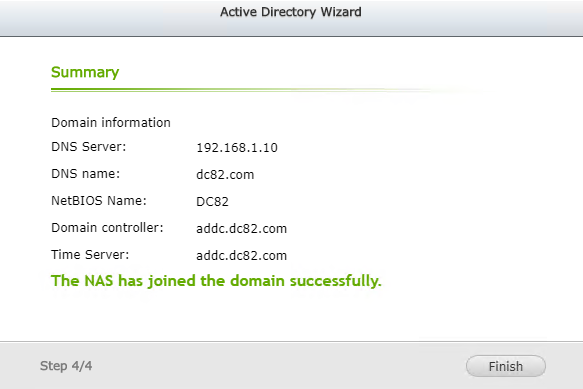
Step 6: Click "Finish".
Creating Sub-folders
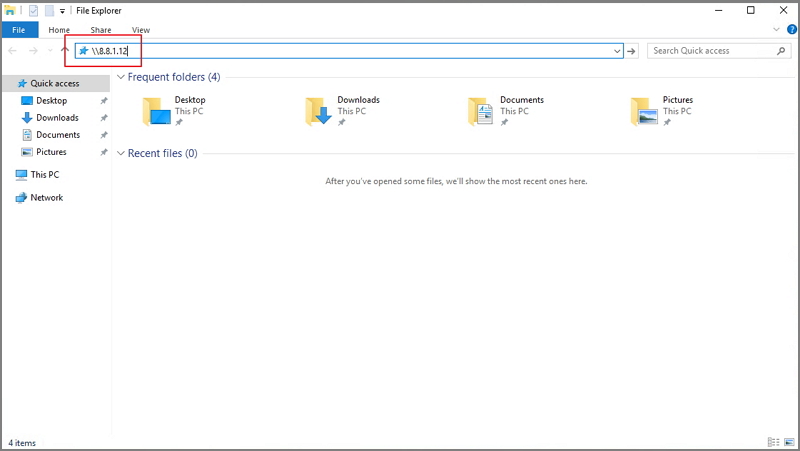
Step 1: Open File Explorer in Windows.
Step 2: Enter the path to the shared folder.
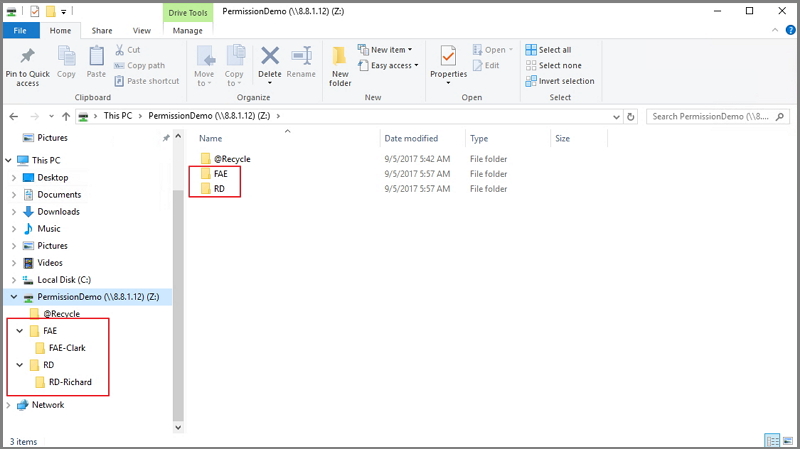
Step 3: Create subfolders for groups and users in the shared folder.
Adding Groups and Users into the Domain
Step 1: Open "Active Directory Users and Computers" on the Active Directory Domain Controller.
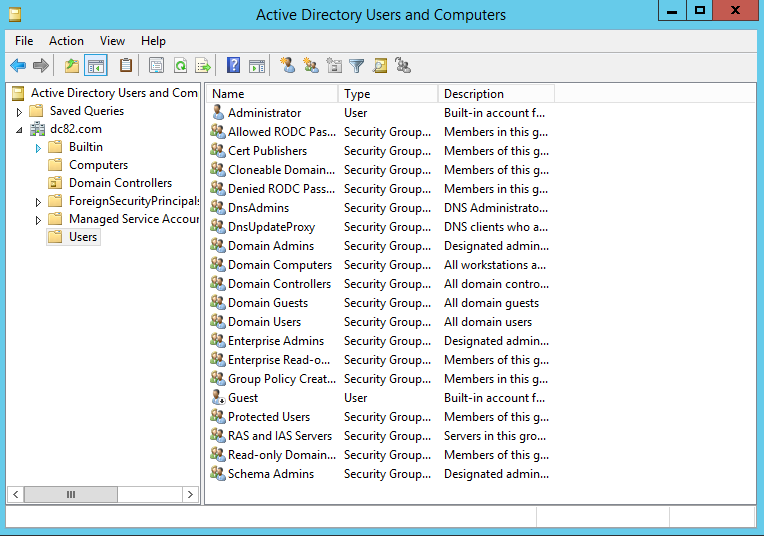
Step 2: Select "Users" from the left panel.
Step 3: Right-click in the main panel to create a new group.
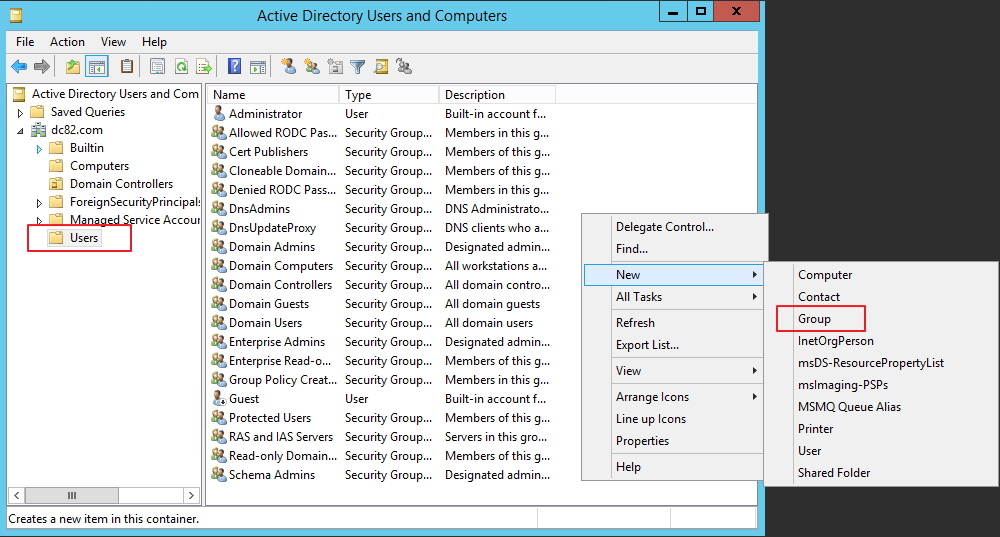
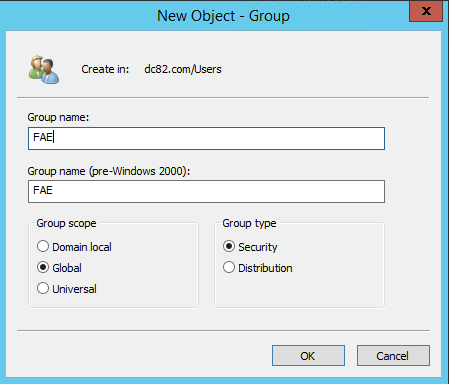
Step 4: Enter the group name, then click "OK".
Step 5: Select "Users" from the left panel.
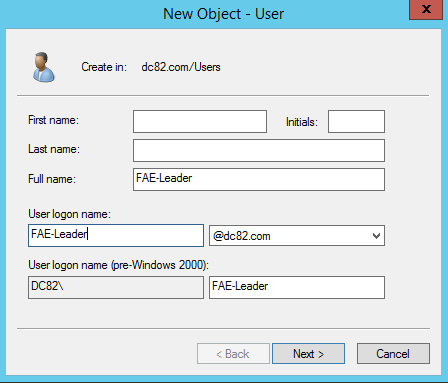
Step 6: Right-click in the main panel to create a new user.
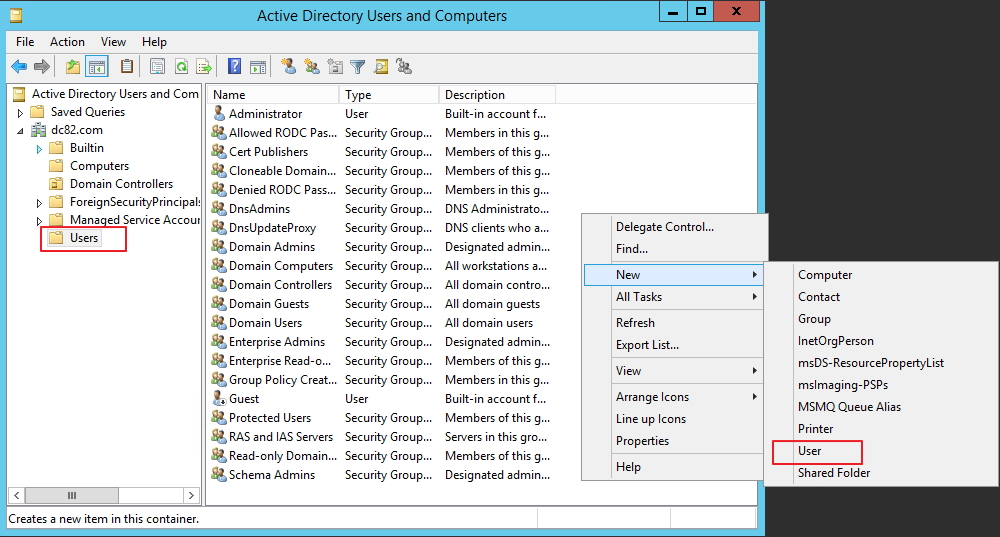
Step 7: Specify a username, then click "Next".
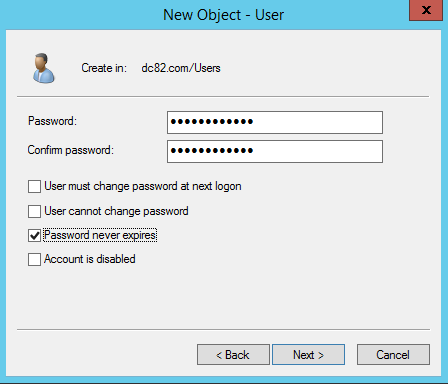
Step 8: Specify a password, then click "Next".
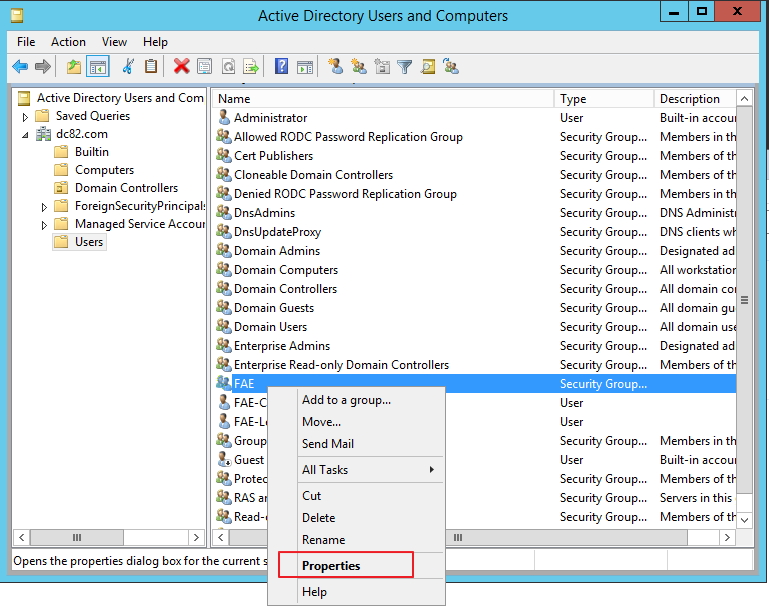
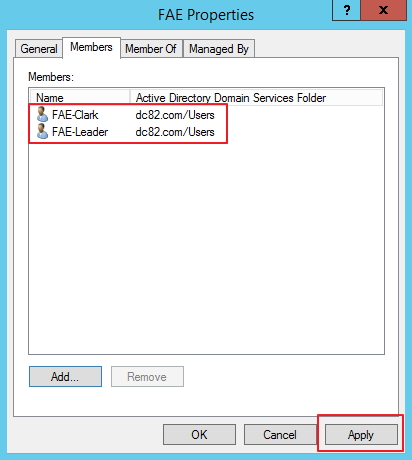
Step 9: Right-click the group you created, then select "Properties".
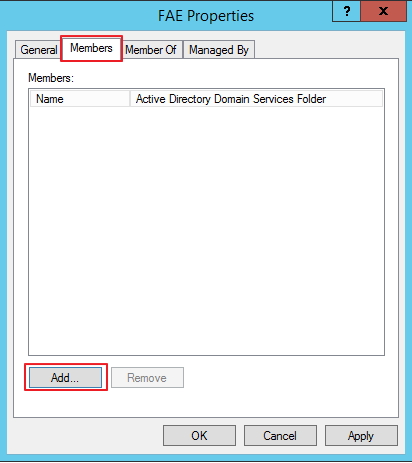
Step 10: Select the "Members" tab, then click "Add".
Step 11: Enter the username you created, then click "Check Names".
The user account is selected.
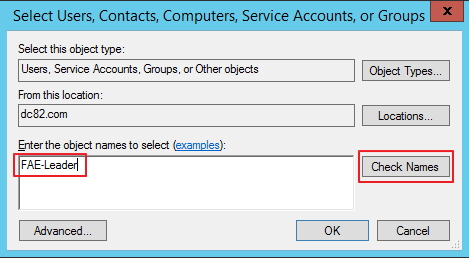
Step 12: Click "OK".

Step 13: Repeat this process to add other users to group, then click "Apply".
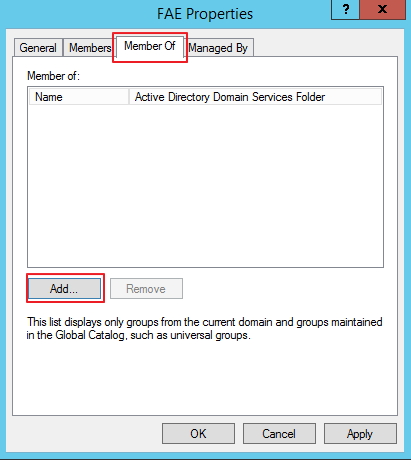
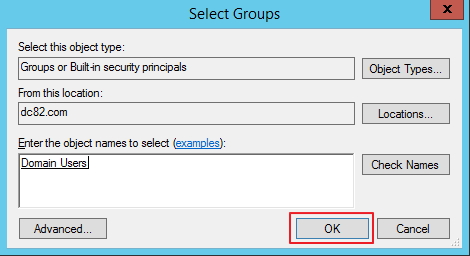
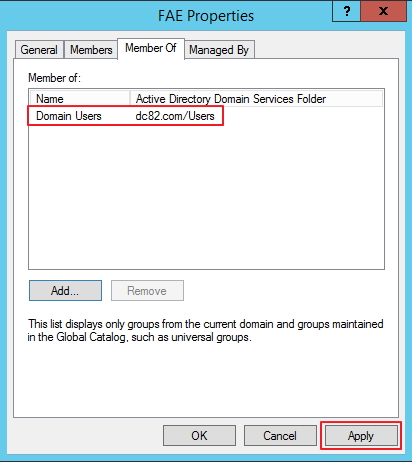
Step 14: Go to the "Member Of" tab, then click "Add".
Step 15: Enter "Domain Users", then click "Check Names".
The group is selected.
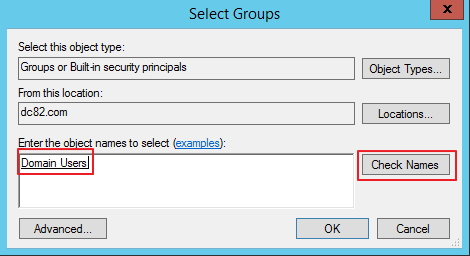
Step 16: Click "OK".
Step 17: Repeat Steps 14 - 16 to configure other groups, then click "Apply".
Assigning Root Permission to All Users
By default, an QES NAS only allows administrators to have root permissions. This section will demonstrate how to assign root permissions to all users.
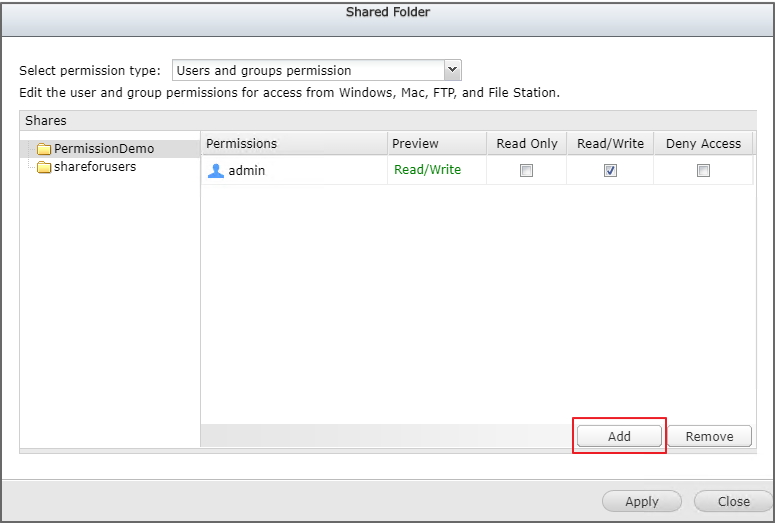
Step 1: In QES, go to "Storage Manager" > "Storage Space", then select the shared folder.
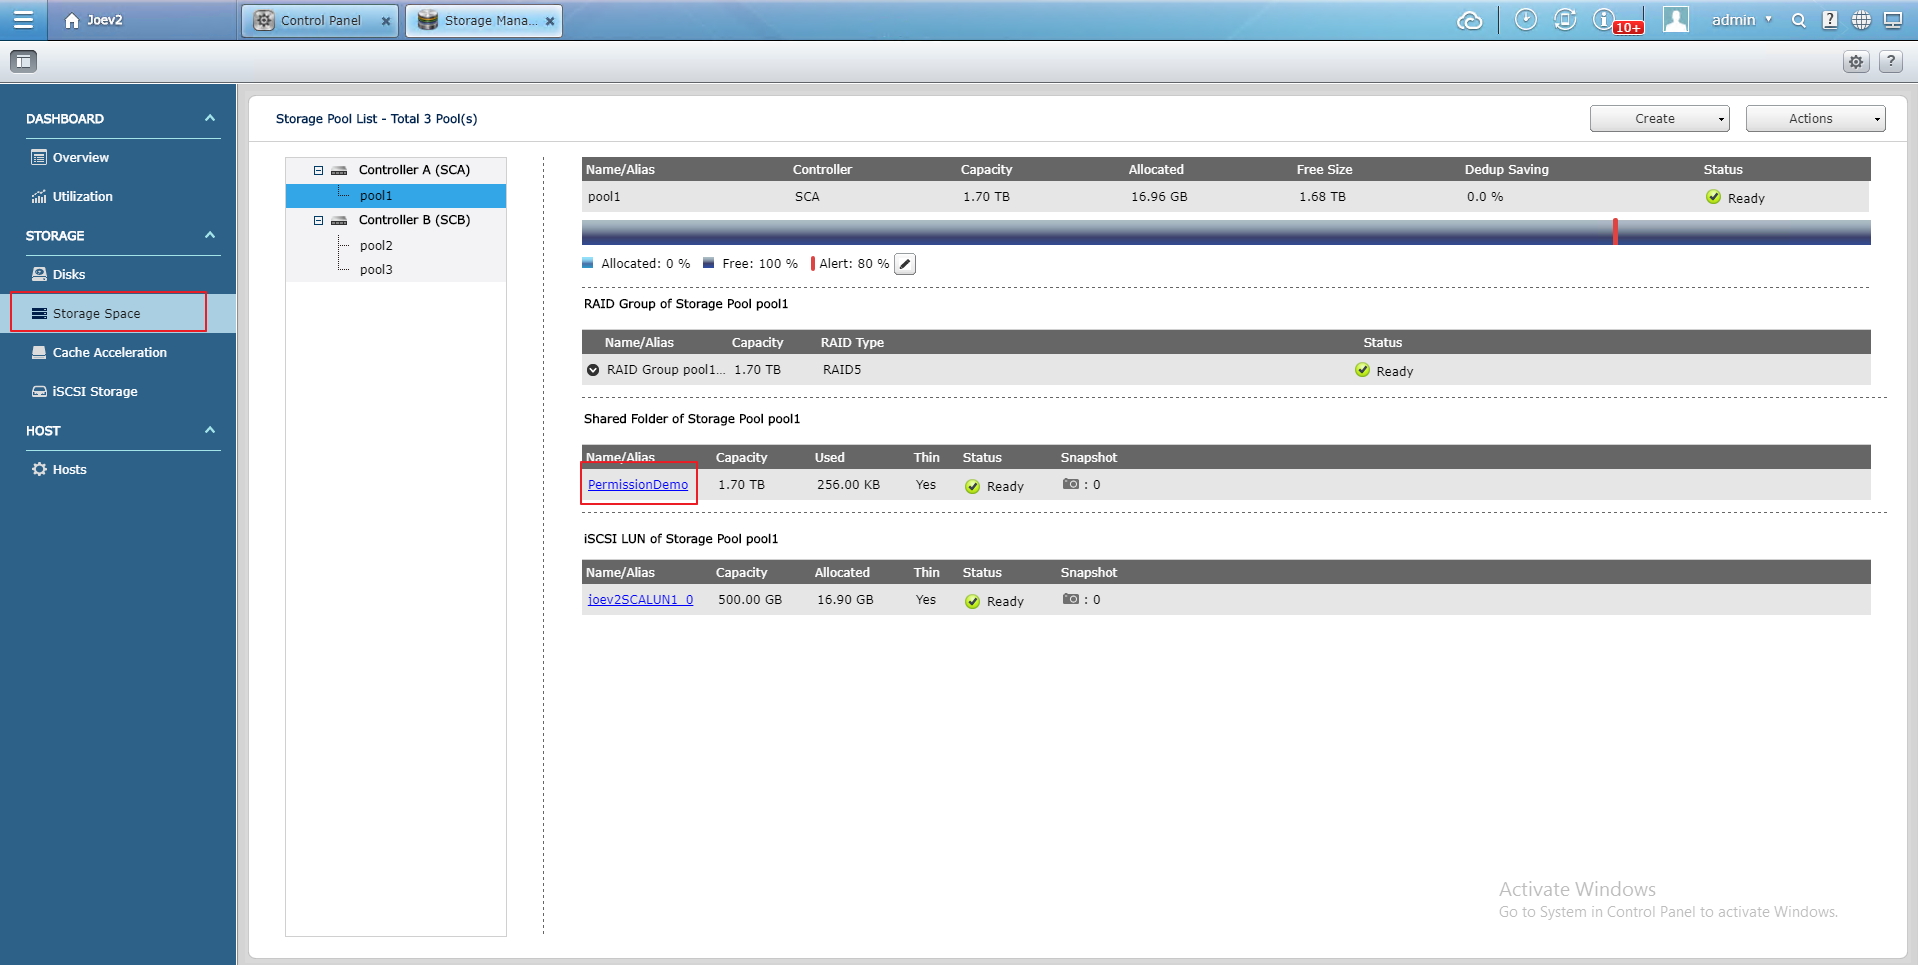
Step 2: Click "Permissions".
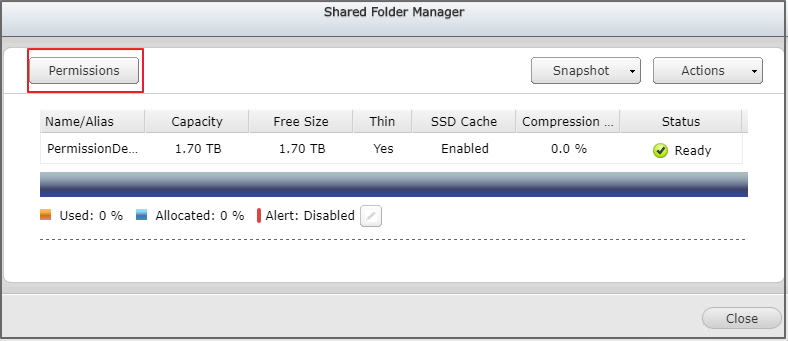
Step 3: Click "Add".
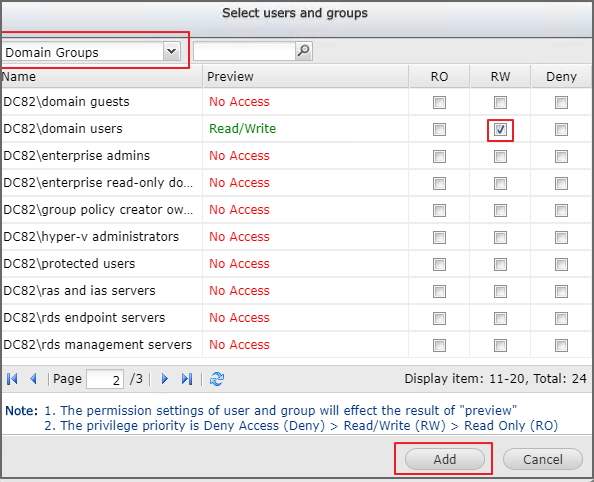
Step 4: Select "Domain Groups" from the menu.
Step 5: Select the "RW" checkbox for "domain admin" and "domain users", then click "Add".
Step 6: Confirm the permission settings, then click "Apply".

Disabling Permission Inheritance and Assigning Permissions to Each Folder
To configure and assign permissions for each folder individually, you must disable inheritance of the root folder permissions.
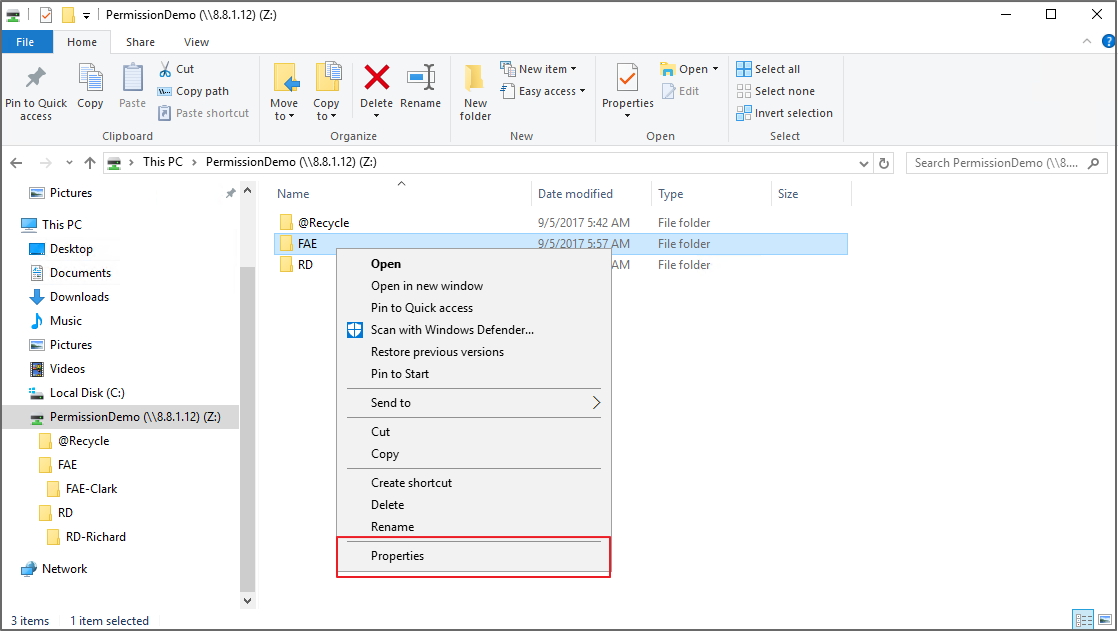
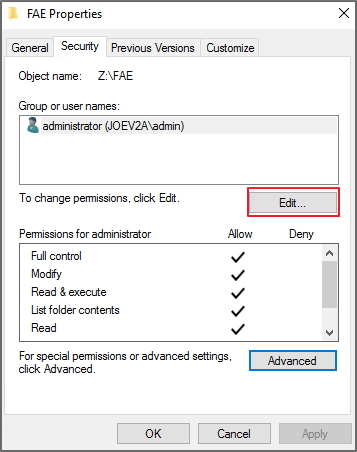
Step 1: In Windows, right-click the subfolder, then select "Properties".
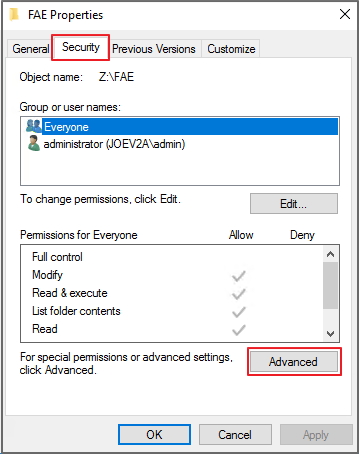
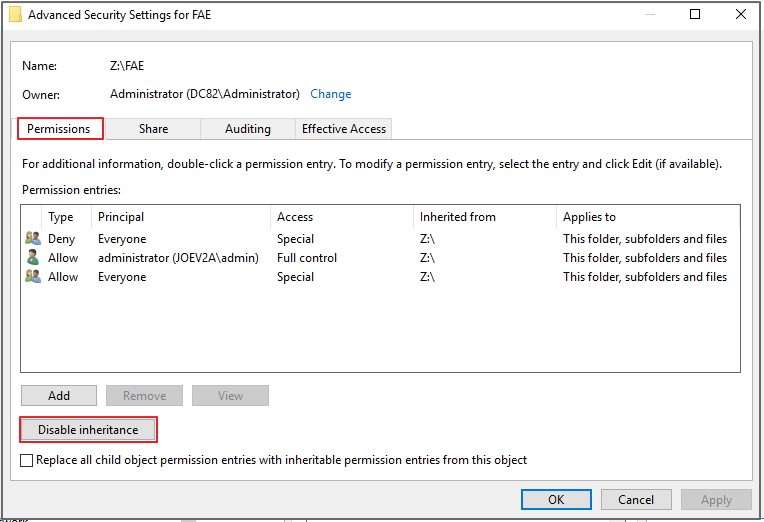
Step 2: Go to "Security" tab, then click "Advanced".
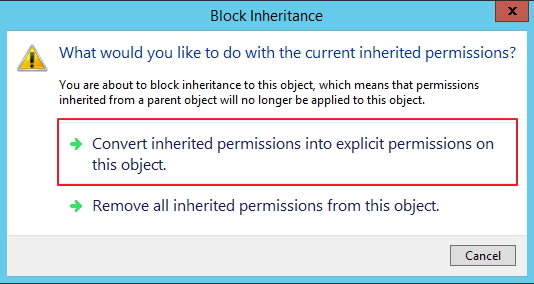
Step 3: Go to "Permissions" tab, then click "Disable inheritance".
Step 4: Click "Convert inherited permissions into explicit permissions on this project".
Step 5: Remove all permission entries except "administrator".
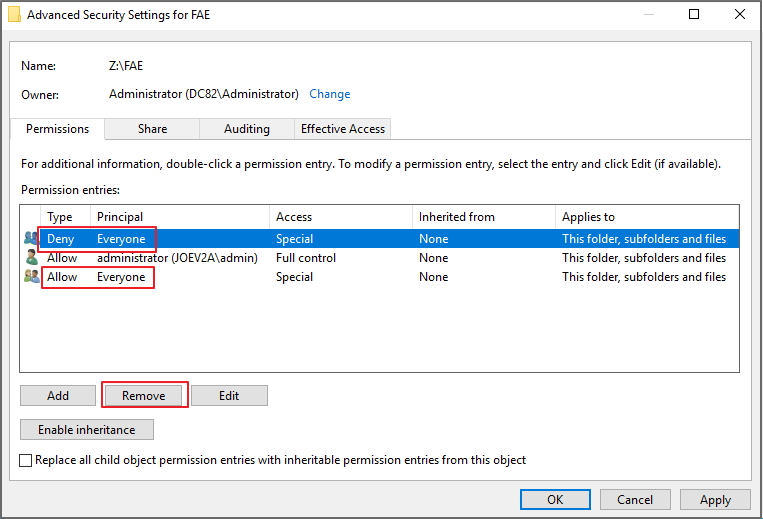
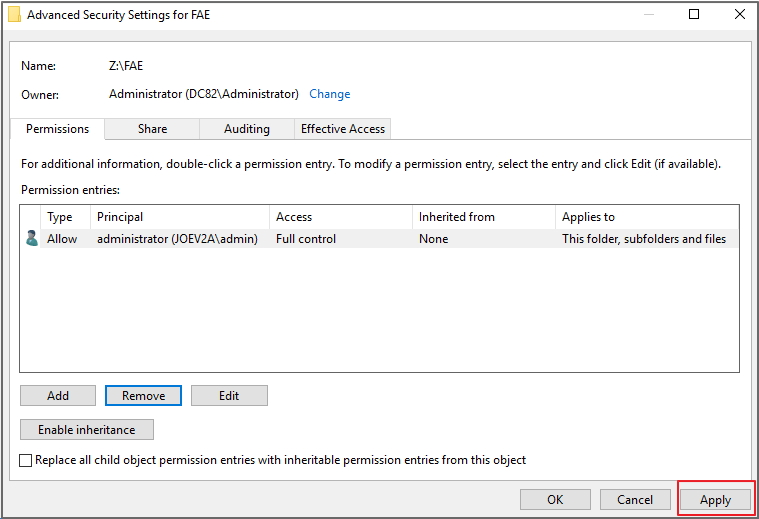
Step 6: Click "Apply".
Step 7: Go to the "Security" tab, then click "Edit".
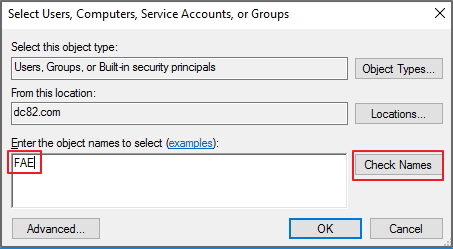
Step 8: Click "Add".
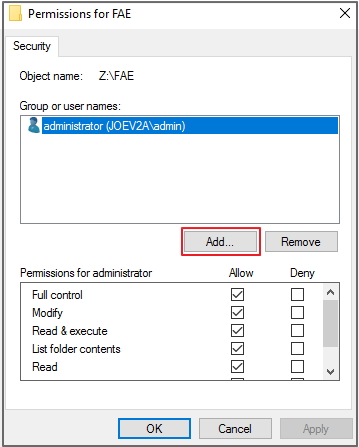
Step 9: Enter the group name, then click "Check Names".
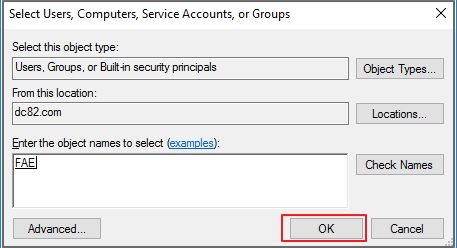
The group is selected.
Step 10: Click "OK".
Step 11: Select group, then assign permissions using the check boxes.
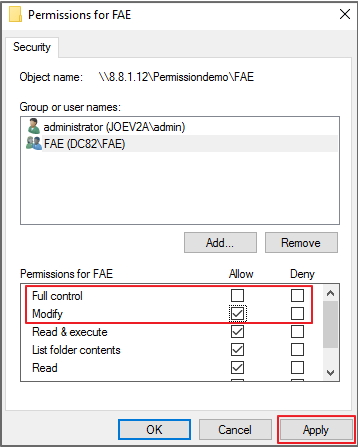
Step 12: Click "Apply".
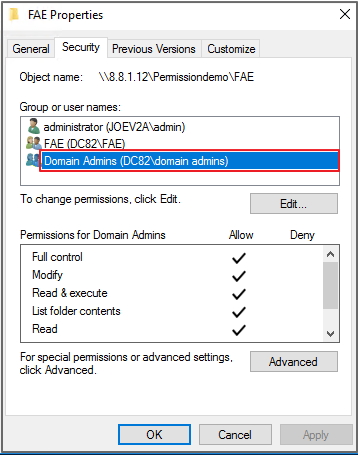
Step 13: Repeat steps 8 – 12 for "Domain Admins". Assign the group "Full control" permissions.
Step 14: Repeat steps 1 – 13 to disable inheritance and assign permission for each folder and subfolder.
Verifying Permissions
Step 1: Log into the Windows Server as an administrator.
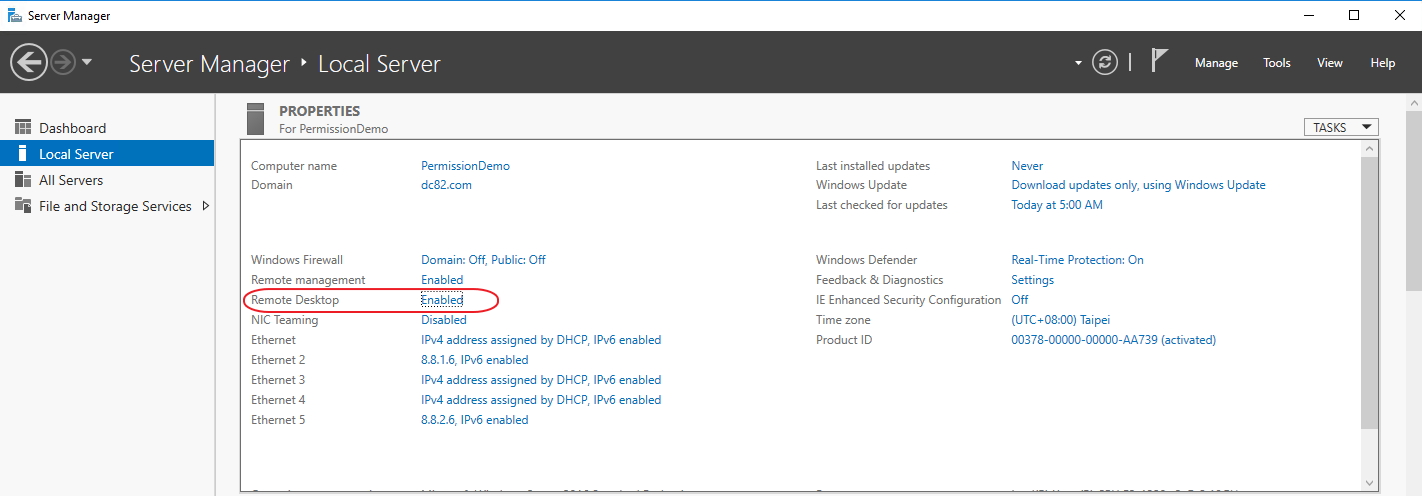
Step 2: Access the Server Manager console.
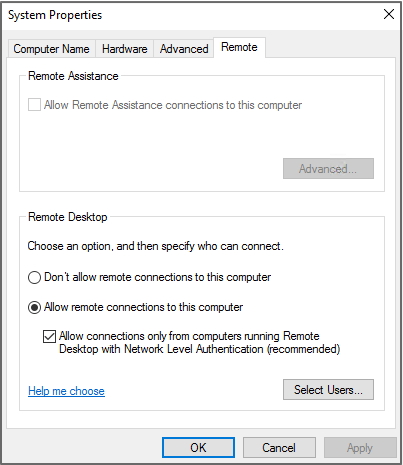
Step 3: Select "Local Servers" from the left panel, then click the hyperlinked value for the "Remote Desktop" property.
The "System Properties" window opens.
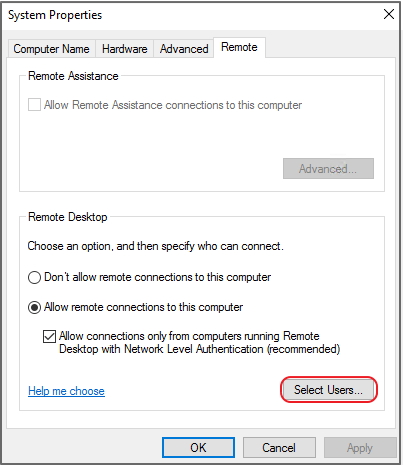
Step 4: Go to the "Remote" tab.
Step 5: Click "Select Users".
The "Remote Desktop Users" window opens.
Step 6: Click "Add".

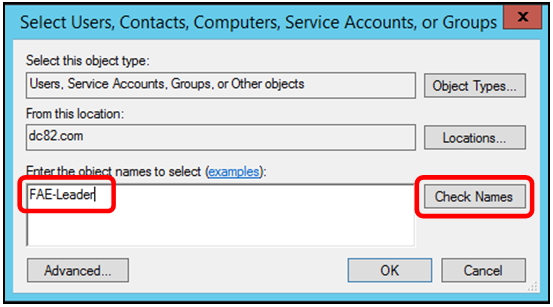
Step 7: Enter the created username, then click "Check Names".
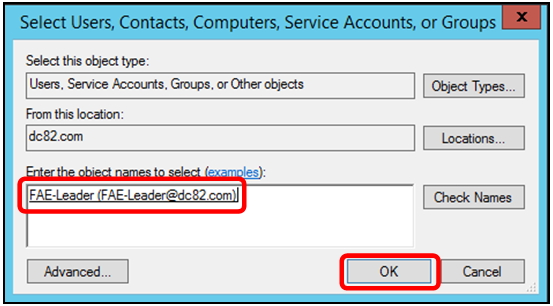
The user account is selected.
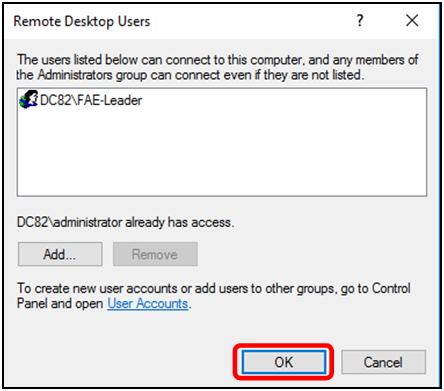
Step 8: Click "OK".
The account is added to the remote connection list.
Step 9: Click "OK".
Step 10: Click "OK".
Step 11: Log into the Windows Server with the account you added to the Remote Connection list.
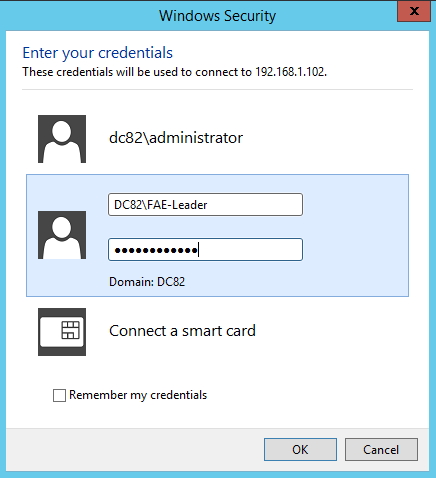
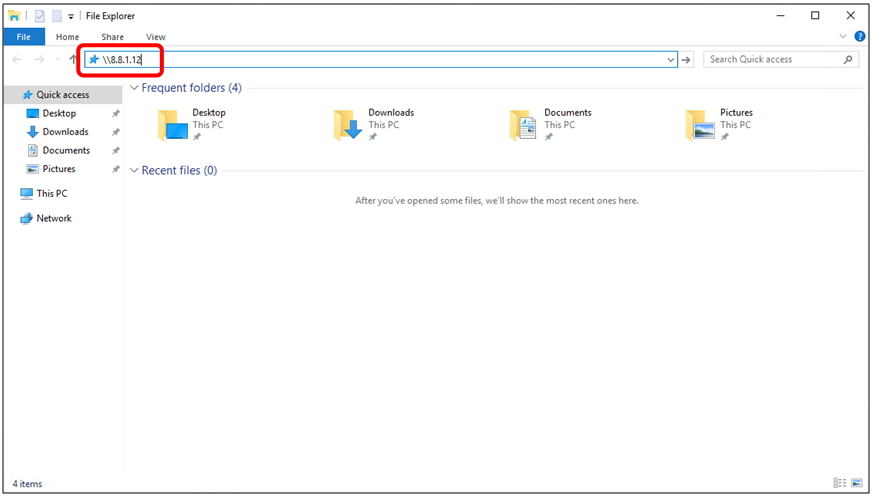
Step 12: Open File Explorer in Windows.
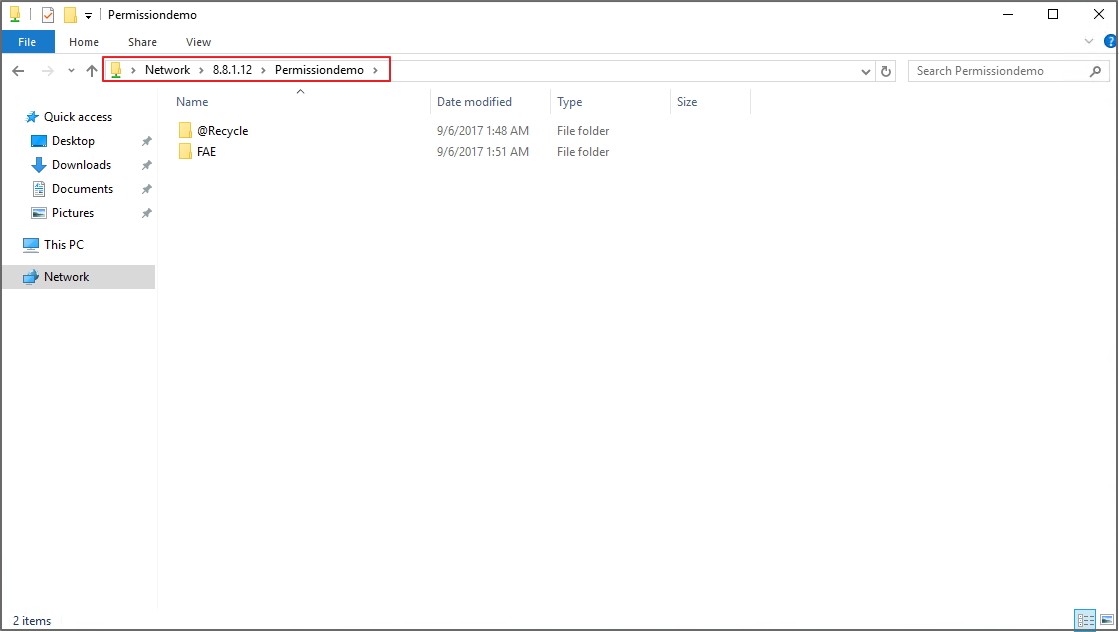
Step 13: Enter the data port IP address for the shared folder.
The RD group folder does not appear in Windows File Explorer. FAE-Leader only has permission to access the FAE group.
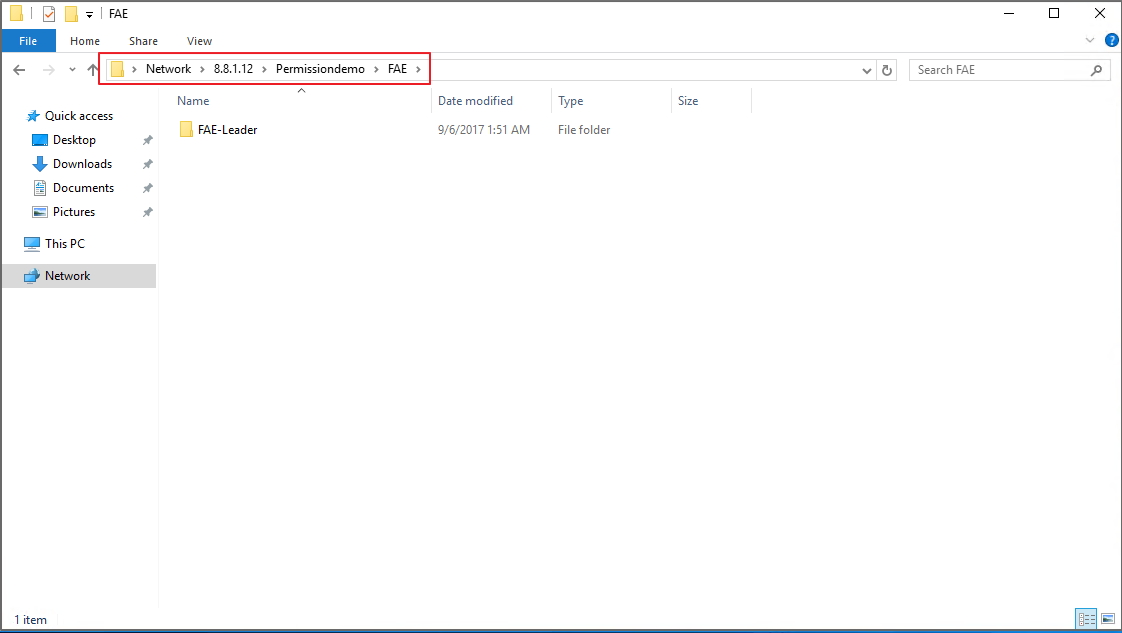
Inside the FAE group folder, FAE-Clark is not visible because FAE -Leader doesn't have permission to view the folder.
Additional References
For more tutorials related to Windows Server, please refer to the following links:
- Advanced Folder Permissions in QES
- Configuring Microsoft Windows Shared Folder Permissions in QES
- Use QNAP Enterprise Storage ES NAS to create WORM shared folder - Windows
- Using Qutil to set Windows Registries on a Windows Host


