How to access files on NAS via NFS from UNIX/Linux clients?
This tutorial guides you to setup your NAS to be accessed via NFS from UNIX/Linux clients in the local network. The first step is to enable the NFS service on NAS.
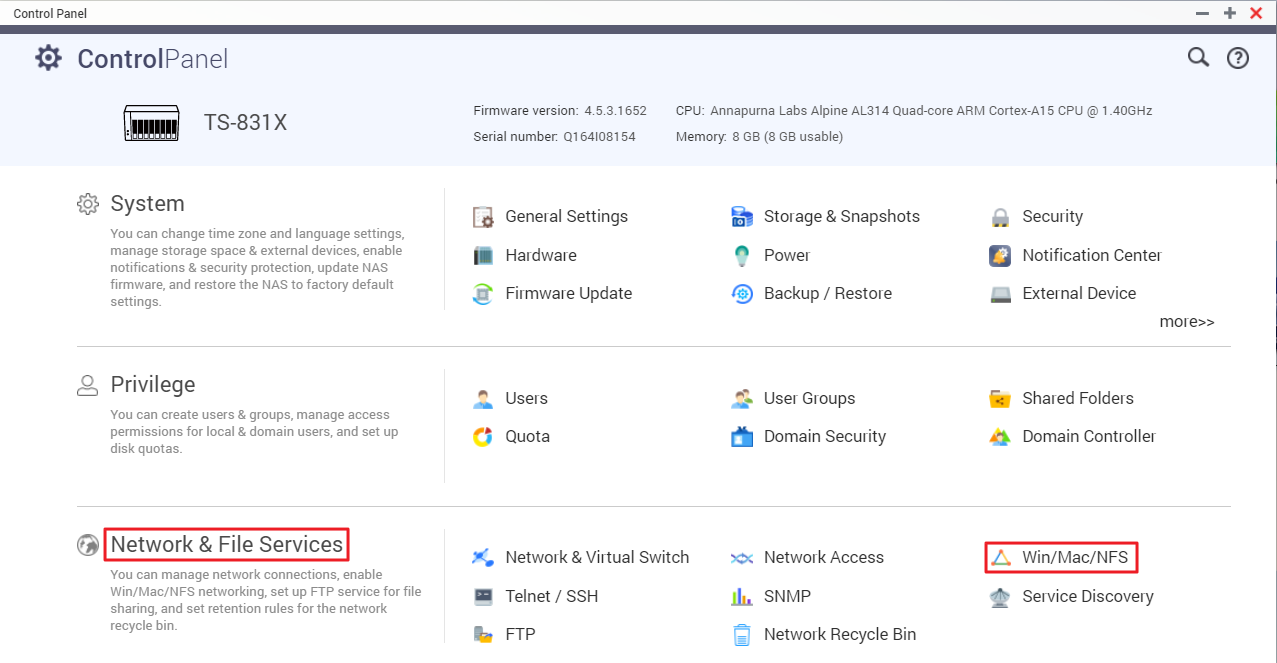
Enable NFS Service
- Open Control Panel and navigate to Network & File Services > Win/Mac/NFS
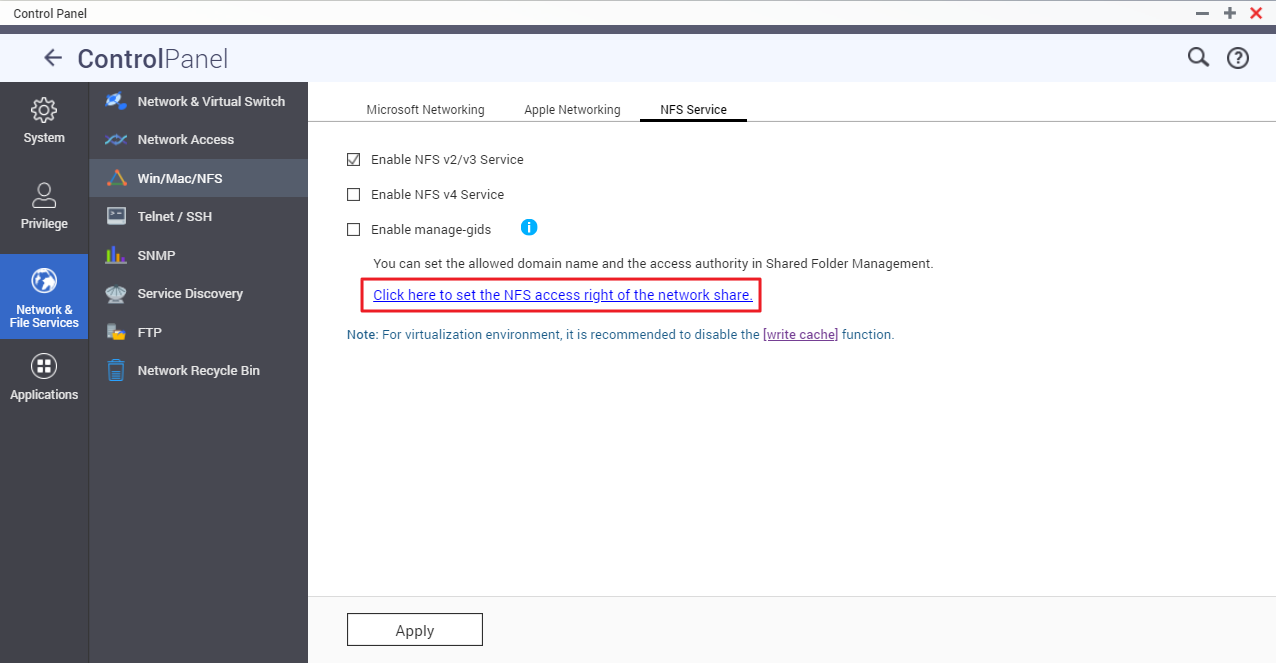
- Click NFS Service tab in the new window and tick the option to enable NFS v2/v3 and/or NFS v4

- Click Apply button to apply and save the settings After the service is enabled, the next step is to setup NFS host access. [back to top]
Setup NFS host access
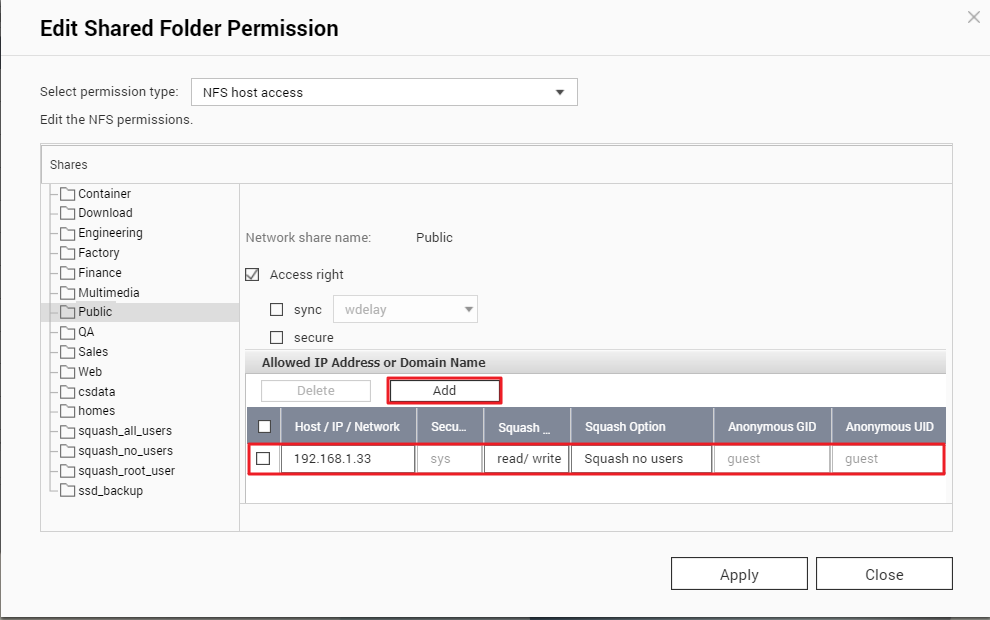
- Click on the link “Click here to set the NFS access right of the network share”. You will be taken to the Shared Folders menu.
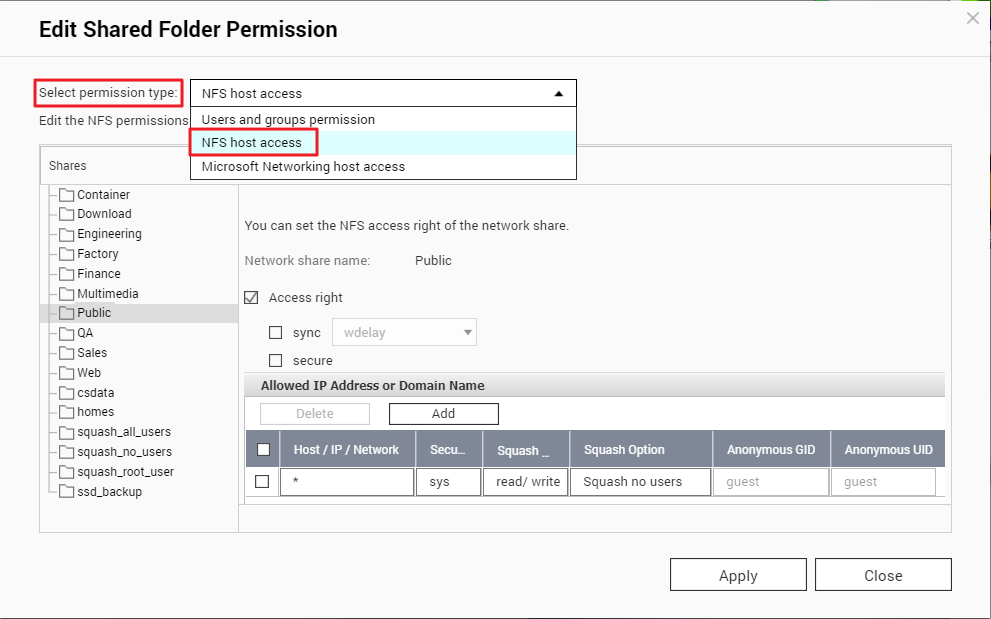
- Under the Action column, please click on the icon of Edit Shared Folder Permission

-
In next window, select NFS host access under Select permission type
-
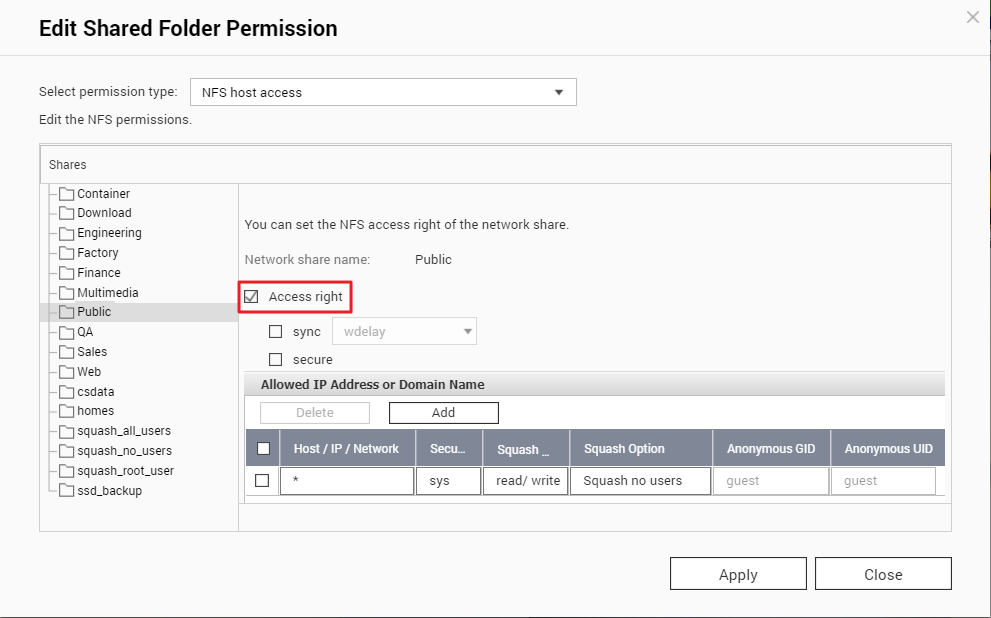
NFS access right is disabled by default, here you can enable it first
-
Click the Add button to add Host / IP / Network and to set their permissions
-
Click Apply button to apply and save the settings
Allowed IP Address or Domain Name
-
Single server: A valid domain name, host name, or IP address that can be resolved by a DNS server.
-
Use wildcard characters to specify a series of servers: Use “*” or “?” to specify the string criteria. When you use wildcard characters in a valid host name, dot (.) is not included in wildcard characters. For example, when you enter *.example.com, one.example.com is counted while one.two.example.com is not counted.
-
IP network: Use a.b.c.d/x. a.b.c.d refers to the network and x refers to number of bits of the network mask, for example, 192.168.0.0/24. Another valid format is a.b.c.d/network mask. In this case, a.b.c.d refers to the network and the following value refers to the network mask setting. For example, 192.168.100.8/255.255.255.0.
-
If using IPv6, enter the IP address and prefix length (ex: 2001::208:9bff:feed:5023/64) for filtering devices and permission settings. If the prefix length is not set, it will refer to a single host IP.
-
Network group: Represented as @group-name; group-name refers to the name of NIS network group.
Note: Please make sure the format you entered is correct. An incorrect format can lead to access errors.
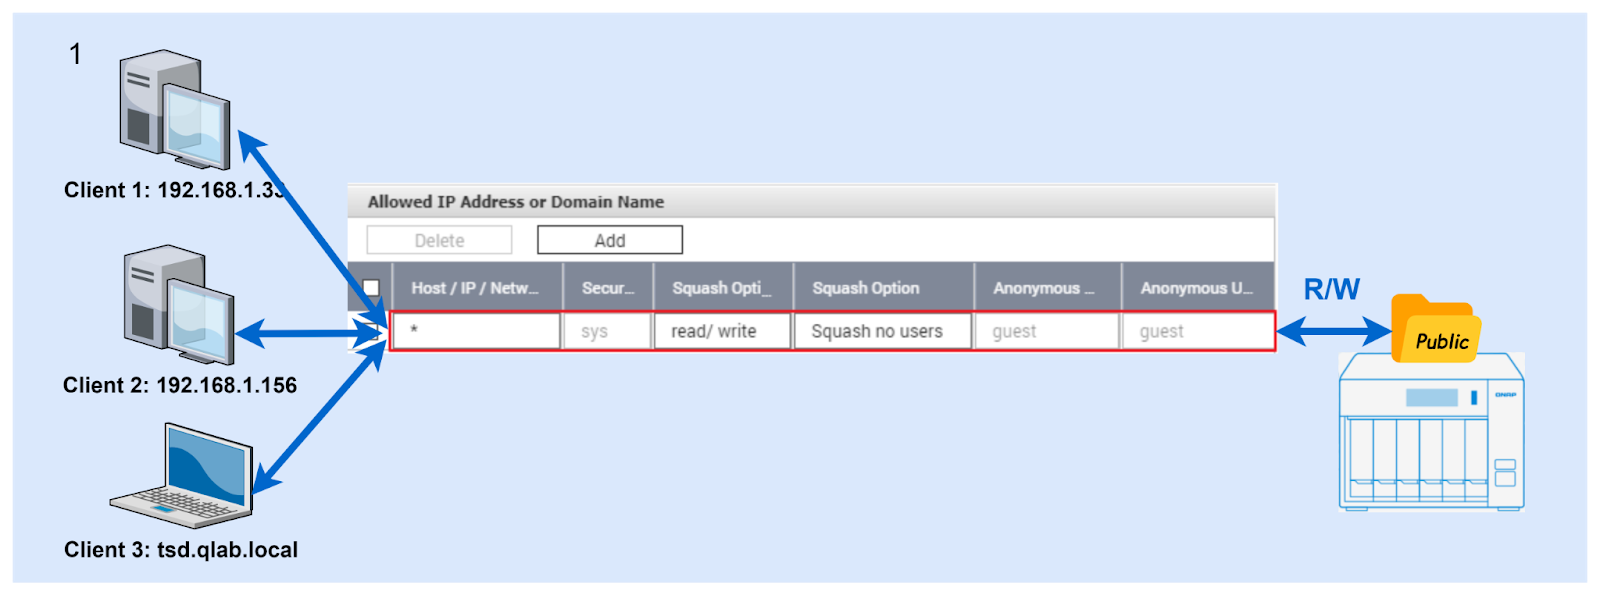
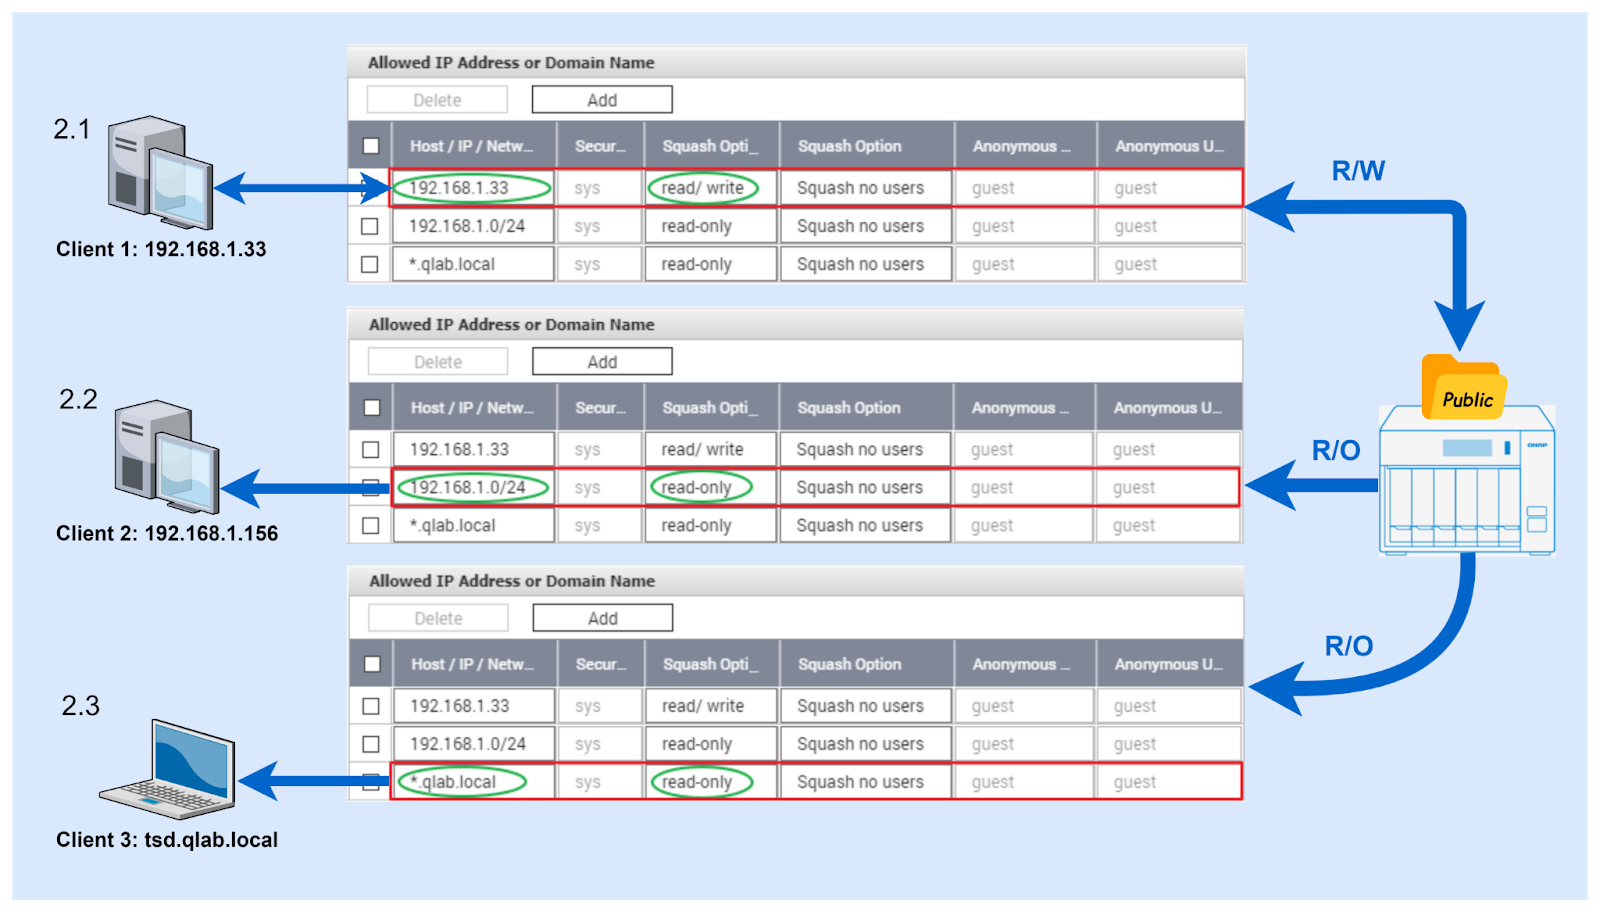
Here are some examples and figures to explain more about the host access settings
- Configure ✱ in Host / IP / Network field to allow accessing the shared folder from all client IP addresses
-
- Configure the full IP address in Host / IP / Network field to allow accessing the shared folder from the dedicated client IP address (ex: 192.168.1.33)
- Configure the IP network in Host / IP / Network field to allow accessing the shared folder from certain client IP networks (ex: 192.168.1.0/24)
- Configure the hostname in Host / IP / Network field to allow accessing the shared folder from certain client hostnames (*.qlab.local)
 [back to top]
There are more options for NFS. The last 3 columns, Squash option, Anonymous GID and Anonymous UID are used for configuring the permission mapping.
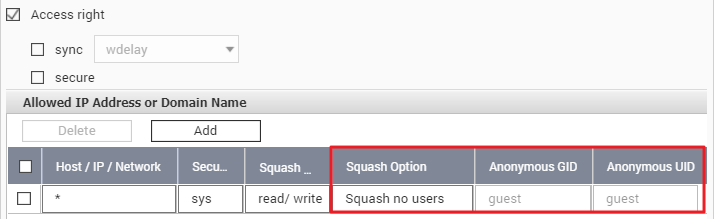
In Squash option, there are 3 options and their definitions are described as below:
SQUASH_ROOT_USER: Only map root(uid/gid 0) to anonymous uid/gid or specific group/user
SQUASH_NO_USERS: Not map to any user to keep the same uid/gid
SQUASH_ALL_USERS: Map all users to anonymous uid/gid or specific group/user
Here are examples to show you how these options work.
-
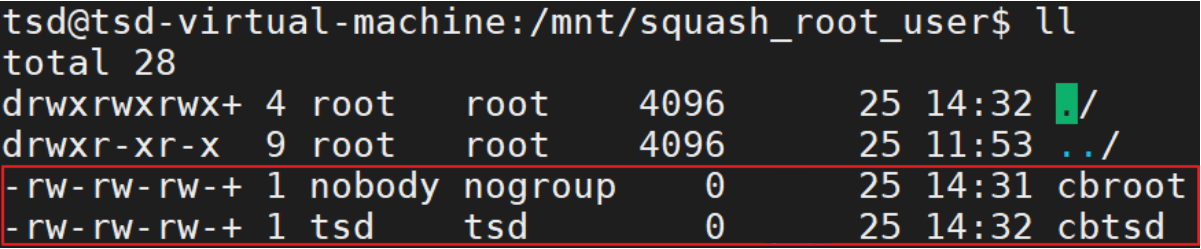
Example 1: (SQUASH_ROOT_USER)
- Choose and configure this option and mount the shared folder from the client.
- Then write the file from the root and the other user, tsd.
You can see only the owner of the file written by root is mapped to nobody:nogroup (65534:65534). The owner of the file written by tsd is still maintained, no changes.
-
Example 2: (SQUASH_NO_USERS)
- Choose and configure this option and mount the shared folder from the client.
- Then write the file from the root and the other user, tsd.
You can see the files owners are the same as the ones who write into this shared folder.
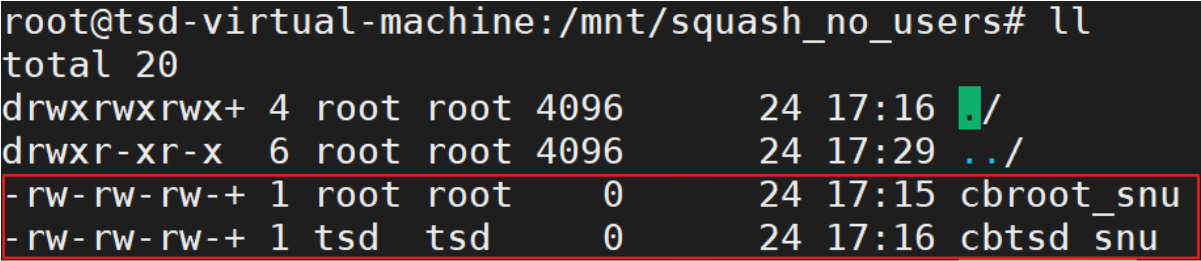
Attention: While SQUASH_NO_USER option is configured, the remote root users own the root permission to change any files in the shared folder. For security, you need to pay more attention while using it.
-
Example 3: (SQUASH_ALL_USERS)
- Choose and configure this option and mount the shared folder from the client.
- Then write the file from the root and the other user, tsd.
You can see the files owners written by both root and tsd are mapped to nobody:nogroup (65534:65534).

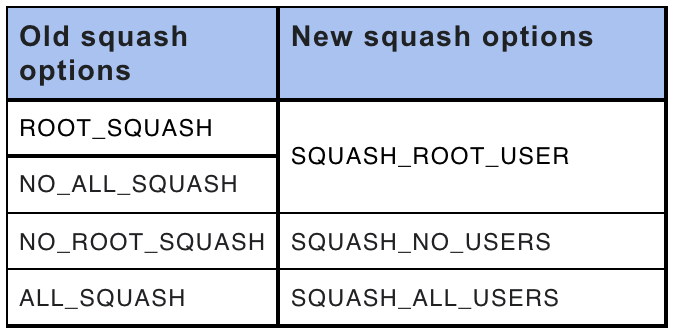
Note: There were 4 squash options in the older QTS firmware(less than QTS v4.4.1). Now, there are 3 squash options. You can refer to the table below for the information of changes.
Related Articles:


