NAS Recovery Guide for Legacy x86-based NAS
Applicable Models
- TS-509 Pro, TS-809 Pro, TS-809U
- TS-239 Pro, TS-239 Pro II, TS-239 Pro II+, TS-439 Pro, TS-439 Pro II, TS-439 Pro II+, TS-639 Pro, SS-439, SS-839
- TS-259 Pro, TS-259 Pro+, TS-459 Pro, TS-459 Pro+, TS-459 Pro II, TS-459U, TS-459U+, TS-559 Pro, TS-559 Pro+, TS-559 Pro II, TS-659 Pro, TS-659 Pro+, TS-659 Pro II, TS-859 Pro, TS-859 Pro+, TS-859U, TS-859U+
- HS-251, HS-251+, TS-x51 Series, TS-x51+ Series, TS-x51U Series
- TS-x53 Series
- TS-453mini
- TS-439U
- TS-469 Pro, TS-469L, TS-469U-RP
- TS-569 Pro, TS-569L, TS-669 Pro, TS-669L, TS-869 Pro, TS-869L, TS-869U-RP, TS-1269U-RP
- TS-451S
- TS-x53U Series, TS-x53S Series
Overview
This FAQ explains how to manually recover your NAS if it fails to start up. This FAQ only applies to the NAS models listed above.
NAS Recovery Requirements
To recover the NAS, you will need the following:
- An empty USB drive of at least 1 GB capacity
- A USB keyboard
- An HDMI™ cable, or a VGA cable
- A Windows PC
- A monitor
Recovering the NAS
You can recover your NAS by first creating a boot disk to restore basic NAS functionality and then updating the firmware with Qfinder Pro. If any part of the recovery process fails, see Further Troubleshooting below. To recover your NAS, perform the following steps:
Prepare the NAS and verify the state of the DOM
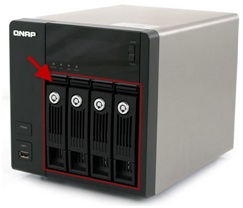
- Power off the NAS.
- Remove all drive trays.
- Connect the USB keyboard to a USB port on the NAS.
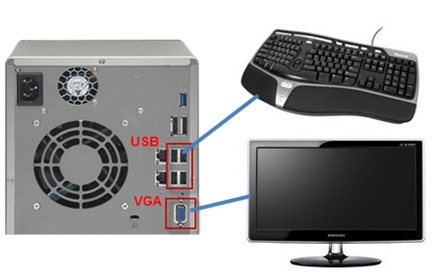
- If the NAS has a VGA or HDMI™ port, connect the NAS to a monitor with a corresponding HDMI™ or VGA Cable.
- If the NAS does not have either a VGA or HDMI™ port but does have a console port, then connect the NAS to a monitor via the console port. For details see, How do I enter BIOS and Console with 3.5mm Console port?
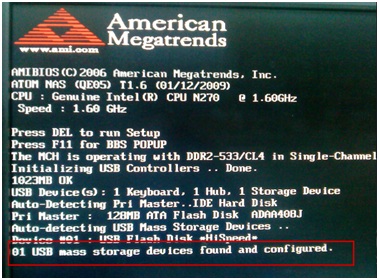
- Power on the NAS
BIOS information is displayed including the version and release date of the BIOS. - Wait until the DOM (Disk-on-module) starts up.
If the DOM fails to start up completely, then the DOM data has been corrupted and you can continue following this guide to recover the NAS.
Create a USB boot drive
- Download and install the Windows version of UNetbootin.
- Download the following Linux ISO file: http://distro.ibiblio.org/damnsmall/current/dsl-4.4.10-initrd.iso
- Connect the USB drive to a USB port on your PC.
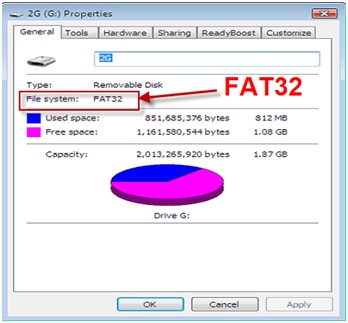
- Format the USB drive as FAT32:
- Open File Explorer.
- Open File Explorer.
- Locate the USB drive.
- Locate the USB drive.
A context menu appears. - Click Format.
The USB Format window appears. - Under File system, select Fat32.
- Click Start.
A confirmation window appears explaining that all data will be erased on the flash drive.WarningFormatting a USB flash drive will erase all its existing data. If you have data on the USB flash drive you want to preserve, copy the data to your PC first, then after formatting the USB flash drive, copy the data back.
- Open Unetbootin.
- For Distribution, select Damn Small Linux.
- For Diskimage, select ISO.
- Click "...".
- Locate and select the downloaded Linux ISO file from the previous steps.
- Click OK.
- For Type, select USB Drive.
- Click OK
UNetbootin installs the Linux ISO onto the USB drive.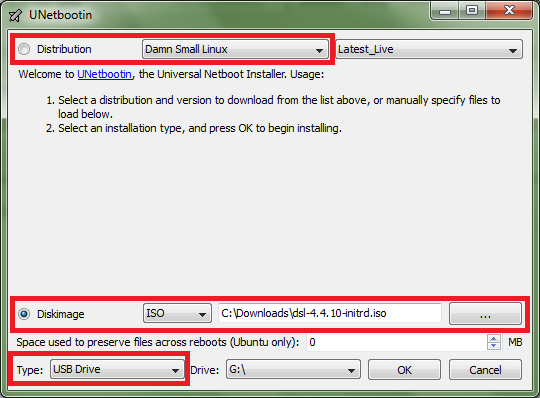
- After installation is completed, click Exit.
- Download the NAS system image below corresponding to the NAS model:
- TS-239 Pro
- TS-239Pro II
- TS-239 Pro II+
- TS-259 Pro, TS-259 Pro+
- TS-439 Pro
- TS-439 Pro II
- TS-439 Pro II+
- TS-439U
- TS-459 Pro, TS-459 Pro+, TS-459 Pro II
- TS-459U, TS-459U+
- TS-469 Pro, TS-469L
- TS-469U-RP
- TS-509 Pro
- TS-559 Pro, TS-559 Pro+, TS-559 Pro II
- TS-569 Pro, TS-569L
- TS-639 Pro
- TS-659 Pro, TS-659 Pro+, TS-659 Pro II
- TS-669 Pro, TS-669L
- TS-809 Pro
- TS-809U
- TS-859 Pro, TS-859 Pro+
- TS-859U, TS-859U+
- TS-869 Pro, TS-869L
- TS-869U-RP
- TS-1269U-RP
- SS-439
- SS-839
- HS-251
- HS-251+
- TS-x51 Series
- TS-x51+ Series
- TS-x51U Series
- TS-451S
- TS-x53 Series
- TS-x53U Series
- TS-453mini
- TS-x53S Series
- Rename the NAS system image to "dom.img".
- Copy "dom.img" to the root folder of USB drive.
The USB drive can now be used as a USB boot drive to recover your NAS system's DOM.
Use the USB boot dive to recover the corrupted DOM
- Power off the NAS.
- Connect the USB drive to a USB port on the NAS.
- Power on the NAS and while the NAS is starting up, press the F11 key repeatedly until the NAS displays the BIOS menu.TipThe F11 key must be pressed at a specific time to trigger the BIOS menu. Pressing the F11 key repeatedly helps ensure the key will be pressed at the correct time.
- Under Boot Device, select the USB drive.
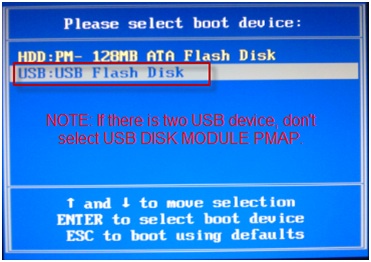 WarningDo not select USB DISK MODULE PMAP.
 - On the following menu, select Default for monitor setting.
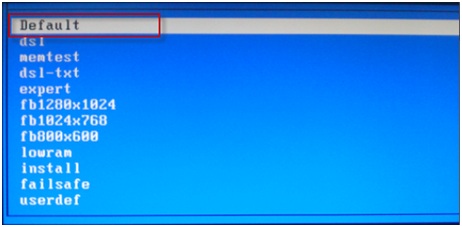
- Press Enter.
The NAS starts up and the following window is displayed: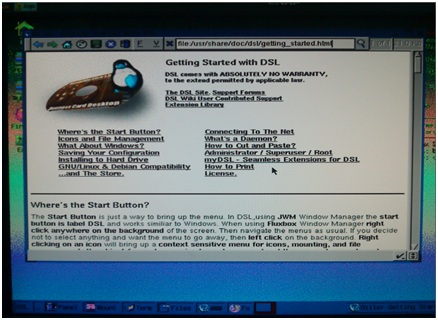
- Press Ctrl+Alt+Del to open the command line.
- Input the following command:
sudo su
fdisk –l
The following partitions are present:
Partition Description /dev/sda The USB boot device /dev/sdb or /dev/hda The DOM (Disk On Module) which is either 126 MB or 515 MB in size 
- Enter the following commands:
mkdir usbdrive mount /dev/sda1 /home/dsl/usbdrive cd /home/dsl/usbdrive - Enter the following command:
cp dom.img {0}Variable Description {0} The path of the DOM. Either "/dev/sdb" or "/dev/hda" The NAS system image "dom.img" is copied from USB boot drive to the DOM.
- Reboot your NAS with the following command:
reboot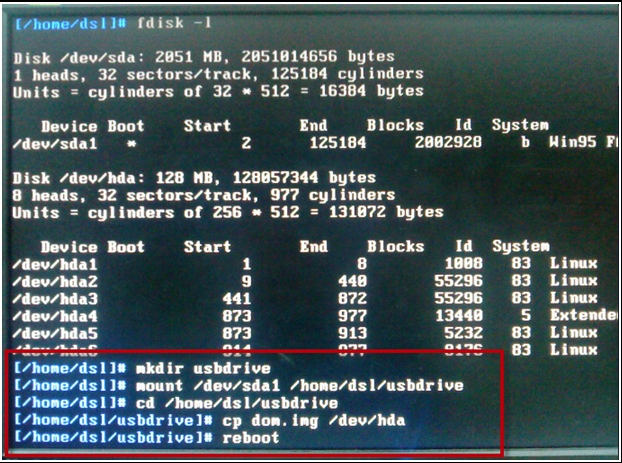
The NAS starts up correctly and Qfinder Pro can now find your NAS.
Update the NAS firmware (For firmware versions 1.x.x)
If the NAS system image downloaded above is version 1.x.x, then you must update your firmware to a newer version to complete the recovery process. Follow the steps below to update your firmware:
- If the NAS is a TS-239, TS-439, TS-439U, TS-509, TS-639, TS-809, TS-809U, SS-439 or SS-839, follow the steps in this tutorial:
http://wiki.qnap.com/wiki/NAS_Firmware_Update_When_No_HDD(s)_Installed - For all other x-86 based NAS, use Qfinder Pro to update the firmware:
- Download and install Qfinder Pro.
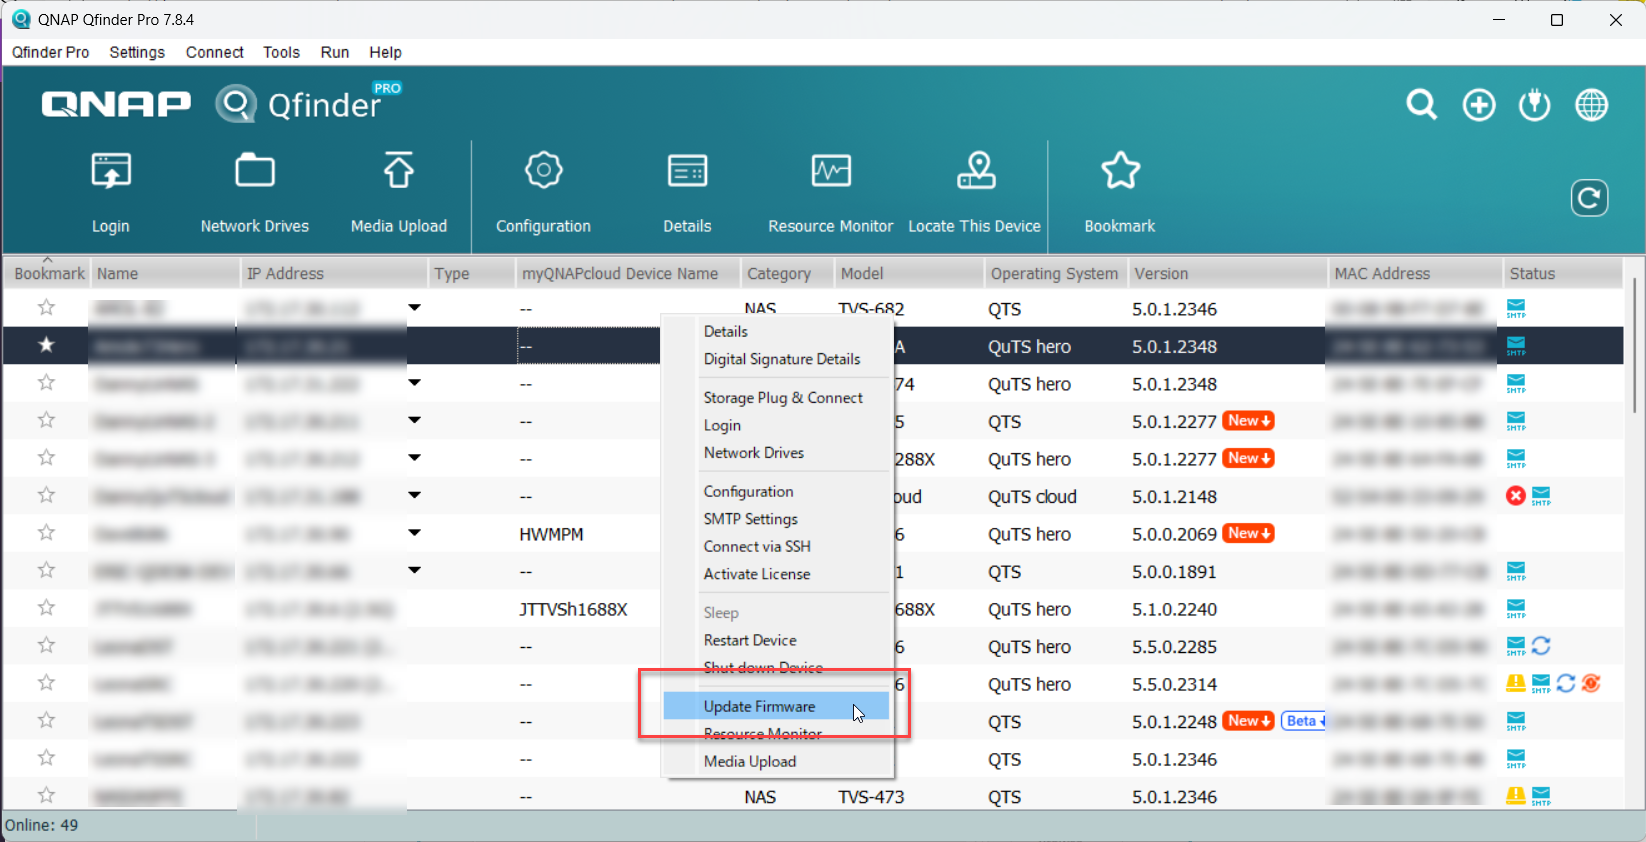
- Open Qfinder Pro.
- Locate your NAS in the device list.TipFor details on using Qfinder Pro, see Qfinder Pro Help.
- For details on using Qfinder Pro, see Qfinder Pro Help.
- Select Update Firmware and login with the default admin credential.
 The Update Firmware window opens.
 - Select Automatically update the firmware to the latest version.
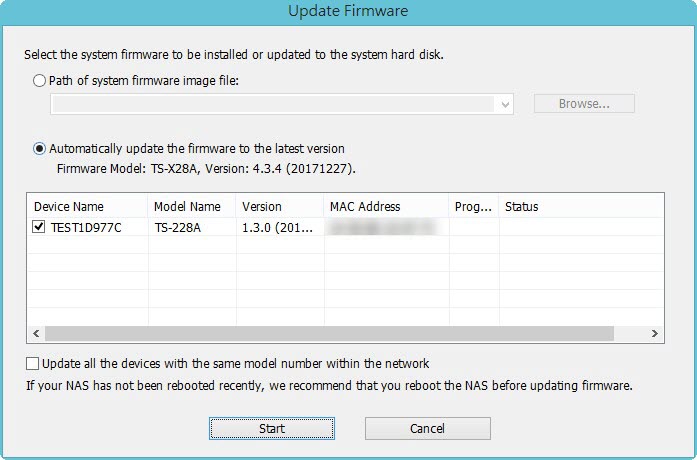
- Click Start.
The NAS firmware will be updated to the latest version.
Install hard drives
- After the firmware is updated, perform the following steps to install hard drives:
- Attach the hard drives to the drive trays.
- Insert the drive trays into the NAS.
For details on installing hard drives, see your NAS User Guide availble for download from Download Center. - If the hard drives are not new, the firmware must be updated again while the hard drives are installed. For details, see Updating the NAS Firmware Using Qfinder Pro in How to search and manage a QNAP NAS using Qfinder Pro.
- If the hard drives are new, you can continue to initialize the NAS. For initializing QTS or QuTS hero on your NAS, see the following:
Further Troubleshooting
- If the NAS BIOS failed to display:
Your NAS needs to be physically serviced by a qualified hardware technician. - If the steps of this guide could not be successfully completed:
Your NAS needs to be physically serviced by a qualified hardware technician. - If you were able to install the latest firmware version on your NAS with Qfinder Pro but after installing the hard drives, the NAS will not boot up:
The hard drives are faulty and need to be replaced. A NAS will fail to start up if the hard drives are faulty.
Further Reading
What to do if Firmware update is stuck?
Why won't my NAS boot after a firmware update?
What can I do if I can not access my NAS after firmware update?
What do I do if there was a power failure or network disconnection during a firmware update?


