Applicable Products
- QuFirewall 2.5.0 and later versions
- myQNAPcloud 1.1.79 and later versions
- QTS 5.2.x and later versions
- QuTS hero h5.2.x and later versions
Overview
Secure IP Access is an authentication control built into QuFirewall that verifies the identity of remote devices before they can reach NAS services. When enabled, the NAS only accepts connections from registered IP addresses, or from devices that can prove ownership of those addresses through a trusted verification process. This reduces unauthorized access attempts and blocks unknown hosts before they can interact with system services.
QuFirewall works with myQNAPcloud to validate remote device IP addresses and maintain a trusted access list. You can decide which users or devices are allowed to connect, and unverified connections are denied automatically. By combining firewall rules with IP-based identity checks, Secure IP Access gives you a more reliable way to control remote access on both home and enterprise networks.
Procedure
Enable Secure IP Access on QuFirewall
- Log in to your NAS.
- Open QuFirewall.
- On the side panel, click Secure IP Access.
- Enable the Secure IP Access toggle switch.
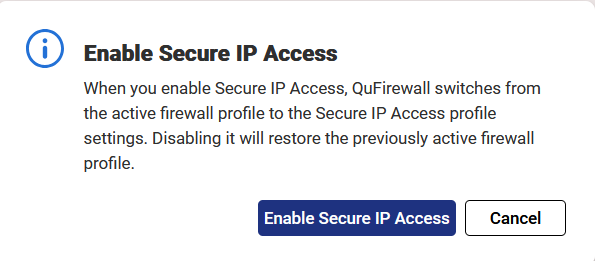
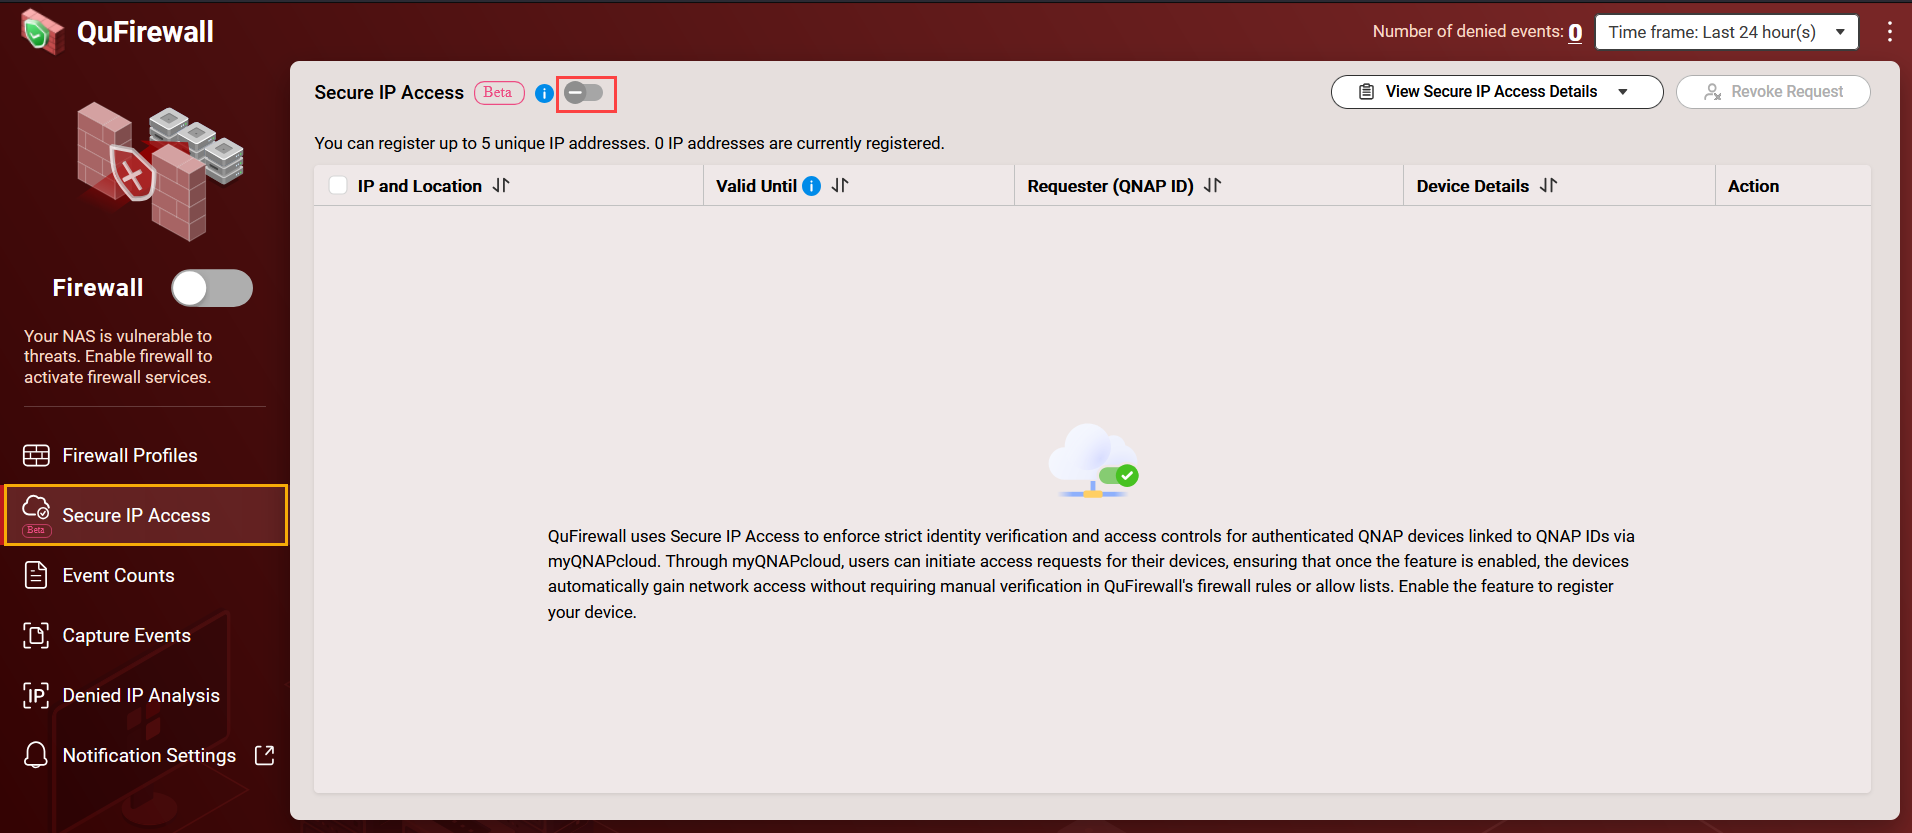 The Enable Secure IP Access window appears.
 - Click Enable Secure IP Access.
Note
If the NAS is not already linked to a QNAP ID, the system prompts you to complete the binding process.
Register your NAS on myQNAPcloud
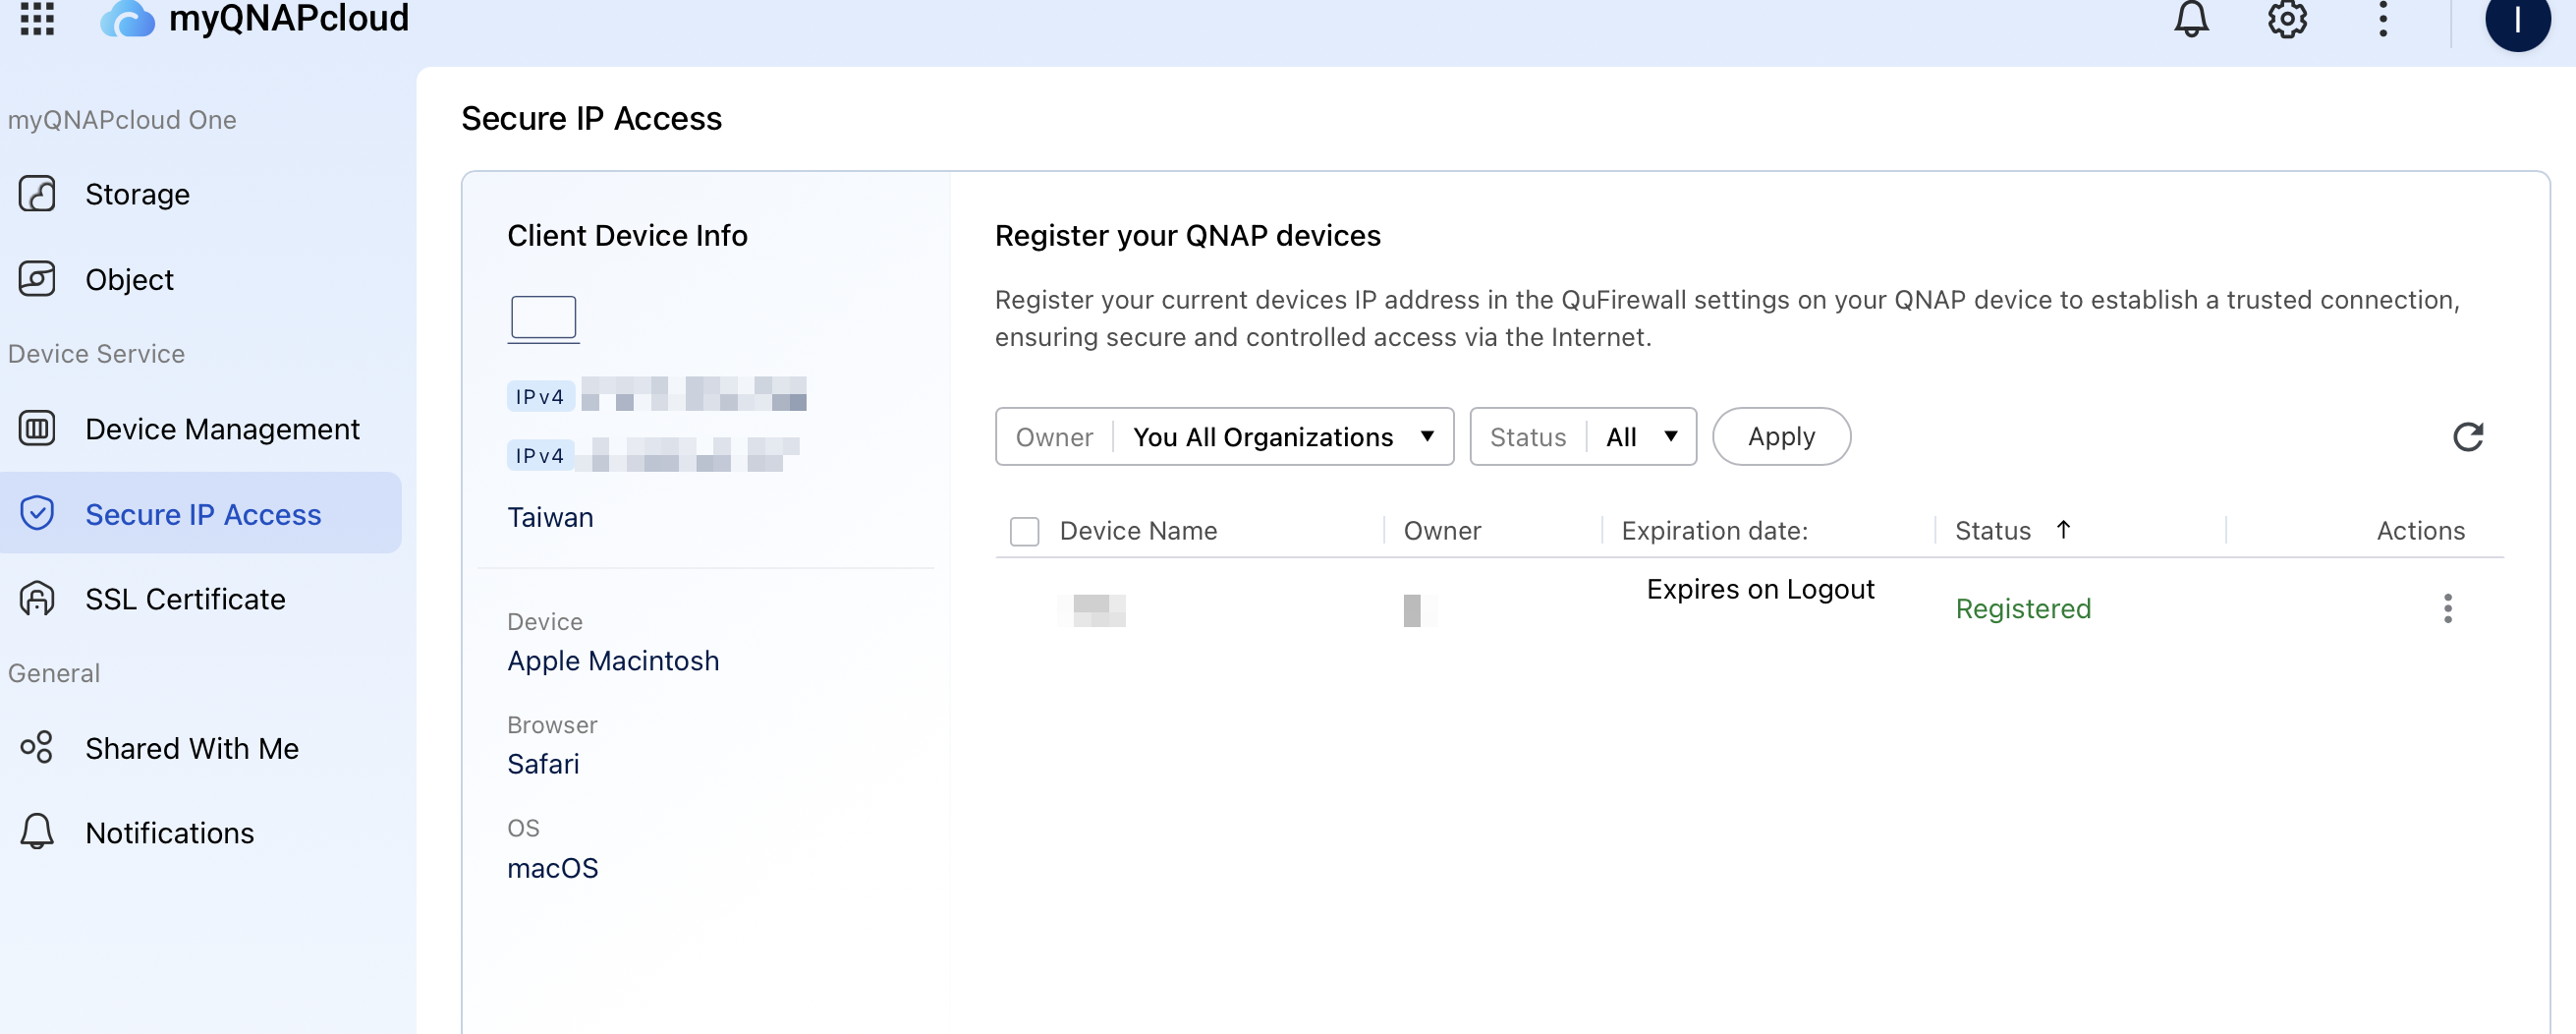
- Go to https://www.myqnapcloud.com/.
- Log in using your QNAP ID.
- On the side panel, click Secure IP Access or
 .
. - Identify your NAS.
- Under Actions, click Register.
The window for configuring an access expiration opens. - Specify how long the device is permitted to access the NAS over the internet.
- Restrict access to the current session associated with the signed-in QNAP ID.
- Assign a fixed expiration period ranging from 1 minute to several hours.
- Click Register.
After registration, the device is added to the trusted list, and its remote access permissions are enforced according to the selected expiration policy.
Revoking access to secured devices
When you no longer want a device to connect to the NAS over the internet, you can revoke its permission at any time. Revocation can occur automatically when the configured limit is reached, or you can remove the device’s permission manually using either QuFirewall or the myQNAPcloud portal. Once access is revoked, the device cannot connect again until it is registered once more.
- Automatically revoke access to a device
Access is removed automatically when the configured expiration condition is met. This happens when you sign out of the QNAP ID or when the time limit expires. - Manually revoke access to a device
You can remove access at any time from either of the following locations:- QuFirewall
- Open QuFirewall on your QNAP NAS.
- Click Secure IP Access on the side panel.
- Select the device whose access you want to revoke.
- Click Revoke Request.
QuFirewall removes the device's permission to access the NAS over the internet.
- myQNAPcloud
- Log in to https://www.myqnapcloud.com/.
- Click Secure IP Access on the side panel.
- Select the device you want to revoke.
- Under Actions, click
 .
. - Click Revoke.
myQNAPcloud remove the device’s permission to access the NAS over the internet.
After you revoke access, the device cannot connect to the NAS again until you register it once more.
Further Reading
适用产品
- QuFirewall 2.5.0 and later versions
- myQNAPcloud 1.1.79 and later versions
- QTS 5.2.x and later versions
- QuTS hero h5.2.x and later versions
概述
安全 IP 访问是内置于 QuFirewall 中的一种身份验证控制,能够在远程设备访问 NAS 服务之前验证其身份。启用后,NAS 仅接受来自注册 IP 地址的连接,或通过可信验证过程证明拥有这些地址的设备连接。这减少了未经授权的访问尝试,并在未知主机与系统服务交互之前将其阻止。
Qu 防火墙与 myQNAPcloud 协作验证远程设备 IP 地址并维护可信访问列表。您可以决定允许哪些用户或设备连接,未验证的连接将自动被拒绝。通过将防火墙规则与基于 IP 的身份检查相结合,安全 IP 访问为您提供了一种更可靠的方式来控制家庭和企业网络的远程访问。
步骤
在 QuFirewall 上启用安全 IP 访问
- 登录到您的 NAS。
- 打开QuFirewall。
- 在侧边面板中,点击安全 IP 访问。
- 启用安全 IP 访问切换开关。该启用安全 IP 访问窗口出现。
- 点击启用安全 IP 访问。
注意
如果 NAS 尚未绑定到 QNAP ID,系统会提示您完成绑定过程。
在 myQNAPcloud 上注册您的 NAS
- 前往https://www.myqnapcloud.com/。
- 使用您的 QNAP ID 登录。
- 在侧边面板中,点击安全 IP 访问 或 。
- 识别您的 NAS。
- 在操作下,点击注册。
配置访问过期时间的窗口将打开。 - 指定设备允许通过互联网访问 NAS 的时间长度。
- 限制访问与登录的 QNAP ID 相关的当前会话。
- 分配一个固定的到期时间,从 1 分钟到几个小时不等。
- 点击注册。
注册后,设备将被添加到信任列表中,并根据所选的到期策略强制执行其远程访问权限。
撤销对安全设备的访问
当您不再希望某设备通过互联网连接到 NAS 时,您可以随时撤销其权限。当达到配置的限制时,撤销可以自动发生,或者您可以通过 QuFirewall 或 myQNAPcloud 门户手动移除设备的权限。一旦访问被撤销,设备在重新注册之前无法再次连接。
- 自动撤销设备访问权限
当达到配置的过期条件时,访问权限会自动移除。这会在您退出 QNAP ID 或时间限制到期时发生。 - 手动撤销设备访问权限
您可以随时从以下位置移除访问权限:- QuFirewall
- 在您的 QNAP NAS 上打开 QuFirewall。
- 点击侧边栏上的安全 IP 访问。
- 选择您想要撤销访问权限的设备。
- 点击撤销请求。
QuFirewall 将移除设备通过互联网访问 NAS 的权限。
- myQNAPcloud
- 登录到https://www.myqnapcloud.com/。
- 点击侧边栏上的安全 IP 访问。
- 选择您想要撤销的设备。
- 在操作下,点击。
- 点击撤销。
myQNAPcloud 将移除设备通过互联网访问 NAS 的权限。
撤销访问后,设备在重新注册之前无法再次连接到 NAS。
进一步阅读


