Applicable Products
QTS, QuTS hero
Container Station
What is Open WebUI?
Open WebUI is a ChatGPT-style, self-hosted web interface designed to connect to local Large Language Models (LLMs) like Ollama. It provides a polished, user-friendly chat experience without requiring cloud subscriptions or sending your data to external servers. Once deployed on your QNAP NAS, you can access Open WebUI from any browser on your network.
What You'll Learn
This tutorial covers:
- Creating a Docker Compose YAML file for Open WebUI
- Configuring network connectivity between Open WebUI and Ollama
- Deploying the container and creating an admin account
- Selecting an LLM and testing the chat interface
- Connecting to a remote Ollama instance if needed
Understanding Docker Networking
When both Open WebUI and Ollama run in separate containers on the same QNAP NAS, they communicate via a shared Docker network. The key point: containers communicate using service names (for example: ollama, but not localhost).

The OLLAMA_BASE_URL environment variable tells Open WebUI where to find Ollama. When both containers are on the same Docker network named ai-network, the URL is http://ollama:11434 (using the container service name).
Prerequisites
- QNAP NAS running QTS 5.2 / QuTS hero h5.2 or later versions
- Container Station 3
- Ollama, deployed on the same QNAP NAS
- At least 2GB of free space for the Open WebUI container and persistent data
- Familiarity with Container Station and Docker Compose basics
Procedure
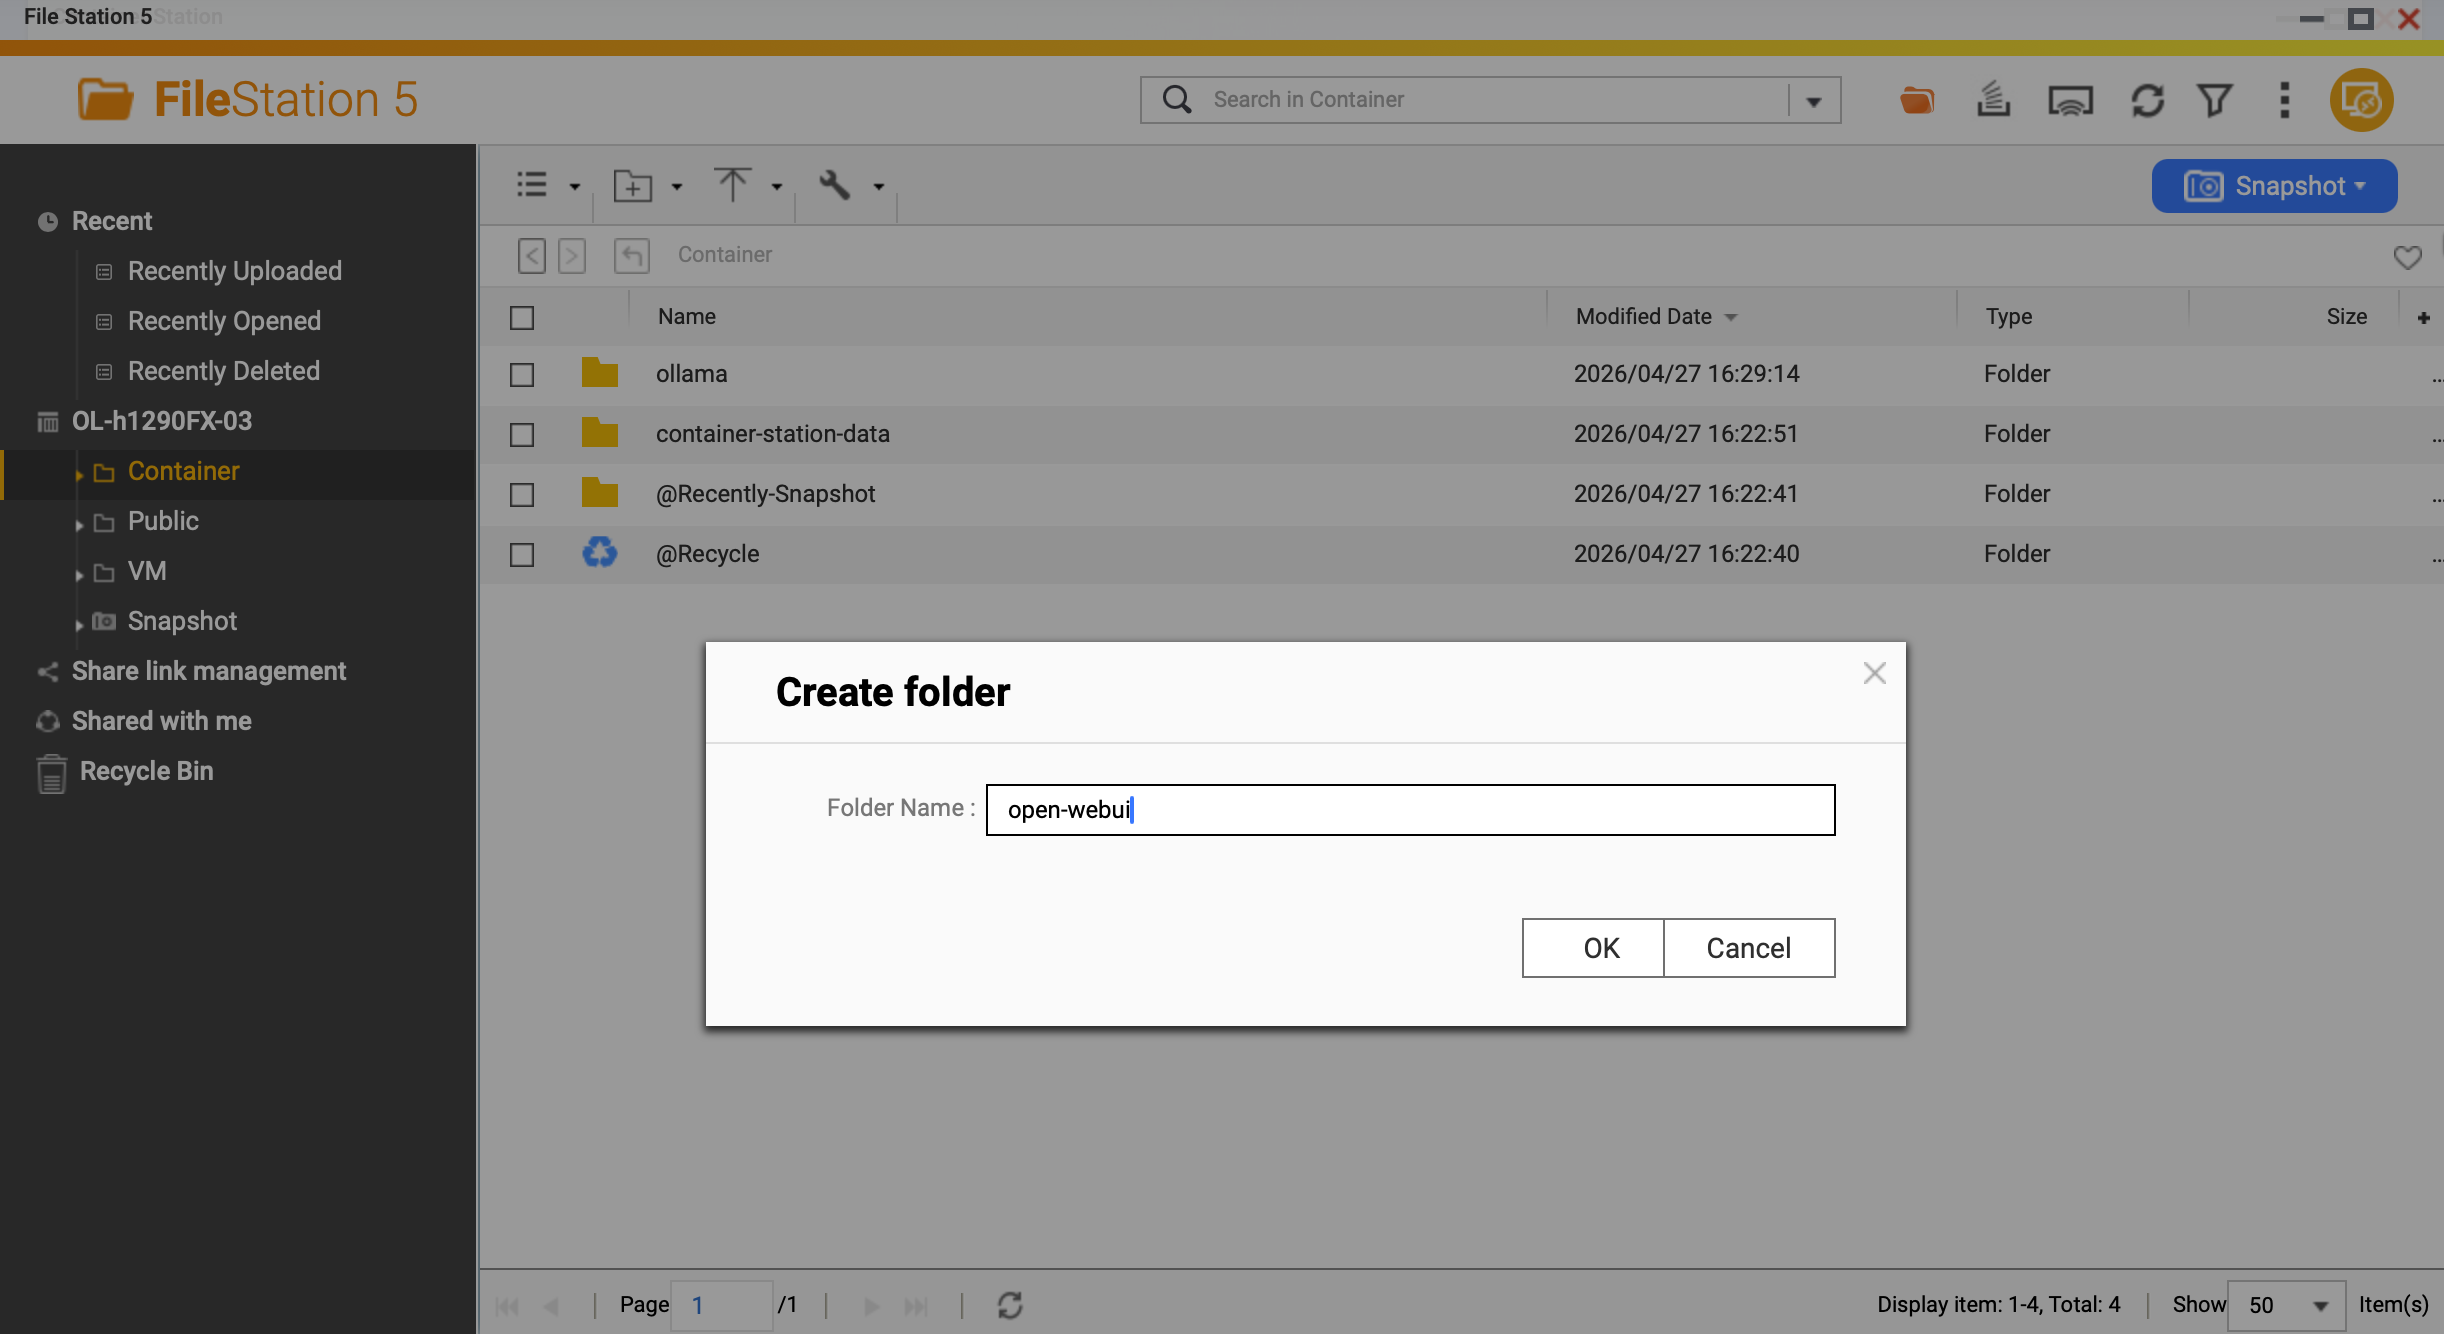
Step 1: Create Storage Folder
Open SSH or File Station on your QNAP NAS. Create a directory for Open WebUI persistent data:
/share/Container/open-webui
This directory stores chat history, user settings, and configuration data. Without this volume mount, all your conversations disappear when the container restarts.
Step 2: Create the Application
In Container Station, create a new Application with the following content:
version: '3.8'
services:
  open-webui:
    image: ghcr.io/open-webui/open-webui:main
    container_name: open-webui
    ports:
      - "3000:8080"
    volumes:
      - /share/Container/open-webui:/app/backend/data
    environment:
      OLLAMA_BASE_URL: http://ollama:11434
    networks:
      - ai-network
    restart: unless-stopped

networks:
  ai-network:
    name: ai-network
    driver: bridge
Key Configuration Explained
- Image:
ghcr.io/open-webui/open-webui:main — Official Open WebUI image from GitHub Container Registry - Port:
3000:8080 — Access from browser at http://NAS-IP:3000, mapped to container port 8080 - Volume:
/share/Container/open-webui:/app/backend/data — Persistent storage for chats and settings - OLLAMA_BASE_URL:
http://ollama:11434 — Must match your Ollama container service name and port - Network:
ai-network — Shared bridge network with Ollama container - Restart:
unless-stopped — Container restarts automatically after QNAP reboots
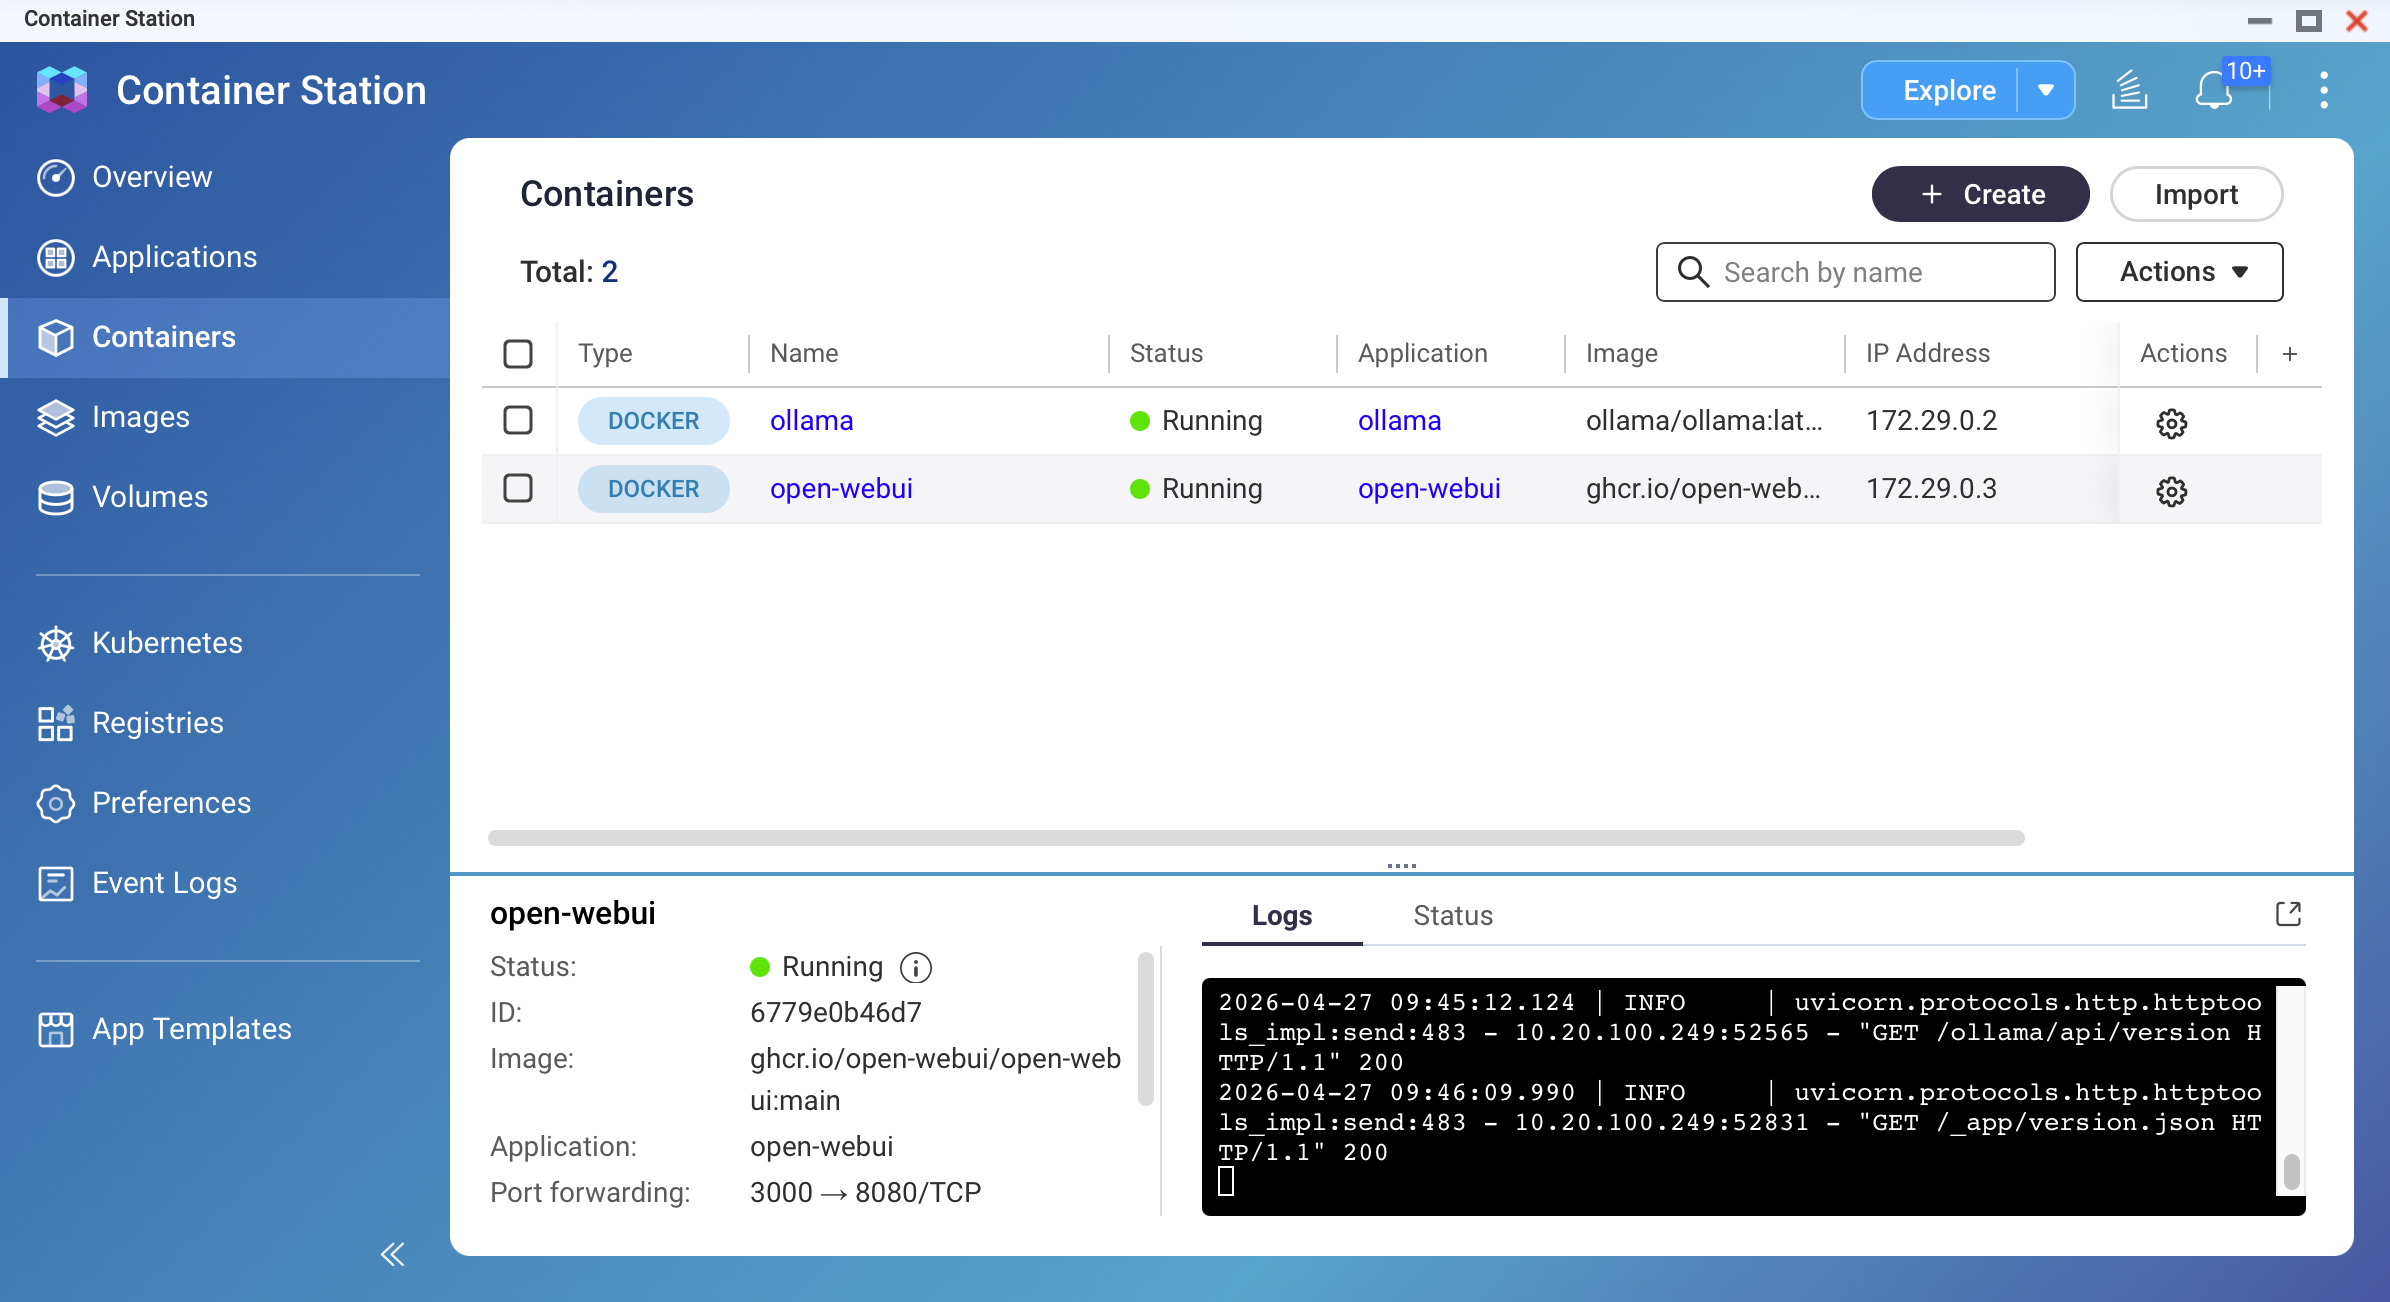
Wait 30-60 seconds for the container to start. Check logs in Container Station.

Step 3: Create Admin Account and Initial Setup
Open your browser and navigate to:
http://YOUR-NAS-IP:3000
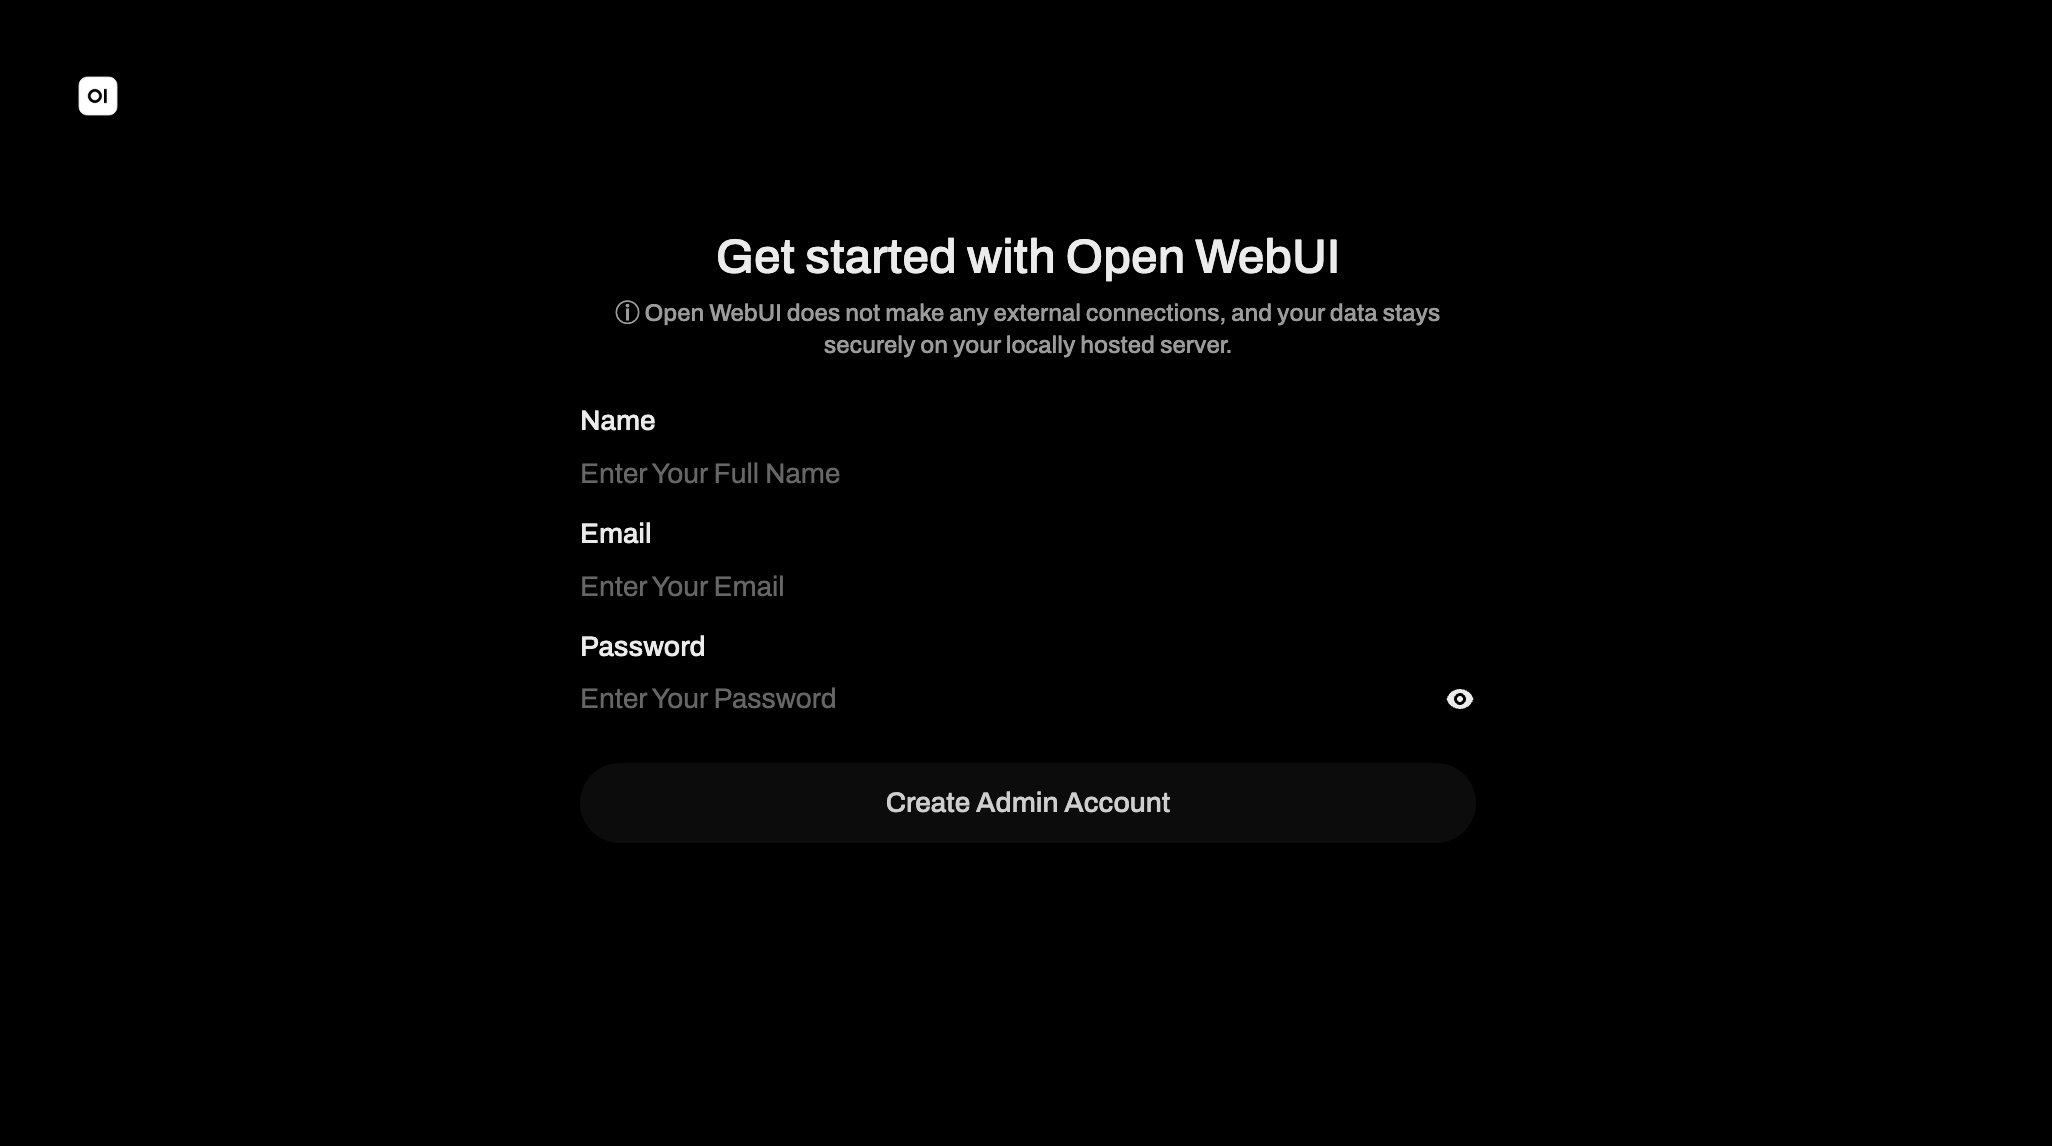 Screenshot: Open WebUI login screen with sign-up fields
On first access, Open WebUI displays a sign-up form. Fill in:
- Name: Your display name
- Email: An email address (does not need to be valid)
- Password: A secure password for your account
The first account created automatically becomes the admin account. You must create this account before the interface unlocks. Click Create Account.
Warning
The first account created becomes admin with full system access. If your QNAP NAS is accessible from the internet, set up a strong password immediately. Do not leave the default or empty credentials.
Step 4: Select a Model and Test
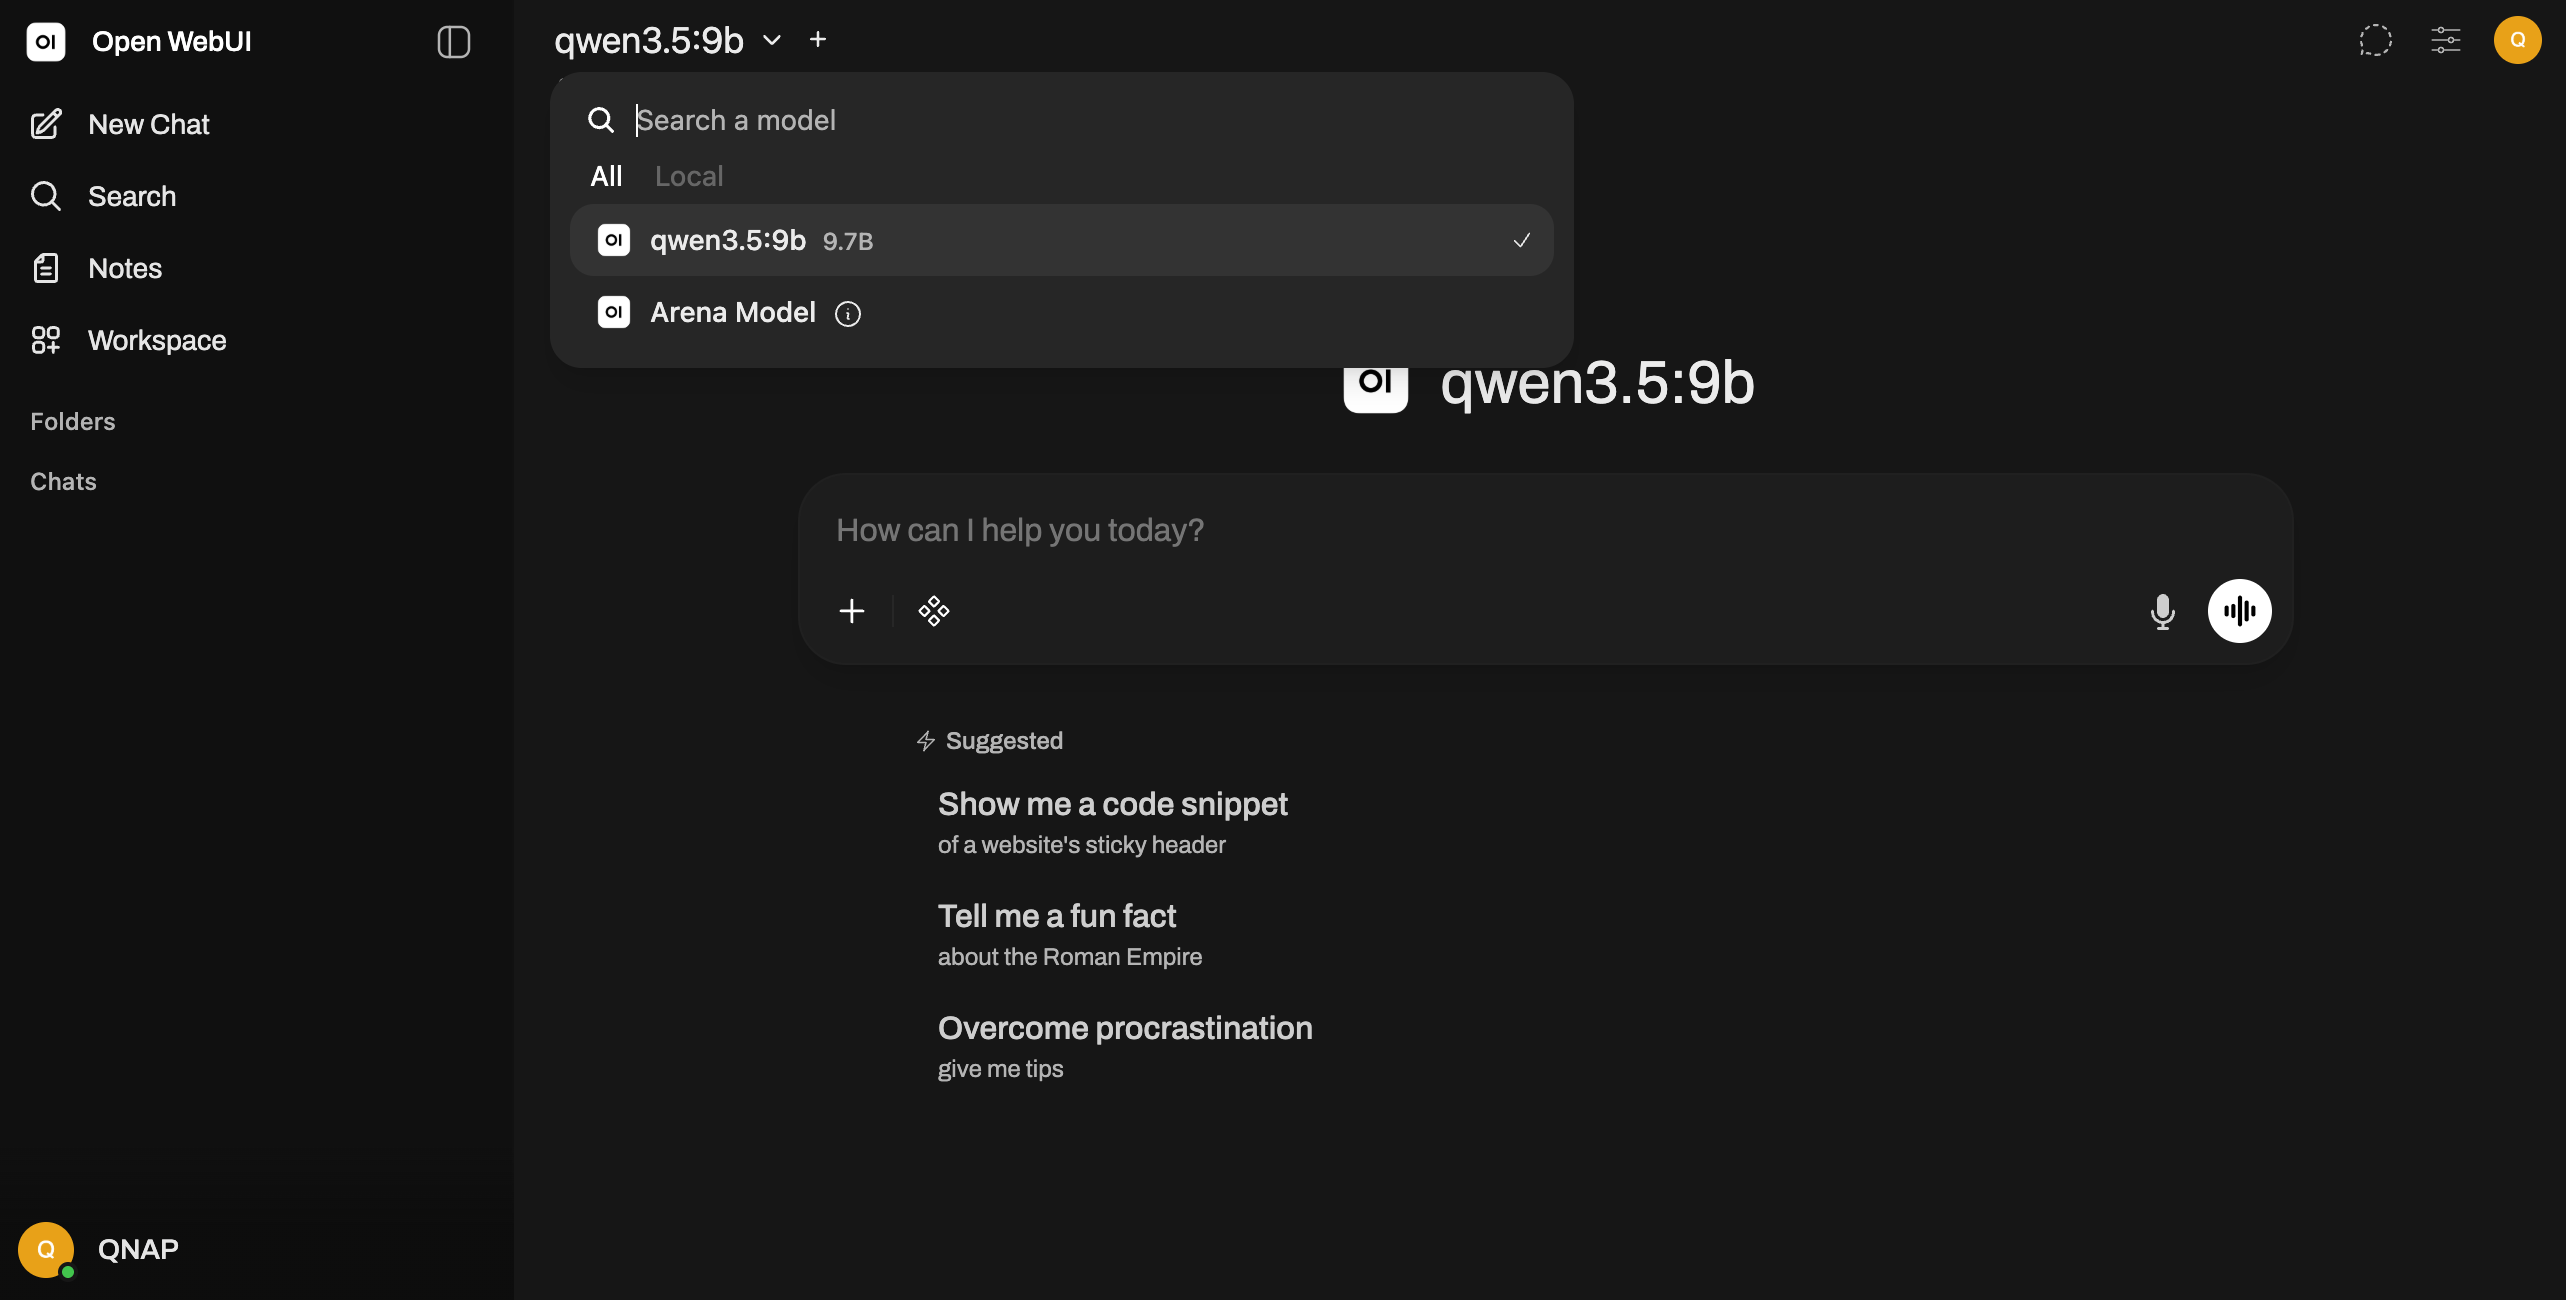
After signing in, Open WebUI shows a model selector. If you have already pulled models in Ollama, they appear here automatically. If no models are listed:
- Go to the Admin Panel menu
- Select Setting -> Models
- Verify Ollama connections and display model availability.
- Pull a model directly from Open WebUI or return to Ollama to pull one first
Select a model from the dropdown (e.g., Gemma, Qwen, Deepseek).

Step 5: Start Chatting
Type a message in the text box at the bottom and press Enter. Open WebUI sends your message to Ollama, which processes it using the selected model and returns a response. The interface stores the full conversation in your persistent volume.

Screenshot: Open WebUI chat interface with a sample conversation
Connecting to a Remote Ollama Instance
If you want Open WebUI to connect to Ollama running on a different QNAP NAS or machine (not the same physical host), modify the environment variable:
OLLAMA_BASE_URL: http://OTHER-NAS-IP:11434
Replace OTHER-NAS-IP with the IP address of the remote machine running Ollama. Ensure that machine's firewall allows port 11434 traffic from your QNAP NAS. Both machines must be on the same network or have proper routing configured.
适用产品
QTS, QuTS hero
Container Station
什么是 Open WebUI?
Open WebUI 是一种类似 ChatGPT 的自托管网页界面,旨在连接本地大型语言模型(LLM),如 Ollama。它提供了一个精致且用户友好的聊天体验,无需云订阅或将您的数据发送到外部服务器。一旦在您的 QNAP NAS 上部署,您可以从网络上的任何浏览器访问 Open WebUI。
您将学到什么
本教程涵盖:
- 为 Open WebUI 创建 Docker Compose YAML 文件
- 配置 Open WebUI 和 Ollama 之间的网络连接
- 部署容器并创建 admin 账户
- 选择一个 LLM 并测试聊天界面
- 如有需要,连接到远程 Ollama 实例
了解 Docker 网络
当 Open WebUI 和 Ollama 在同一 QNAP NAS 上的不同容器中运行时,它们通过共享的 Docker 网络进行通信。关键点:容器使用服务名称进行通信(例如:ollama,但不是localhost)。
OLLAMA_BASE_URL 环境变量告诉 Open WebUI 在哪里找到 Ollama。当两个容器在同一个名为ai-network的 Docker 网络上时,URL 是http://ollama:11434(使用容器服务名称)。
先决条件
- 运行 QTS 5.2 / QuTS hero h5.2 或更高版本的 QNAP NAS
- Container Station 3
- 部署在同一 QNAP NAS 上的 Ollama
- 至少 2GB 的可用空间用于 Open WebUI 容器和持久数据
- 熟悉 Container Station 和 Docker Compose 基础知识
步骤
步骤 1:创建存储文件夹
在您的 QNAP NAS 上打开 SSH 或 File Station。为 Open WebUI 持久数据创建一个目录:
/share/Container/open-webui
此目录存储聊天记录、用户设置和配置数据。如果没有这个卷挂载,当容器重启时,您的所有对话都会消失。
步骤 2:创建应用程序
在 Container Station 中,创建一个新的应用程序,内容如下:
version: '3.8'
services:
  open-webui:
    image: ghcr.io/open-webui/open-webui:main
    container_name: open-webui
    ports:
      - "3000:8080"
    volumes:
      - /share/Container/open-webui:/app/backend/data
    environment:
      OLLAMA_BASE_URL: http://ollama:11434
    networks:
      - ai-network
    restart: unless-stopped

networks:
  ai-network:
    name: ai-network
    driver: bridge
关键配置说明
- 镜像:
ghcr.io/open-webui/open-webui:main — 来自 GitHub 容器注册表的官方 Open WebUI 镜像 - 端口:
3000:8080 — 从浏览器访问http://NAS-IP:3000,映射到容器端口 8080 - 卷:
/share/Container/open-webui:/app/backend/data — 聊天和设置的持久性存储 - OLLAMA_BASE_URL:
http://ollama:11434 — 必须与您的 Ollama 容器服务名称和端口匹配 - 网络:
ai-network — 与 Ollama 容器共享的桥接网络 - 重启:
unless-stopped — QNAP 重启后容器自动重启
等待 30-60 秒以启动容器。在 Container Station 中检查日志。
步骤 3:创建 admin 账户并进行初始设置
打开浏览器并导航至:
http://YOUR-NAS-IP:3000
截图:Open WebUI 登录界面,带有注册字段
访问时,Open WebUI 会显示注册表单。填写以下内容:
- 姓名:您的显示名称
- 电子邮件:一个电子邮件地址(不需要有效)
- 密码:为您的账户设置一个安全的密码
较高个创建的账户会自动成为 admin 账户。您必须在界面解锁前创建此账户。点击创建账户。
警告
较高个创建的账户将成为具有完整系统访问权限的 admin。如果您的 QNAP NAS 可以从互联网访问,请立即设置一个强密码。不要使用默认或空的凭据。
步骤 4:选择模型并测试
登录后,Open WebUI 会显示一个模型选择器。如果您已经在 Ollama 中拉取了模型,它们会自动出现在这里。如果没有列出模型:
- 进入admin 面板菜单
- 选择设置 -> 模型
- 验证 Ollama 连接并显示模型可用性。
- 直接从 Open WebUI 拉取模型或返回 Ollama 先拉取一个
从下拉菜单中选择一个模型(例如,Gemma,Qwen,Deepseek)。
步骤 5:开始聊天
在底部的文本框中输入消息并按回车键。Open WebUI 将您的消息发送到 Ollama,Ollama 使用选定的模型处理并返回响应。界面会将完整对话存储在您的持久卷中。
截图:Open WebUI 聊天界面与示例对话
连接到远程 Ollama 实例
如果您希望 Open WebUI 连接到运行在不同 QNAP NAS 或机器上的 Ollama(不是同一物理主机),请修改环境变量:
OLLAMA_BASE_URL: http://OTHER-NAS-IP:11434
将OTHER-NAS-IP替换为运行 Ollama 的远程机器的 IP 地址。确保该机器的防火墙允许来自您 QNAP NAS 的端口 11434 流量。两台机器必须在同一网络上或已配置正确的路由。


