Applicable Products
Overview
This FAQ guides you through deleting all existing snapshots, disabling scheduled snapshot tasks, and freeing up reserved snapshot space on your QNAP NAS. The steps may vary depending on your operating system version and storage setup.
Note: A snapshot is a point-in-time copy of your data that enables quick recovery from accidental deletion or data corruption. For more information, see the links in Further Reading.
Procedure
While QNAP NAS does not allow you to fully disable the snapshot feature, you can manually delete all existing snapshots and remove any scheduled snapshot tasks. After completing these steps, no new snapshots will be created and space reserved for snapshots will become available for other uses.
1. Disable scheduled snapshots
- Go to Storage & Snapshots > Storage/Snapshots.
- Select the relevant volume, shared folder, or LUN.
- Click Snapshot, and then select Snapshot Manager.
- Click Schedule Snapshot in the top-right corner to open the Snapshot Settings window.
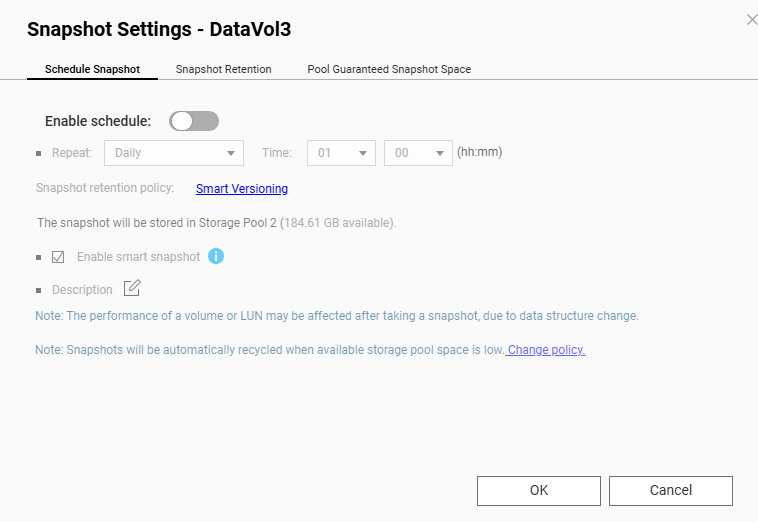
- Toggle off Enable Schedule.
- Repeat these steps for other volumes, shared folders, or LUNs as needed.
2. Delete all snapshots
- Go to Storage & Snapshots > Storage/Snapshots.
- Select the relevant volume, shared folder, or LUN.
- Click Snapshot, and then select Snapshot Manager.
- Click the list view icon to change display mode for easier selection.
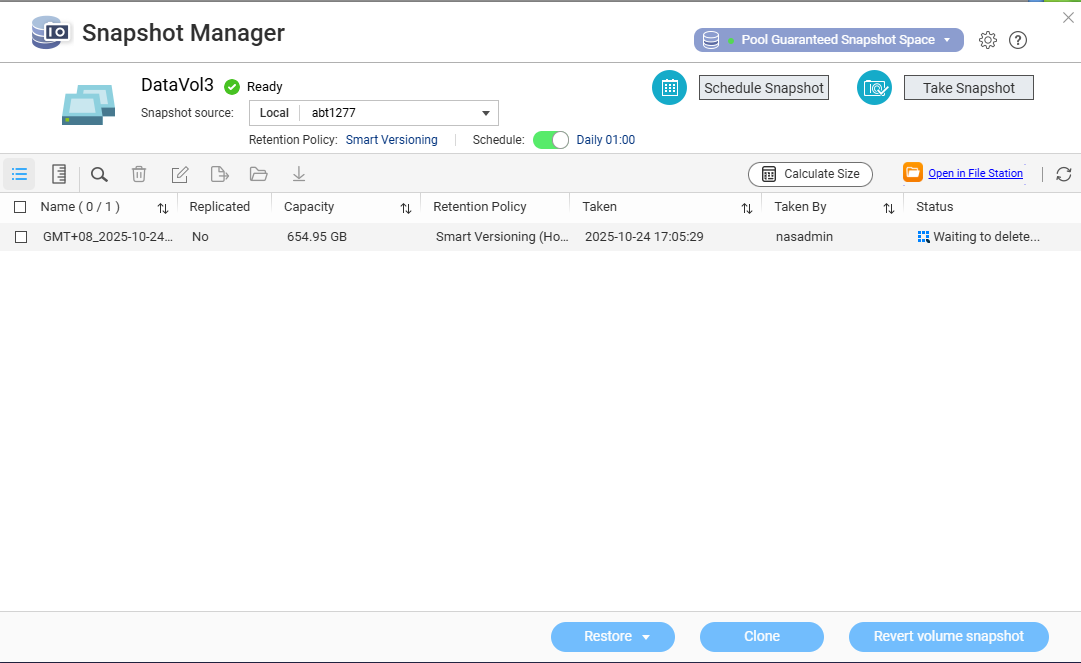
- Select all snapshots you want to delete.
- Click Delete.
- Repeat these steps for other volumes, shared folders, or LUNs as needed.
Reminder: Deleting snapshots is permanent and will remove all recovery points for those items. Back up important data before deletion.
You can also disable Pool Guaranteed Snapshot Space to release reserved space for snapshots:
- Go to Storage & Snapshots > Storage/Snapshots.
- Select the storage pool and click Manage.
- Click Action > Configure Pool Guaranteed Snapshot Space.
- Toggle off Enable Pool Guaranteed Snapshot Space.
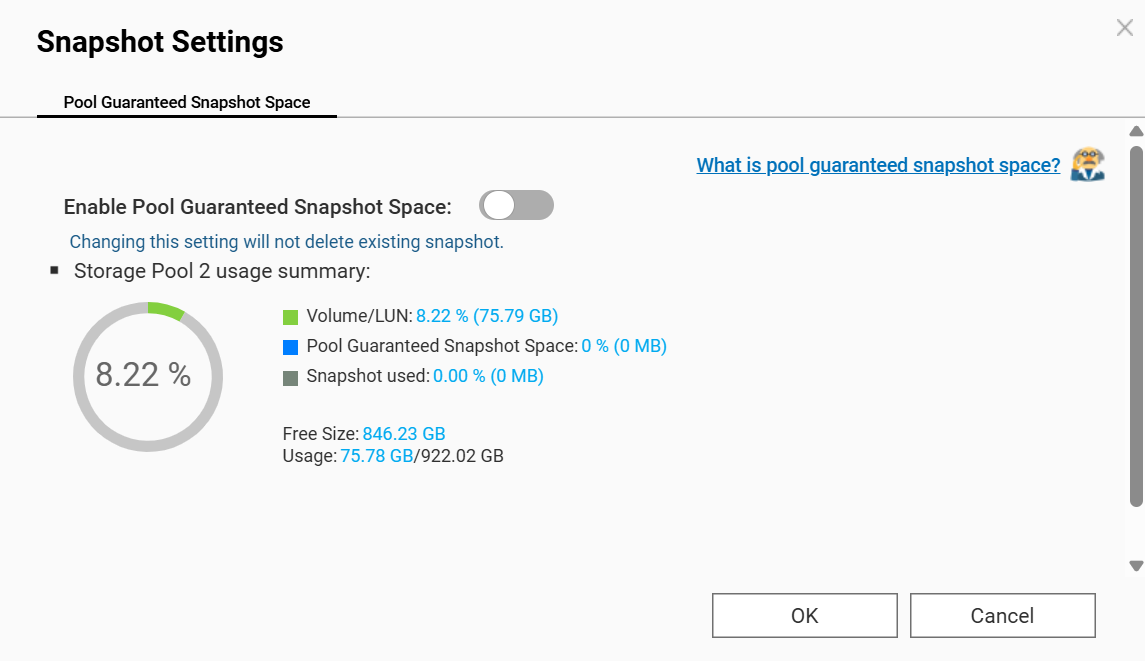
Note: Pool Guaranteed Snapshot Space reserves a portion of your storage pool specifically for snapshots. Disabling this returns the space to your general storage pool.
Further Reading
适用产品
概述
本常见问题解答指导您删除所有现有的快照,禁用计划的快照任务,并释放 QNAP NAS 上保留的快照空间。步骤可能因您的操作系统版本和存储设置而异。
注意:快照是您数据的时间点副本,可快速恢复意外删除或数据损坏。有关更多信息,请参阅进一步阅读中的链接。
步骤
虽然 QNAP NAS 不允许您禁用快照功能,但您可以手动删除所有现有的快照并移除任何计划的快照任务。完成这些步骤后,将不会创建新的快照,为快照保留的空间将可用于其他用途。
1. 禁用计划的快照
- 前往存储与快照总管 > 存储 / 快照。
- 选择相关的卷、共享文件夹或 LUN。
- 点击快照,然后选择快照管理器。
- 点击计划快照在右上角打开快照设置窗口。
- 关闭启用计划。
- 根据需要为其他卷、共享文件夹或 LUN 重复这些步骤。
2. 删除所有快照
- 前往存储与快照总管 > 存储 / 快照。
- 选择相关的卷、共享文件夹或 LUN。
- 点击快照,然后选择快照管理器。
- 点击列表视图图标以更改显示模式,便于选择。
- 选择要删除的所有快照。
- 点击删除。
- 根据需要对其他卷、共享文件夹或 LUN 重复这些步骤。
提醒:删除快照是长期性的,并将删除这些项目的所有恢复点。删除前请备份重要数据。
您还可以禁用池保证快照空间以释放为快照保留的空间:
- 前往存储与快照总管 > 存储 / 快照。
- 选择存储池并点击管理。
- 点击操作 > 配置池保证快照空间。
- 关闭启用池保证快照空间。
注意:池保证快照空间会为快照专门保留一部分存储池。禁用此功能将把空间返回到您的常规存储池。
进一步阅读


