


Storage expansion unit replacement SOP
Applicable products:
- EJ1600 v2 / TL-R1620Sdc
1. Standard 1+3 JBOD topology in Dual-Path mode
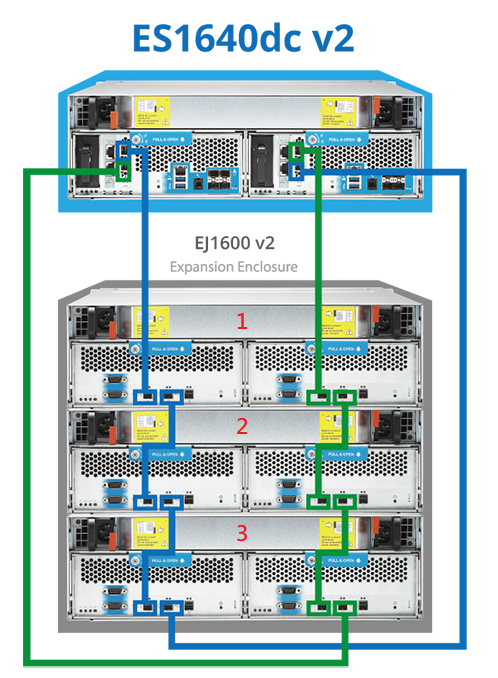
2. Replace JBOD unit in Dual-Path mode
Please check below table to verify if you can replace JBOD without affect others
| JBOD unit to Replace | No.1 JBOD | No.2 JBOD | No.3 JBOD (Last one) |
|---|---|---|---|
| Dual-Path | O | O | O |
| Single-Path | X | X | O |
Example 1, you need offline pools at No.3 JBOD if you want to replace No.2 JBOD in Single-Path mode. Because NAS can not access No.3 JBOD due to lack of loop cable.
Example 2, you need offline pools at No.2 JBOD and No.3 JBOD if you want to replace No.1 JBOD in Single-Path mode due to lack of loop cable from NAS to No.3 JBOD.
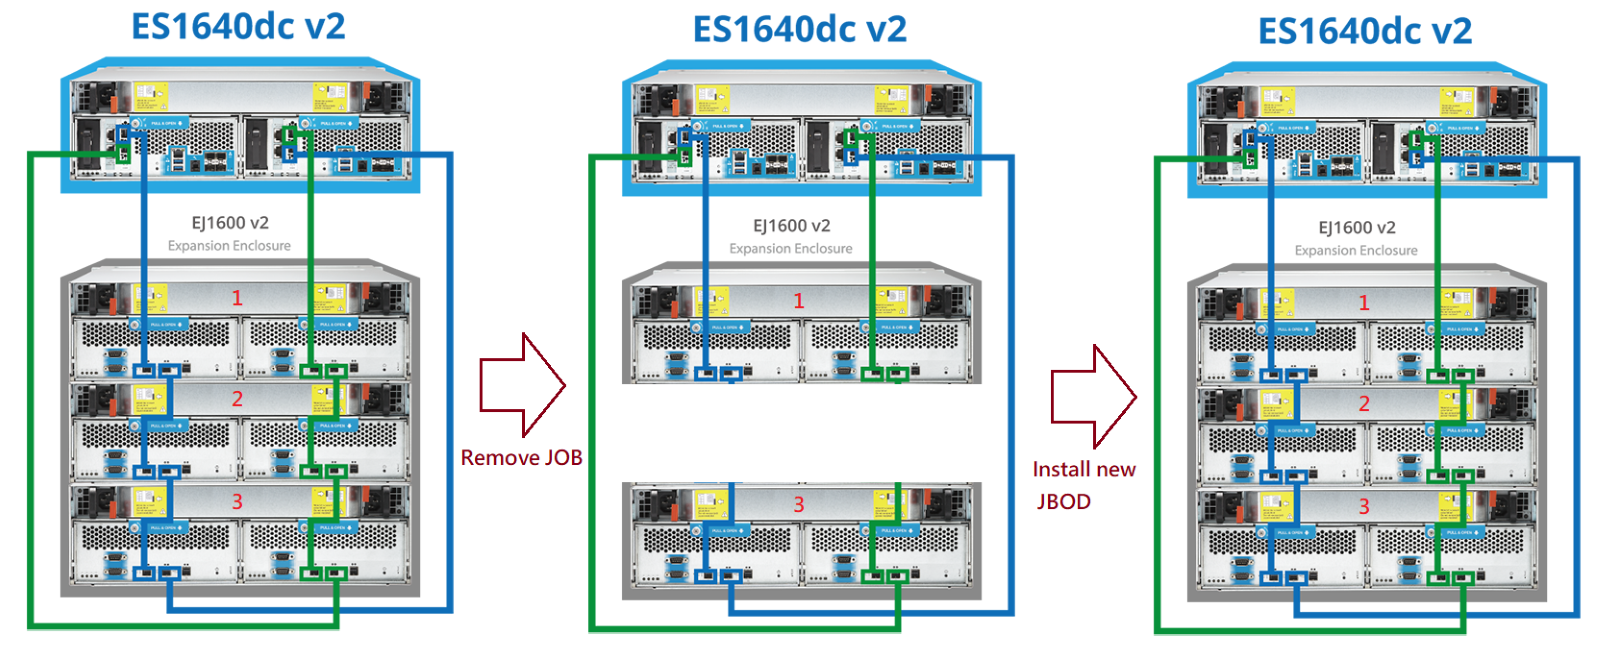
In this case, we will show you how to replace No.2 JBOD without stopping storage service running on other JBODs.
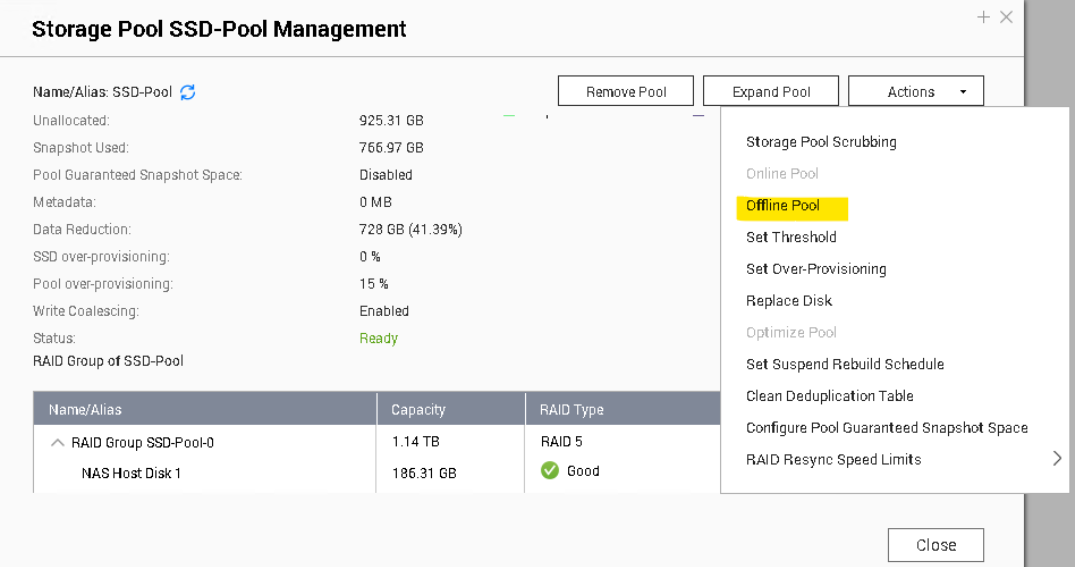
If an existing pool member resided on this JBOD, please take pool OFFLINE first!
Then you can start to remove the JBOD by following steps below.
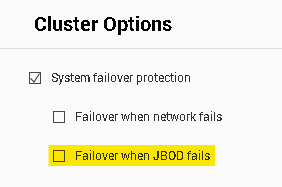
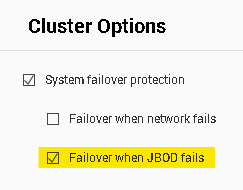
- (For ES NAS model) Disable JBOD failover in the HA page of the NAS.
- Powered-OFF JBOD by holding power button.
- Plug out SAS cables which connect to No.2 and No.3 right in this JBOD.
- Plug out power cables from this JBOD.
- Unmount JBOD from rack.
- Remove drives.
After old JBOD removed, let’s start to replace new JBOD
- Mount new JBOD to rack.
- Install drives.
- Plug in SAS cables.
- Plug in JBOD power cables.
- Turn on JBOD Power.
- (For ES NAS model) Enable JBOD failover in the HA page of the NAS
- Reinitialize the enclosure ID
On WebGUI, go to Storage Manager > Disks > Recover, click Reinitialize enclosure ID.
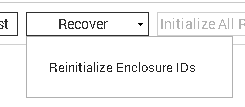
Then the system will discover new JBOD and drives.
3. Add new JBOD No.4 unit to exist topology (Both applied to Dual/Single-Path Mode)
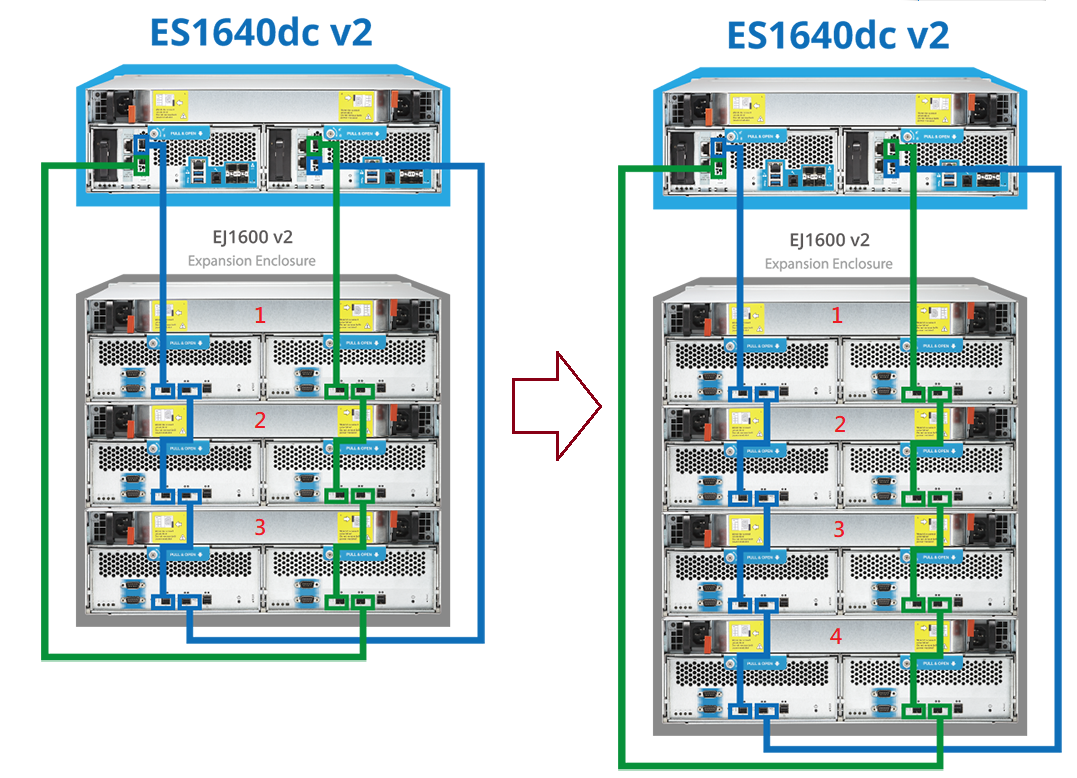
Please follow below steps to add new JBOD
- (For ES NAS model) Disable JBOD failover in the HA page of the NAS
-
Mount new JBOD to rack
-
Install drives
-
(Optional) Reattach the loop cables to the new JBOD,
Skip this step if there are no loop cables.
-
Plug in extra 2 new buying SAS cables, which strip directly from No.3 to No.4 for each JBOD controller.
-
Plug in JBOD power cables
-
Turn on JBOD Power
-
(For ES NAS model) Enable JBOD failover in the HA page of the NAS
- Reinitialize the enclosure ID
On WebGUI, go to Storage Manager > Disks > Recover, click Reinitialize enclosure ID
Then the system will discover new JBOD and drives
需要进一步协助,欢迎前往官方社区发帖,与其他用户及 QNAP 专家交流。 前往 QNAP 官方社区


