How to Restore Your Windows PC with HDP Recovery Media Creator
如何使用 HDP 恢复媒体创建器恢复您的 Windows 电脑
最后修订日期:
2026-04-01
Applicable Products
HDP for PC/VM = 2.3.3 and later
HDP PC Agent = 1.4.0 and later
HDP Recovery Media Creator = 1.0.0 and later
This tutorial explains how to create recovery media and perform a
full system restore of your Windows PC using HDP Recovery Media
Creator.
Prerequisites
Before starting, ensure you have:
At least one successful backup of your Windows PC stored on your
QNAP NAS
A Windows 7 or later PC (for creating recovery media)
A USB drive larger than 1 GB, or more than 1 GB of storage space for an ISO file
Overview
HDP Recovery Media Creator creates bootable recovery media (USB or
ISO) that contains the HDP Recovery Wizard and the necessary tools for
system restoration. Once created, the recovery media can be reused to
restore your PC to any available backup version.
Part 1: Create Recovery Media
Step 1: Select Recovery Media
Type
Download and install HDP Recovery Media
Creator
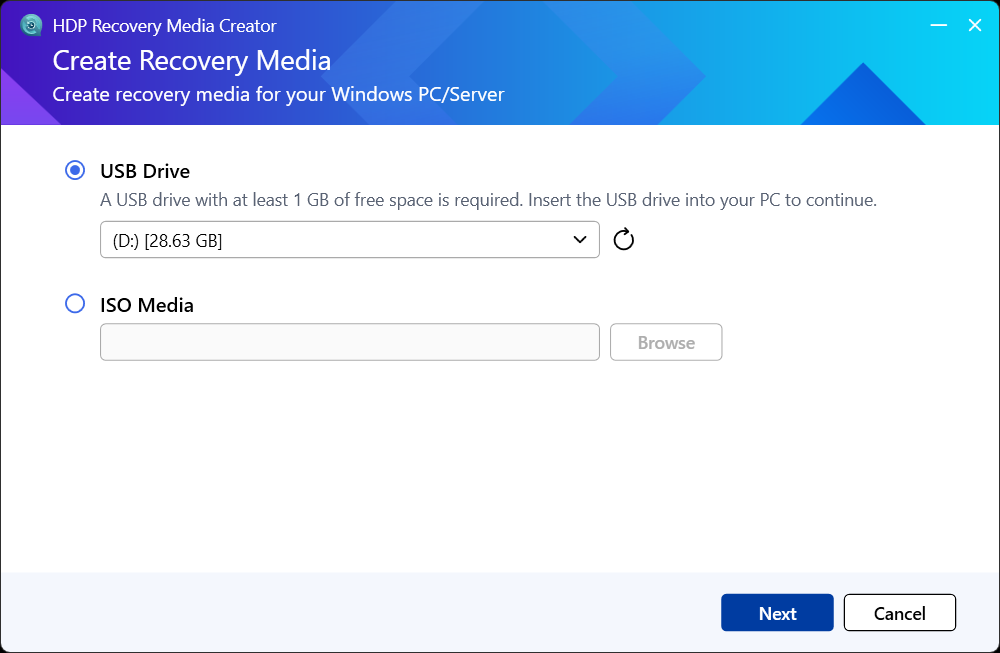
Launch the application and select your media type:
USB Drive: Create a bootable USB recovery
drive
ISO Media: Create an ISO image file (for CD/DVD or
virtual machines)
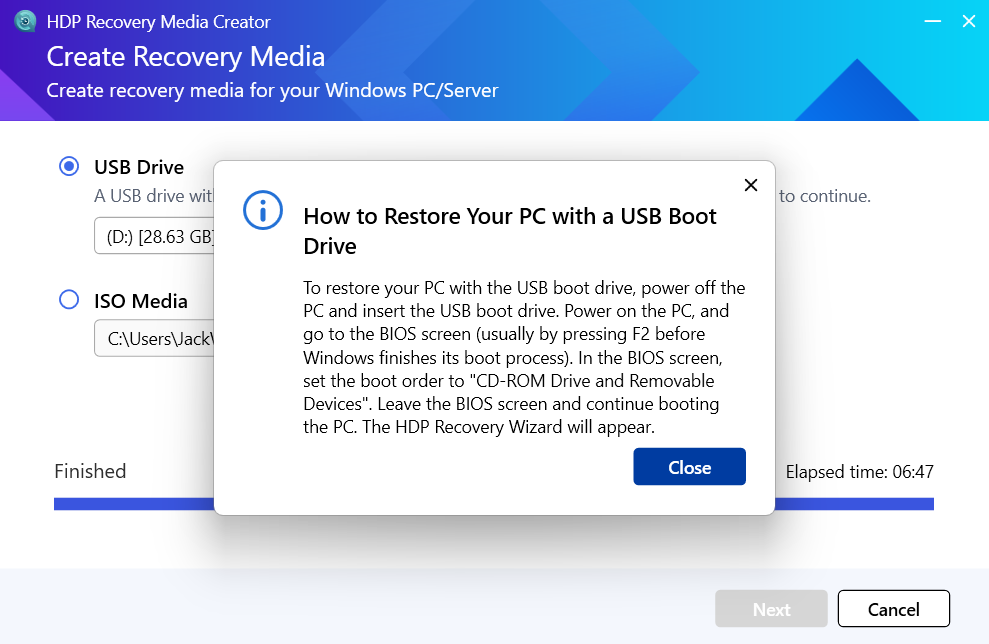
Step 2: Create Recovery Media
Option A: USB Recovery Media
Select USB Drive and insert a USB drive larger than 1 GB
Select your USB drive and click Next
First-Time Setup:
Install Required Components
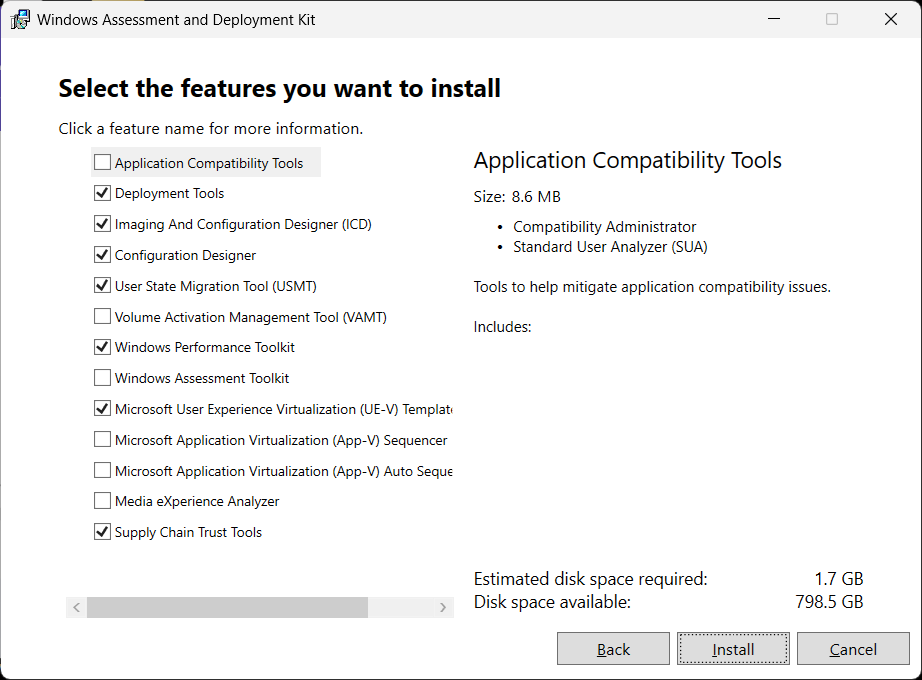
When creating recovery media for the first time, the system will automatically guide you to install:
Windows ADK (Deployment
Tools): Check Deployment Tools and install
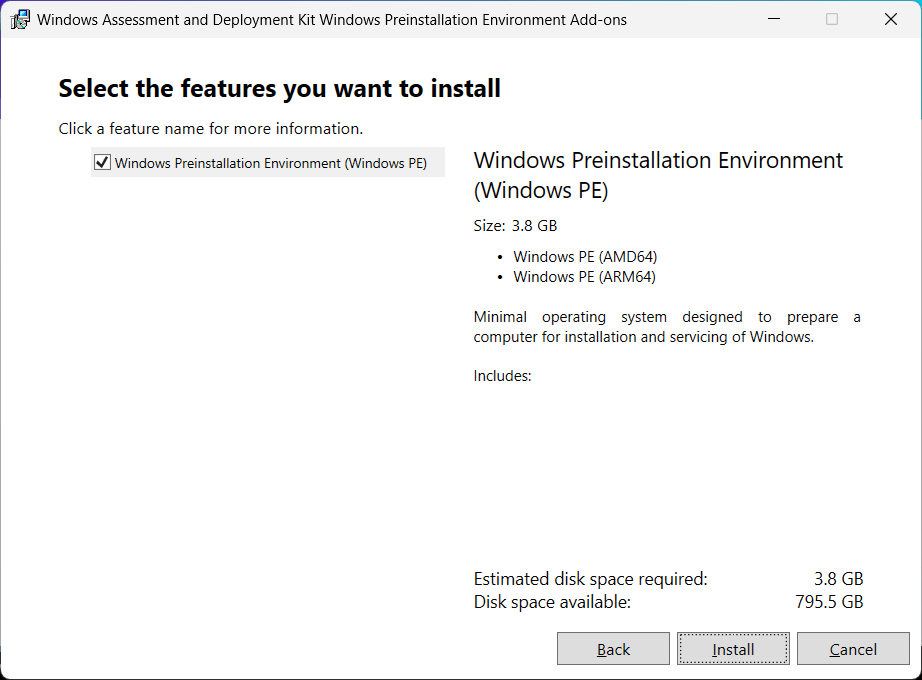
Windows PE
Add-on: Check Windows PE and install (requires approximately
3.8 GB of disk space)
Complete Creation
Confirm the format warning (USB data will be erased) and click Continue
Wait for the creation to complete (approximately 5-10 minutes)
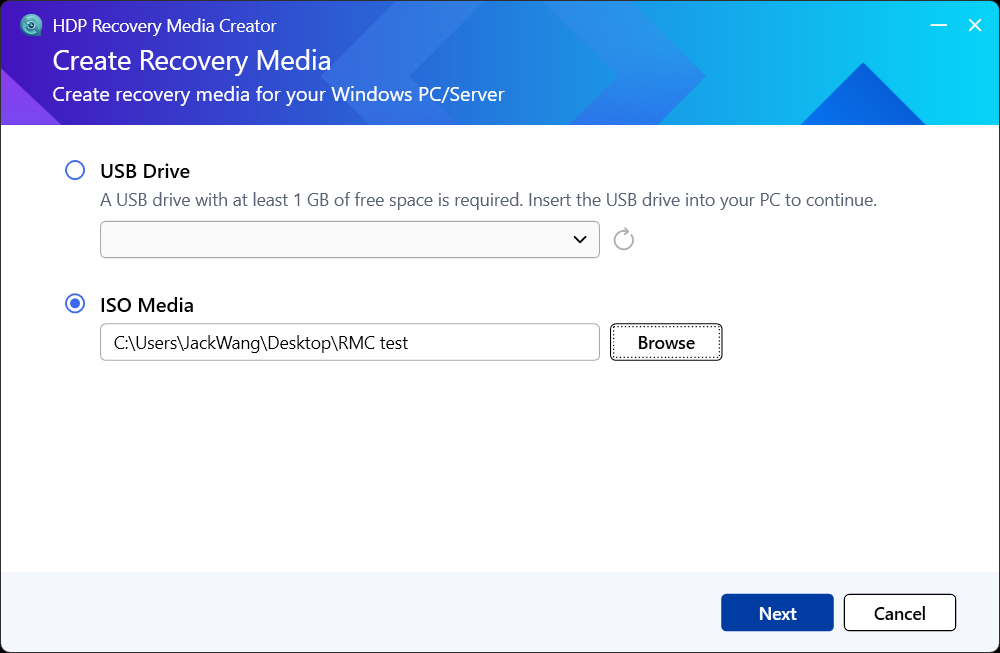
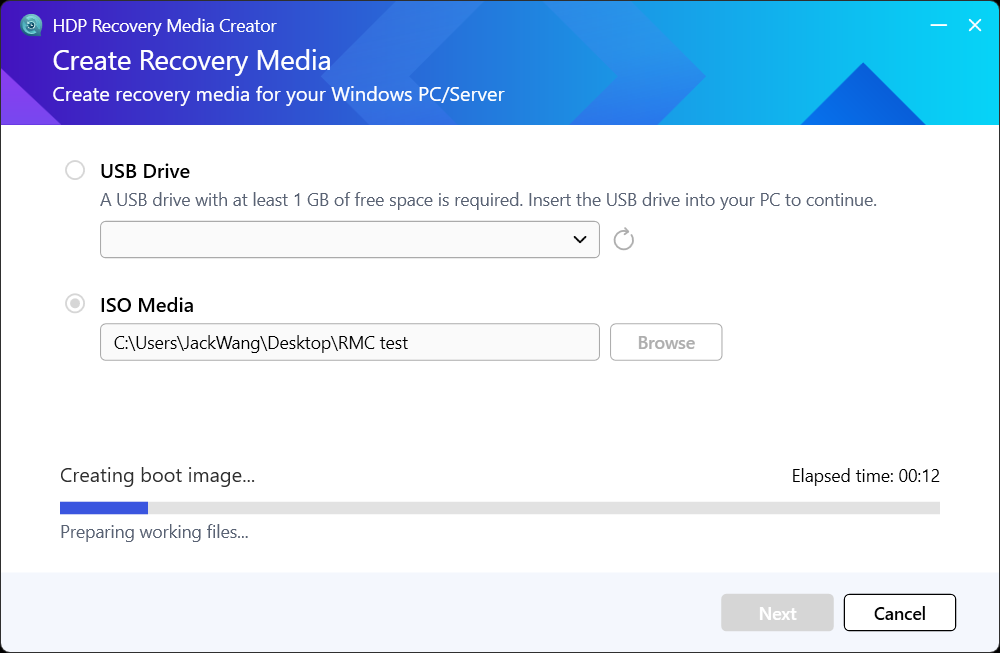
Option B: ISO Recovery Media
Select ISO Media
Choose the save location and filename for the ISO file
Click Next and wait for the creation to complete
Part 2: Restore Your Windows
PC
Step 3:
Configure BIOS to Boot from Recovery Media
Insert the USB recovery media into the target PC (or mount the
ISO)
Restart the PC and press the BIOS key (common keys: F2, F12, Del, or
Esc)
In the BIOS, move USB or CD-ROM to the top of the boot order
Save changes (usually by pressing F10) and restart
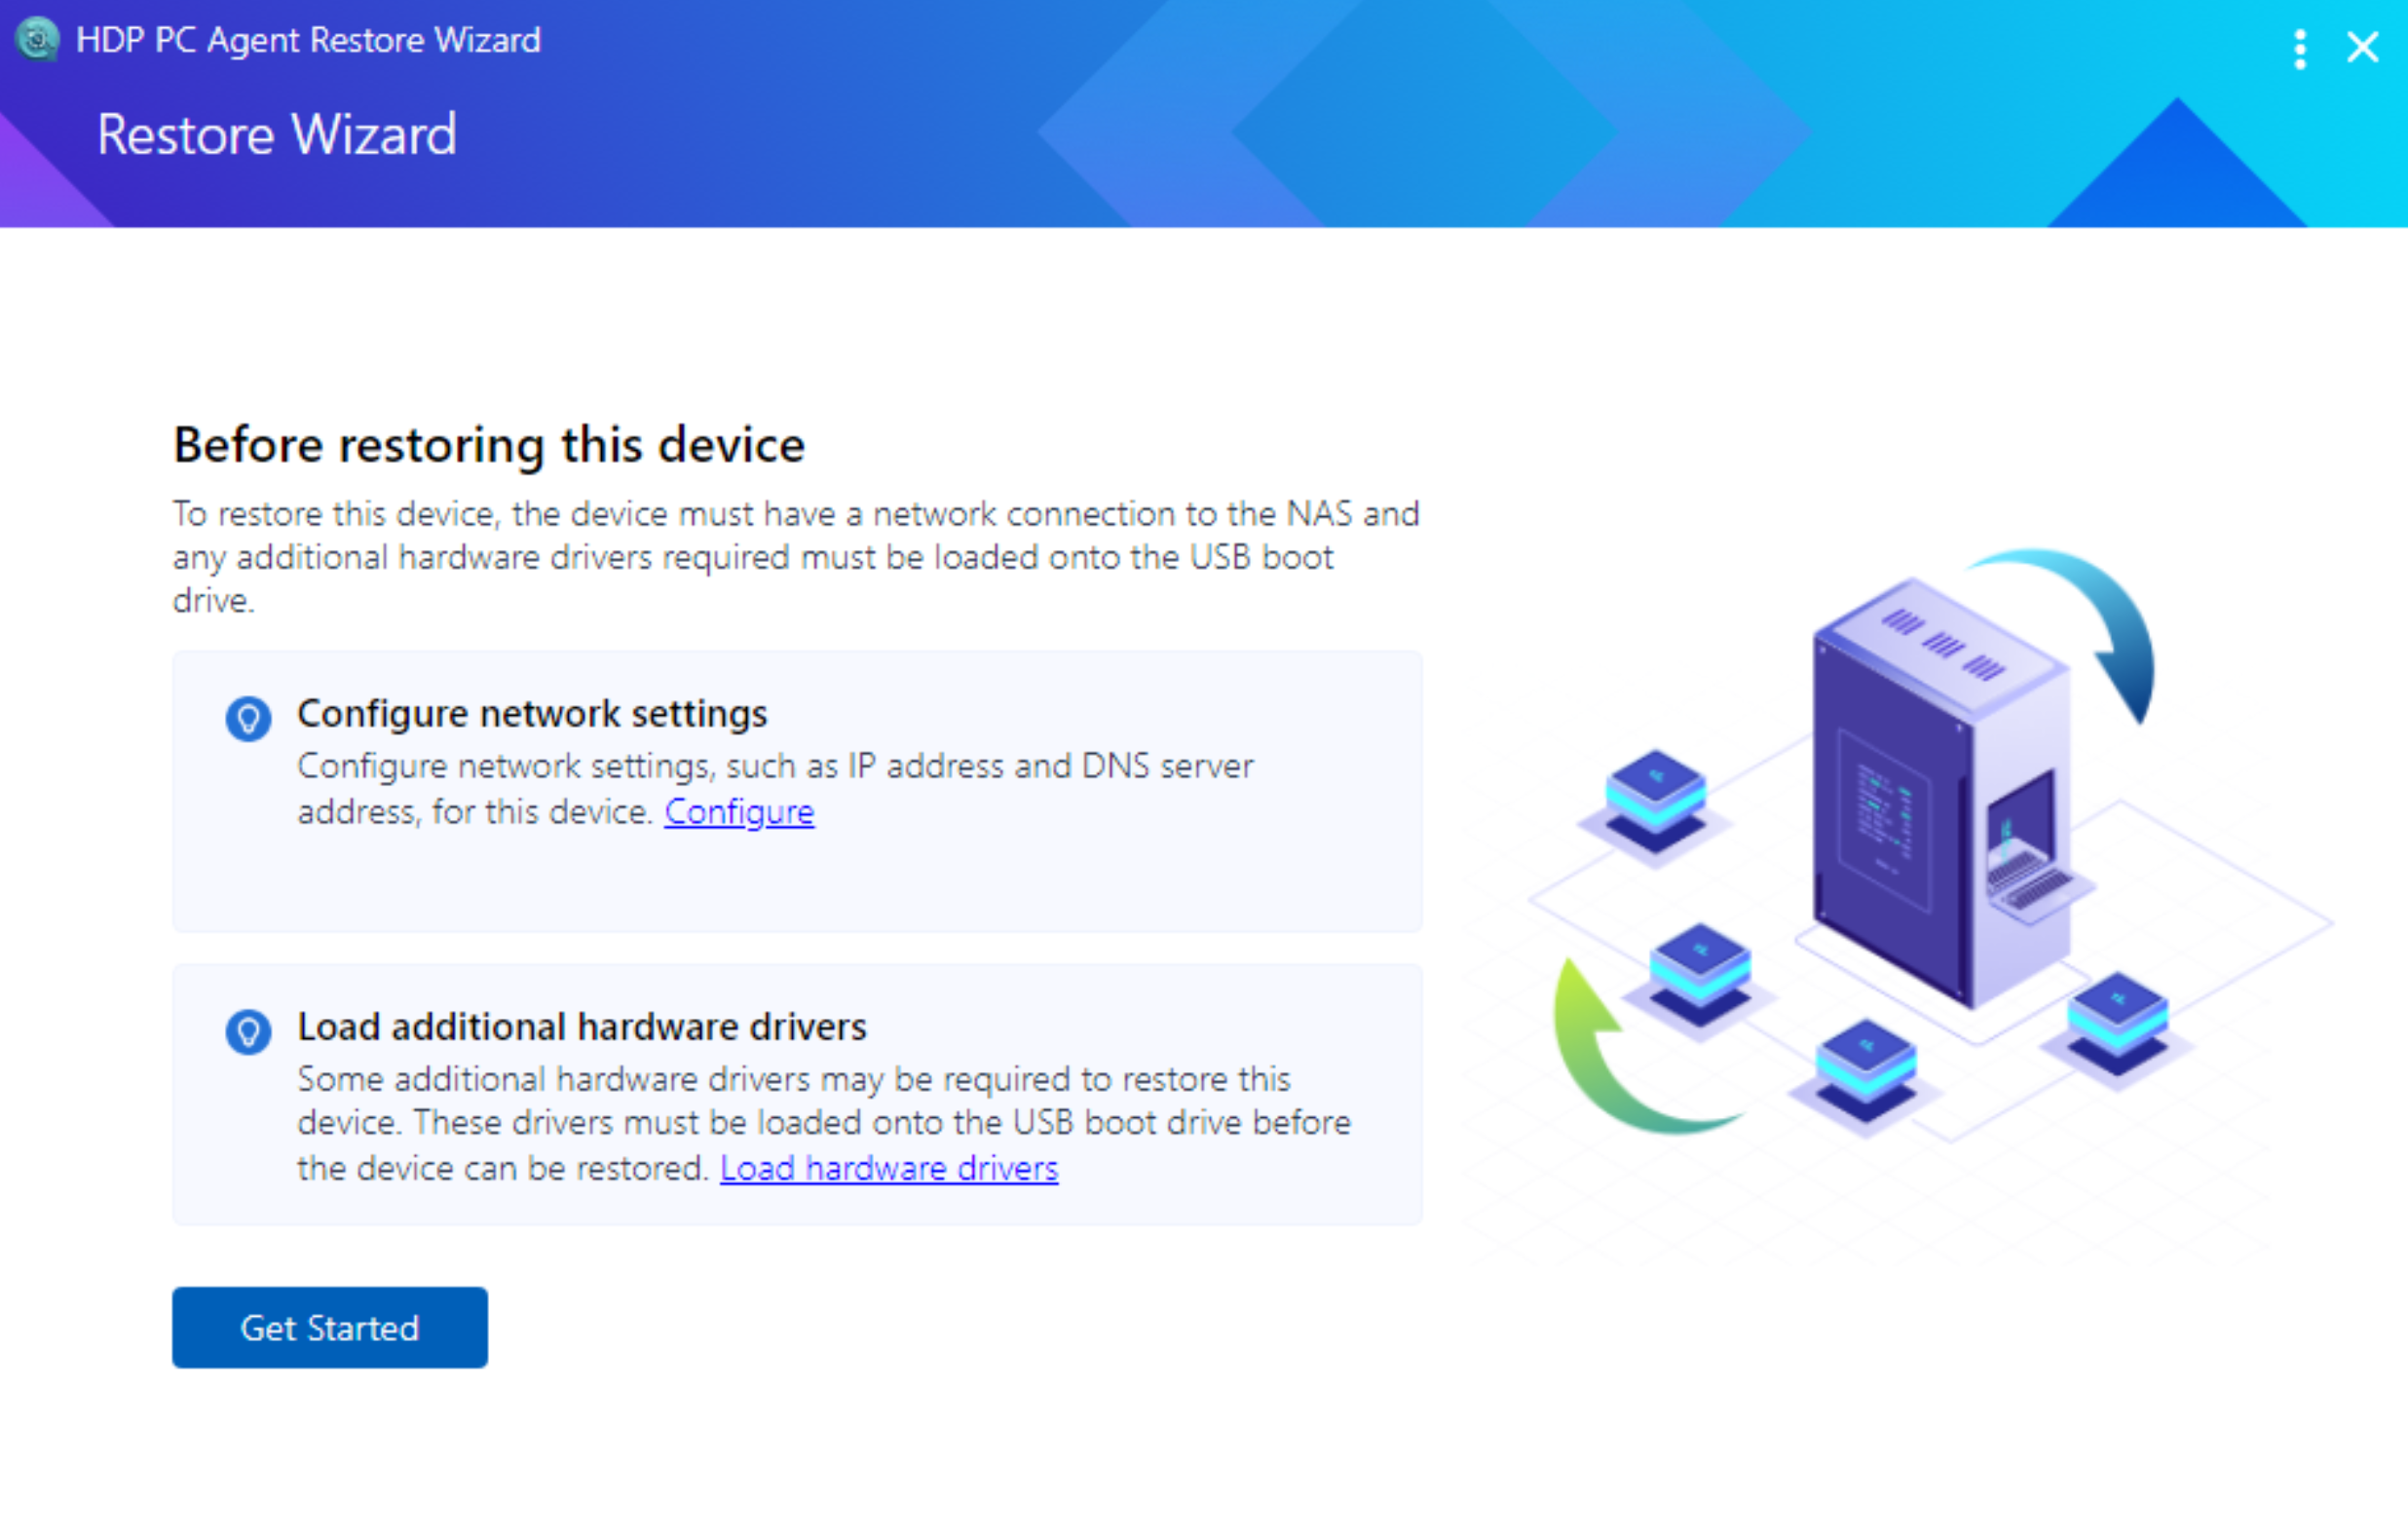
Step 4: Launch the HDP PC Agent Restore Wizard
After the system boots from the recovery media, the HDP PC Agent Restore Wizard will launch automatically
To manually configure the network or load drivers, click the
corresponding option on the welcome screen (optional)
Click Get Started to begin the restore process
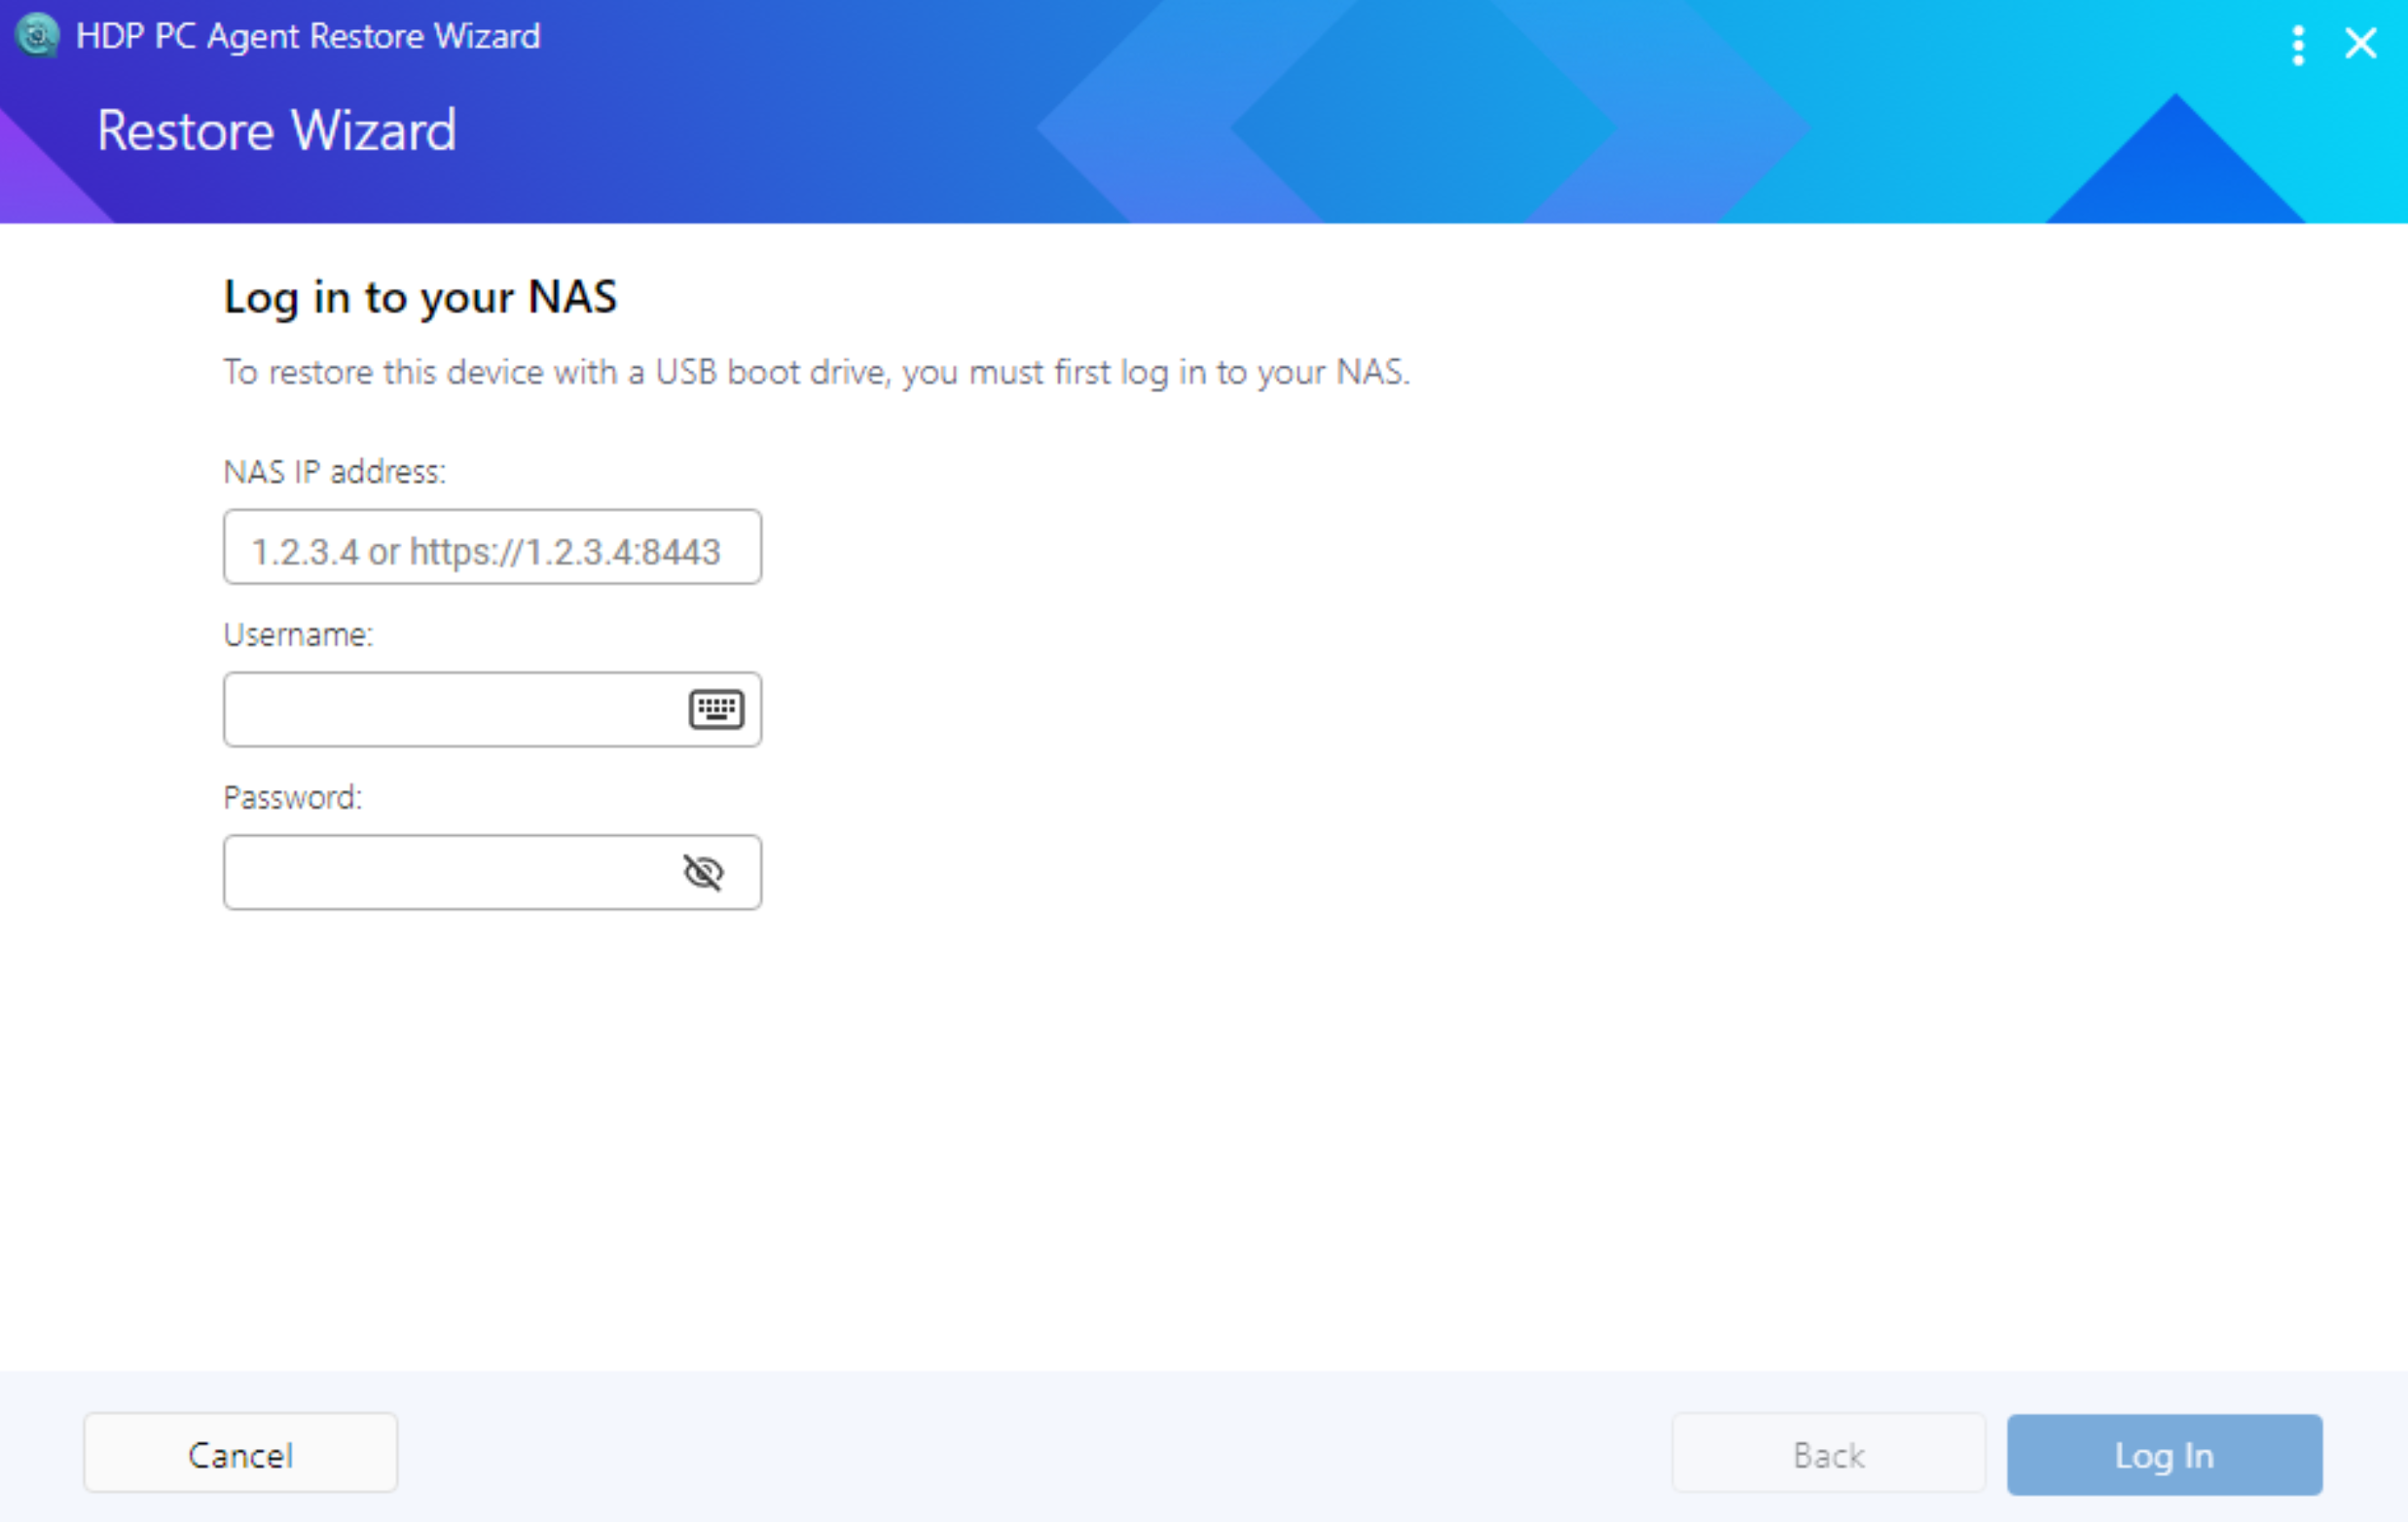
Step 5: Connect to
QNAP NAS and Select Backup
Enter the NAS IP address, username, and password, then click Log In
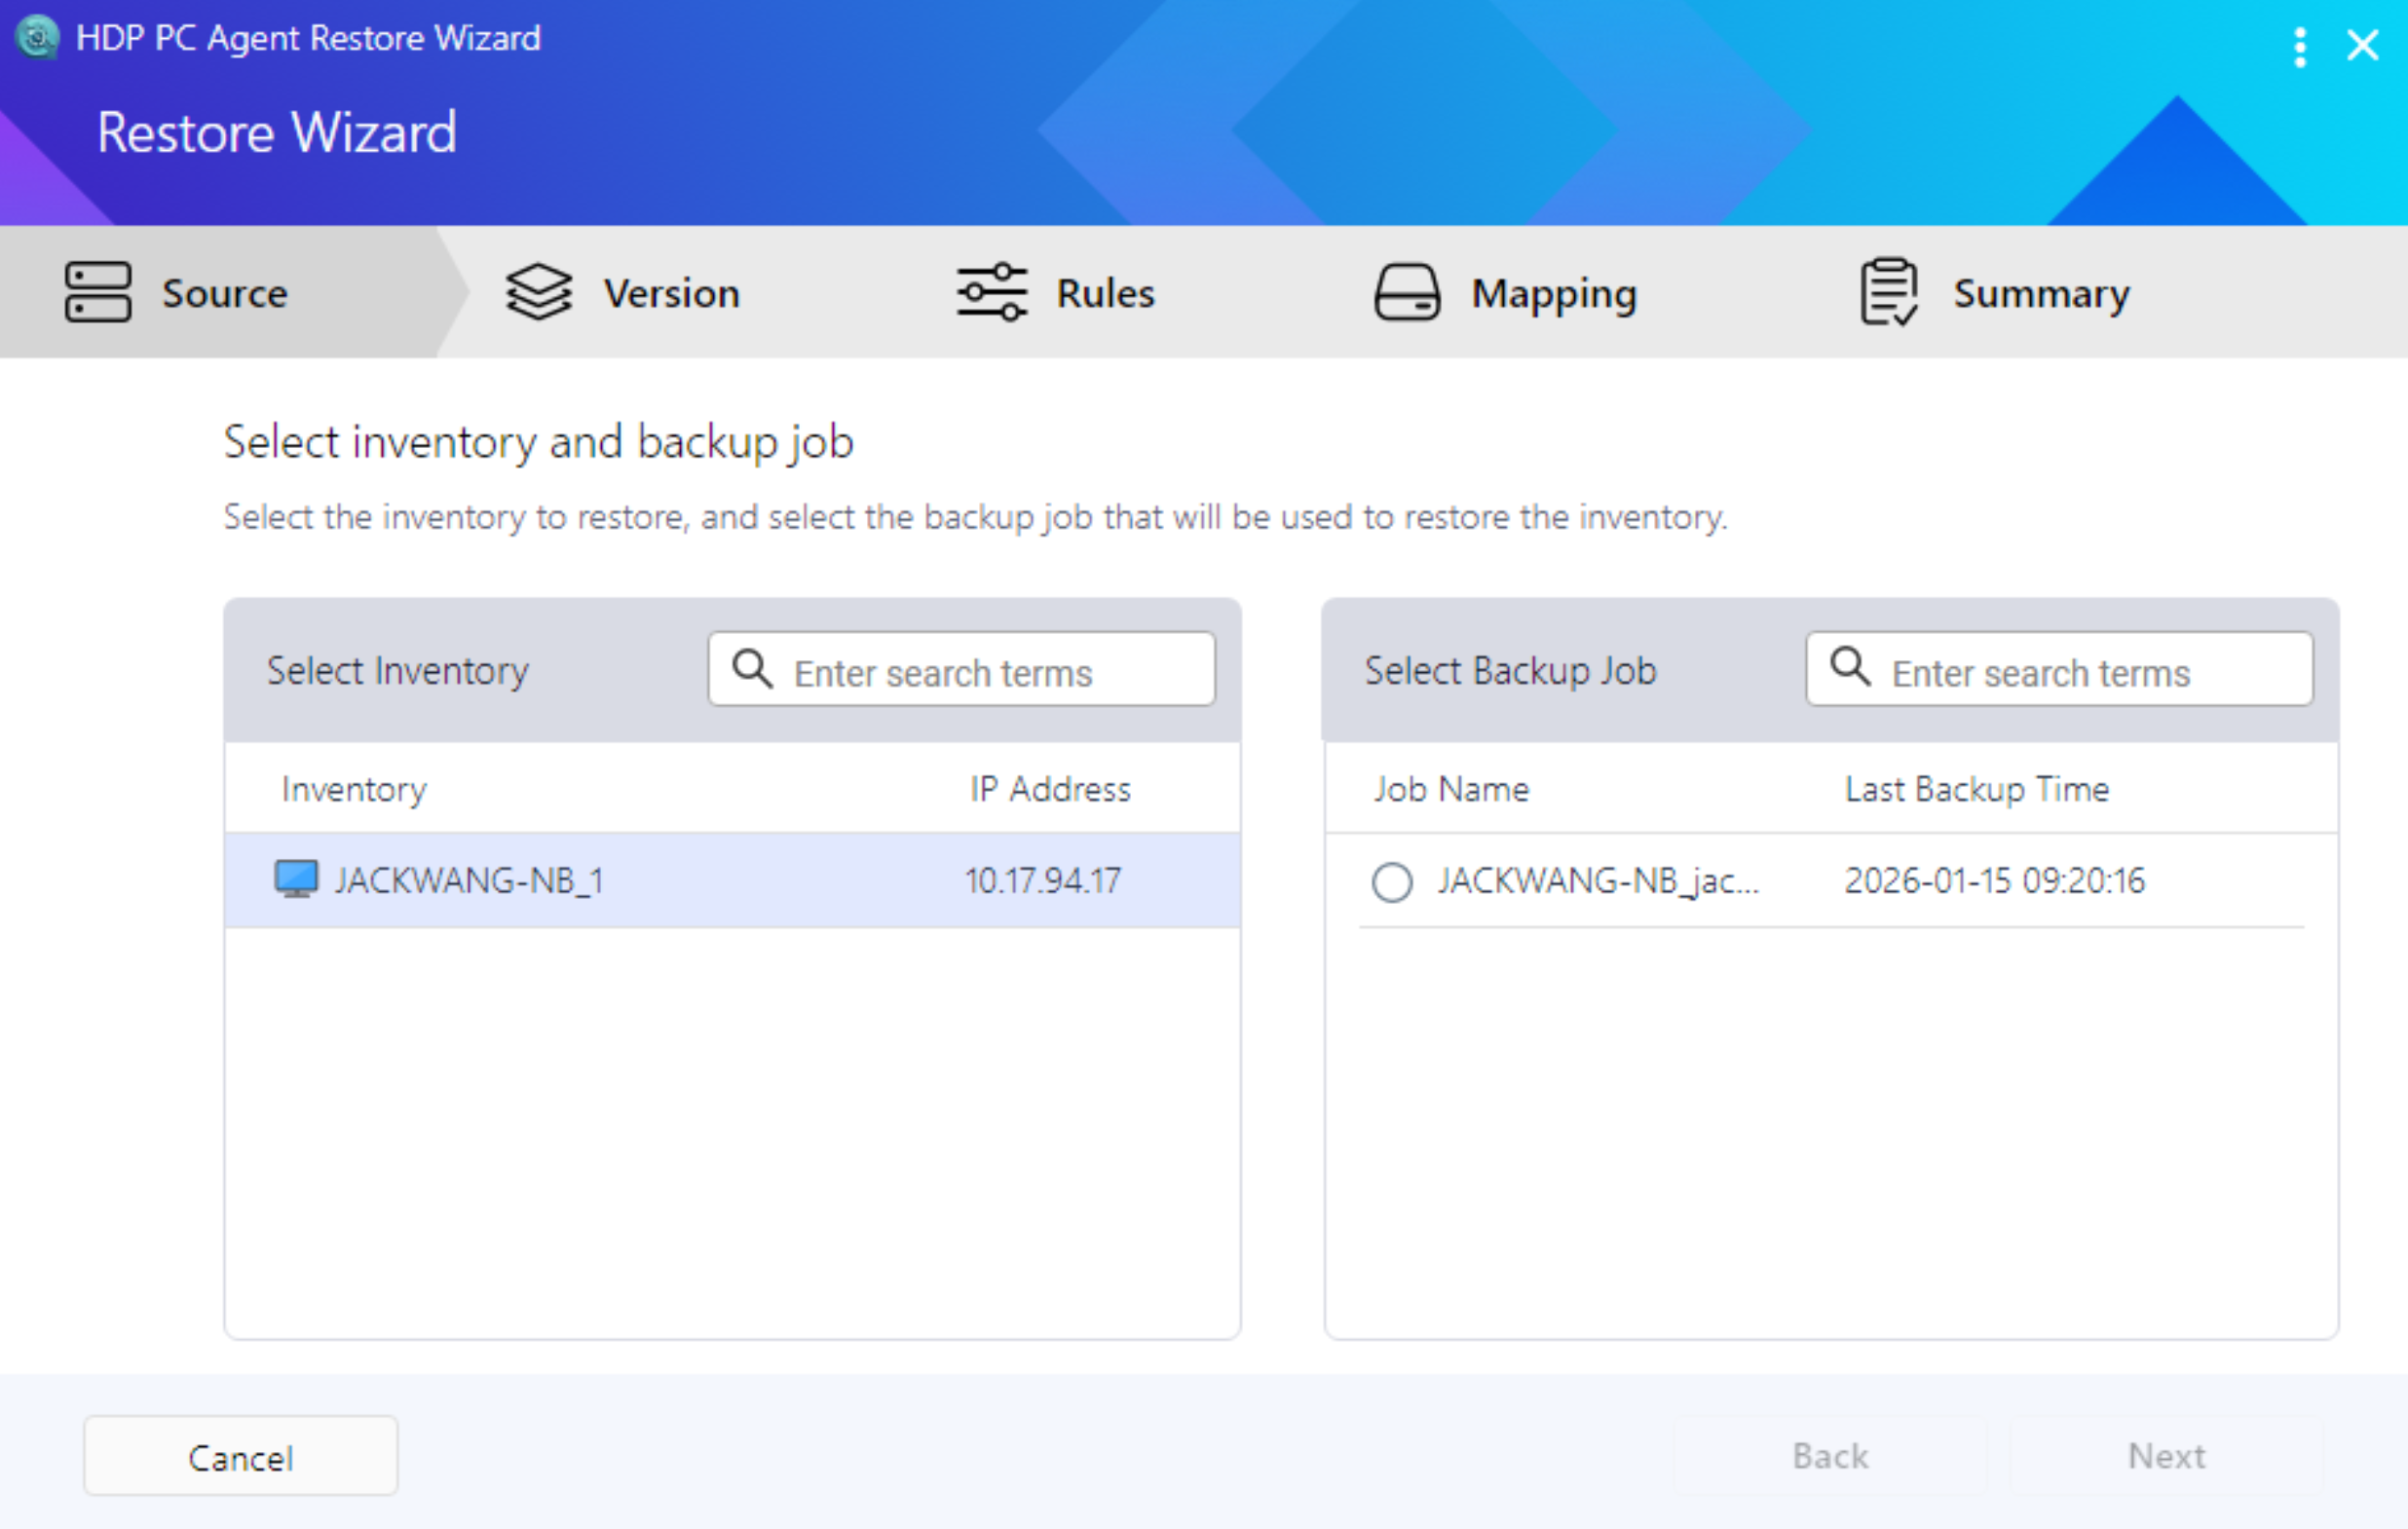
Select the Inventory (device list) and Backup Job you want to restore
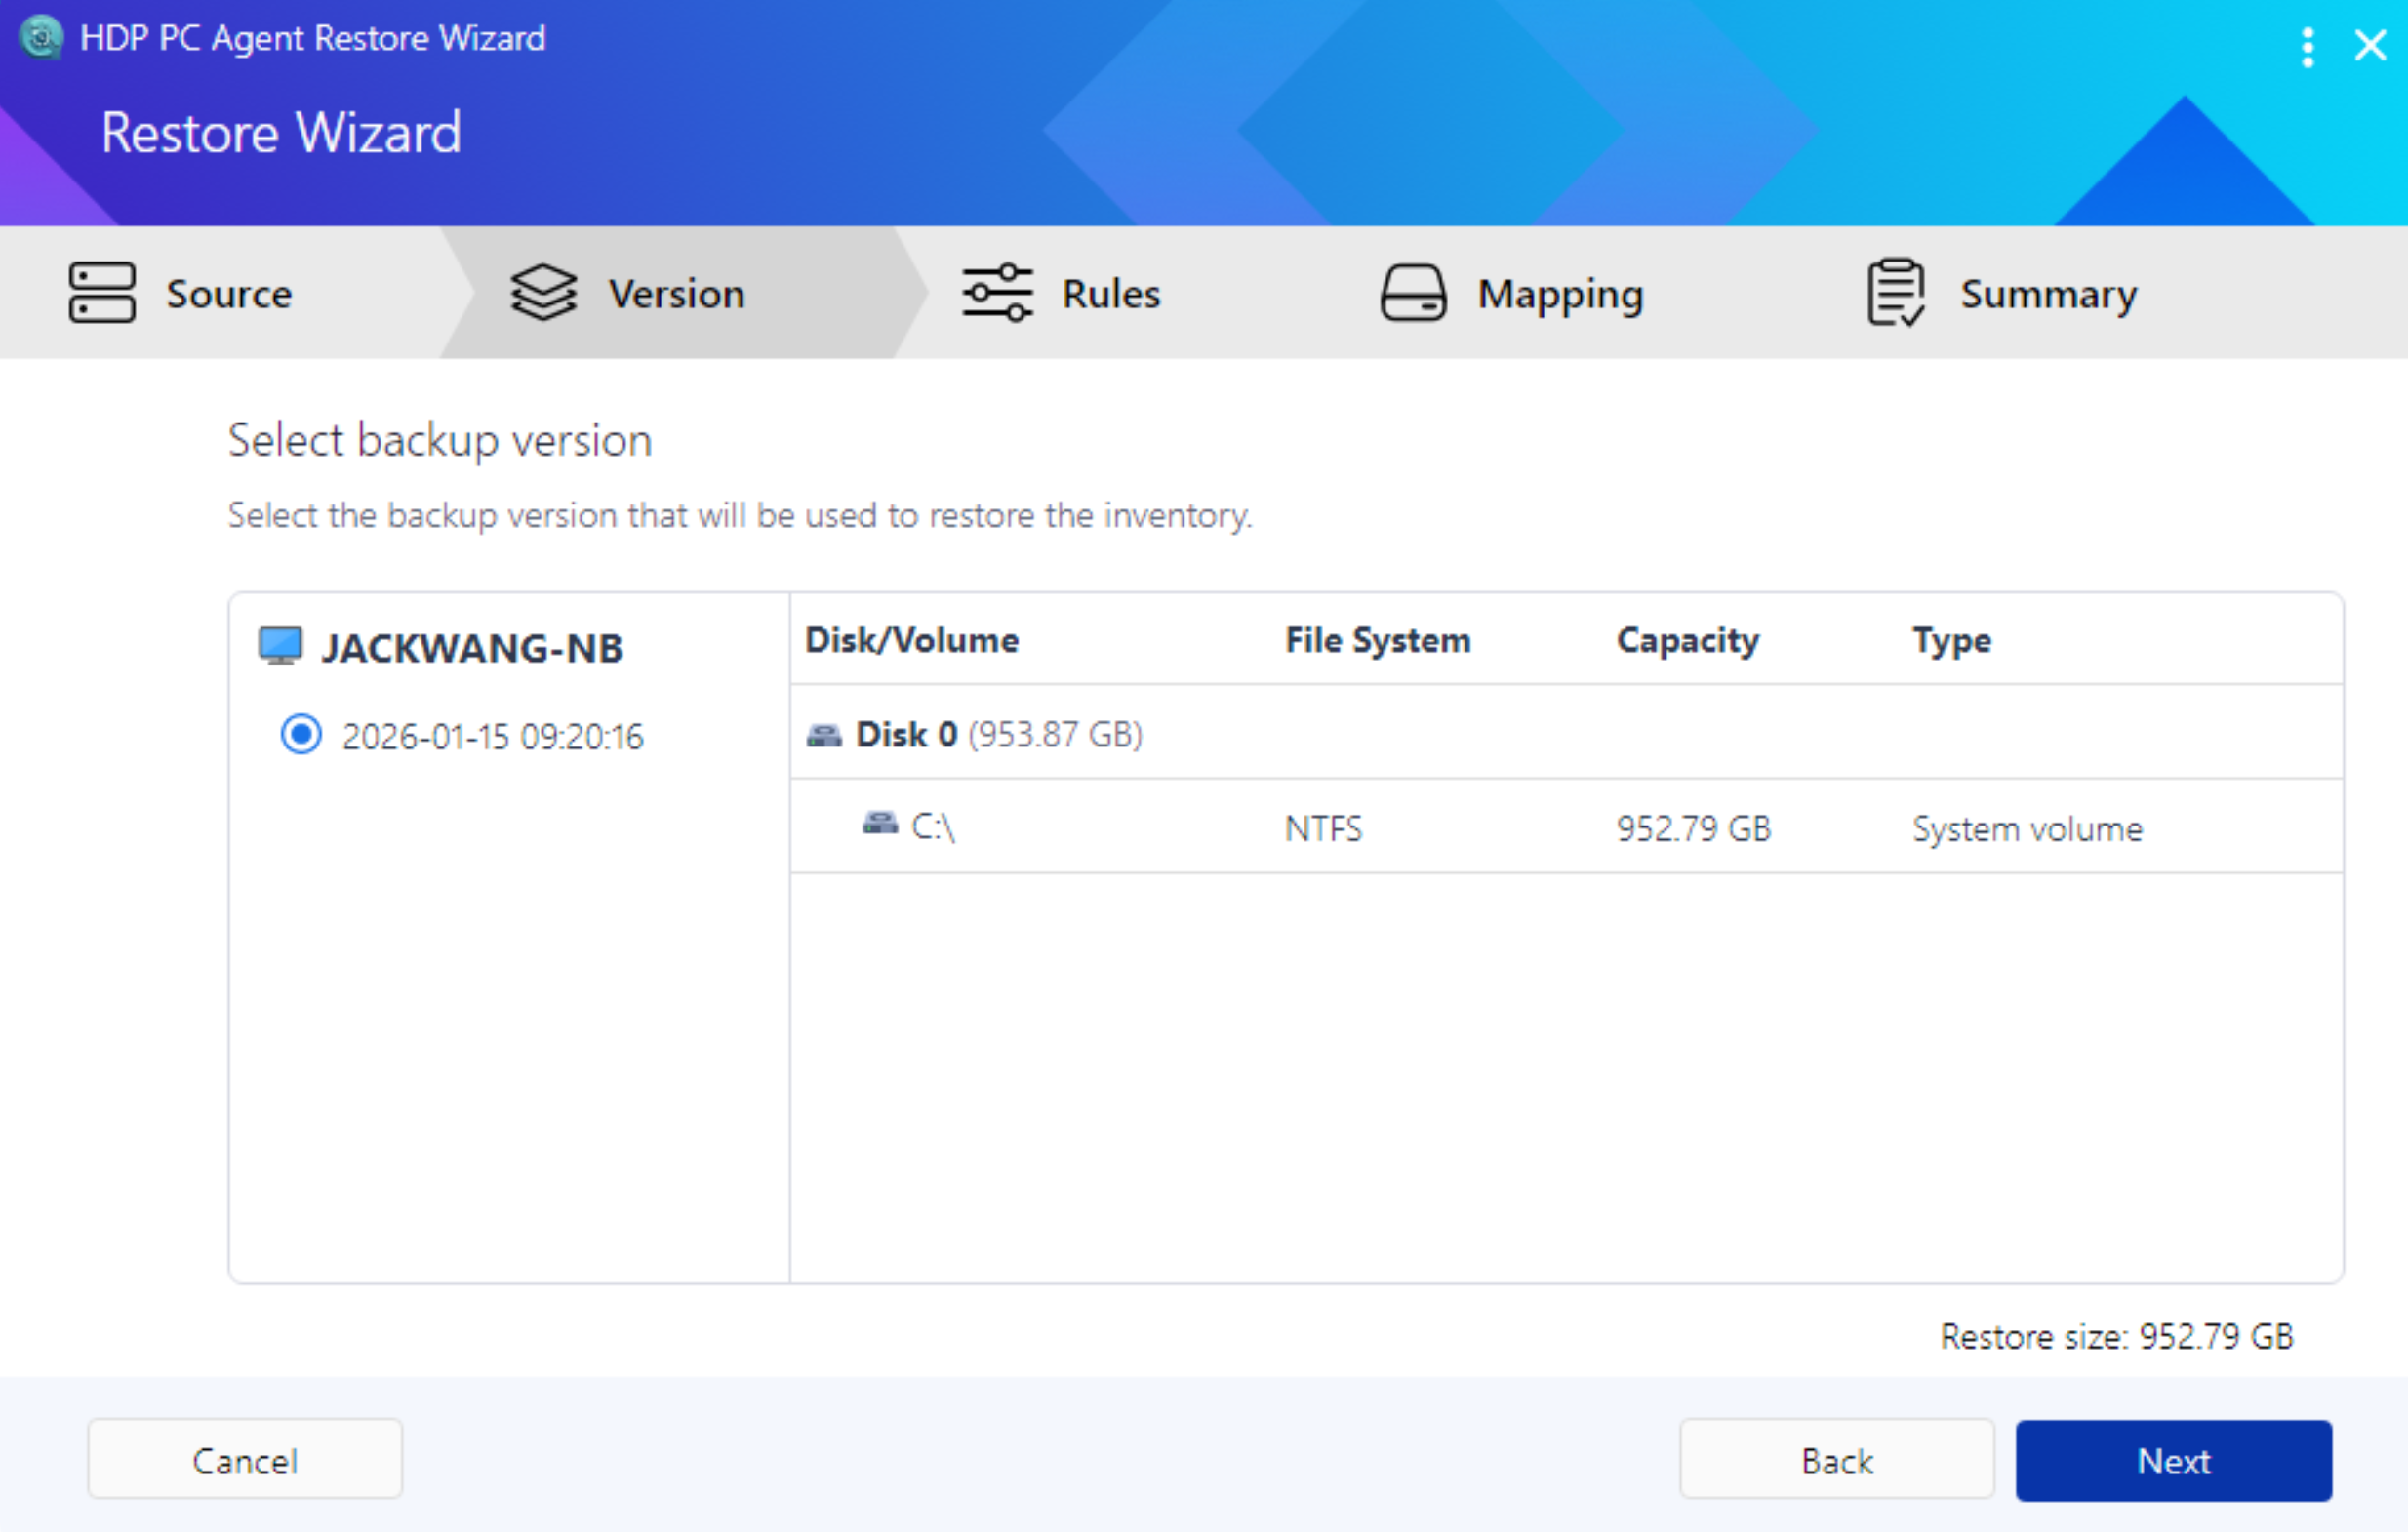
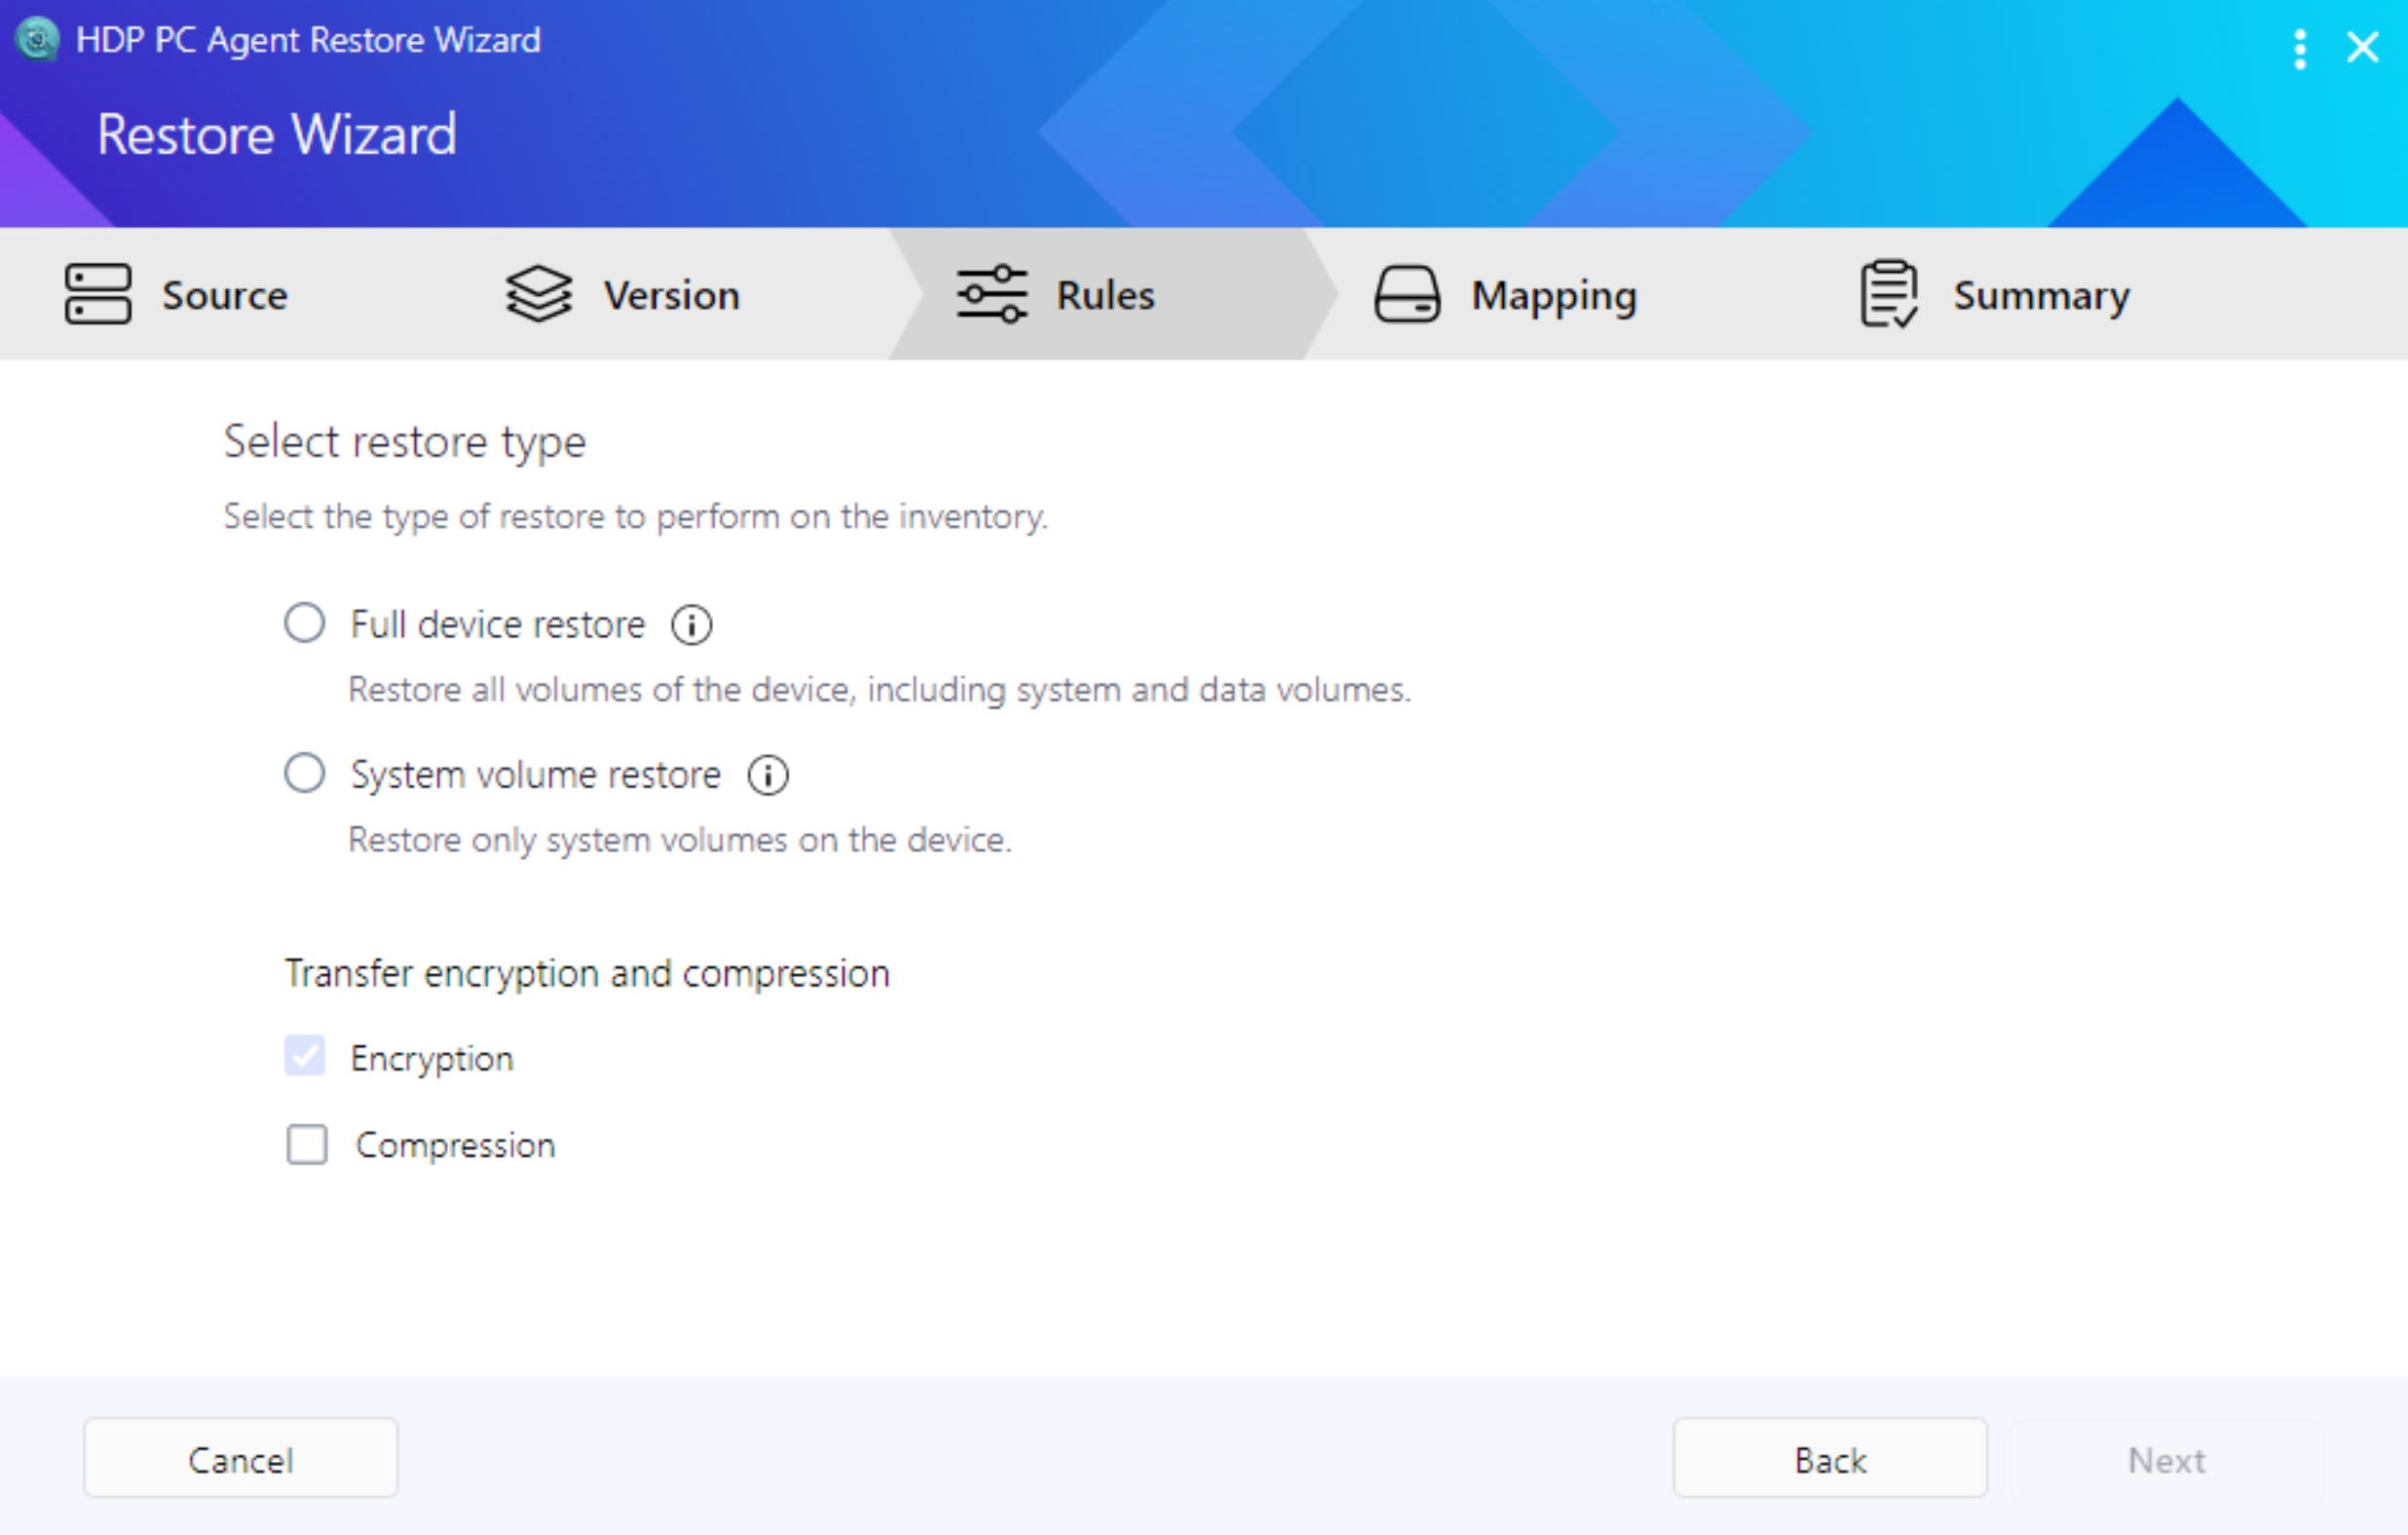
Step 6: Select
Backup Version and Restore Type
Select the backup version you want to restore from the left panel; disk information and restore size will be displayed on the right
Choose the restore type:
Full device restore: Restore all disk volumes
(system + data)
System volume restore: Restore only the system
volume
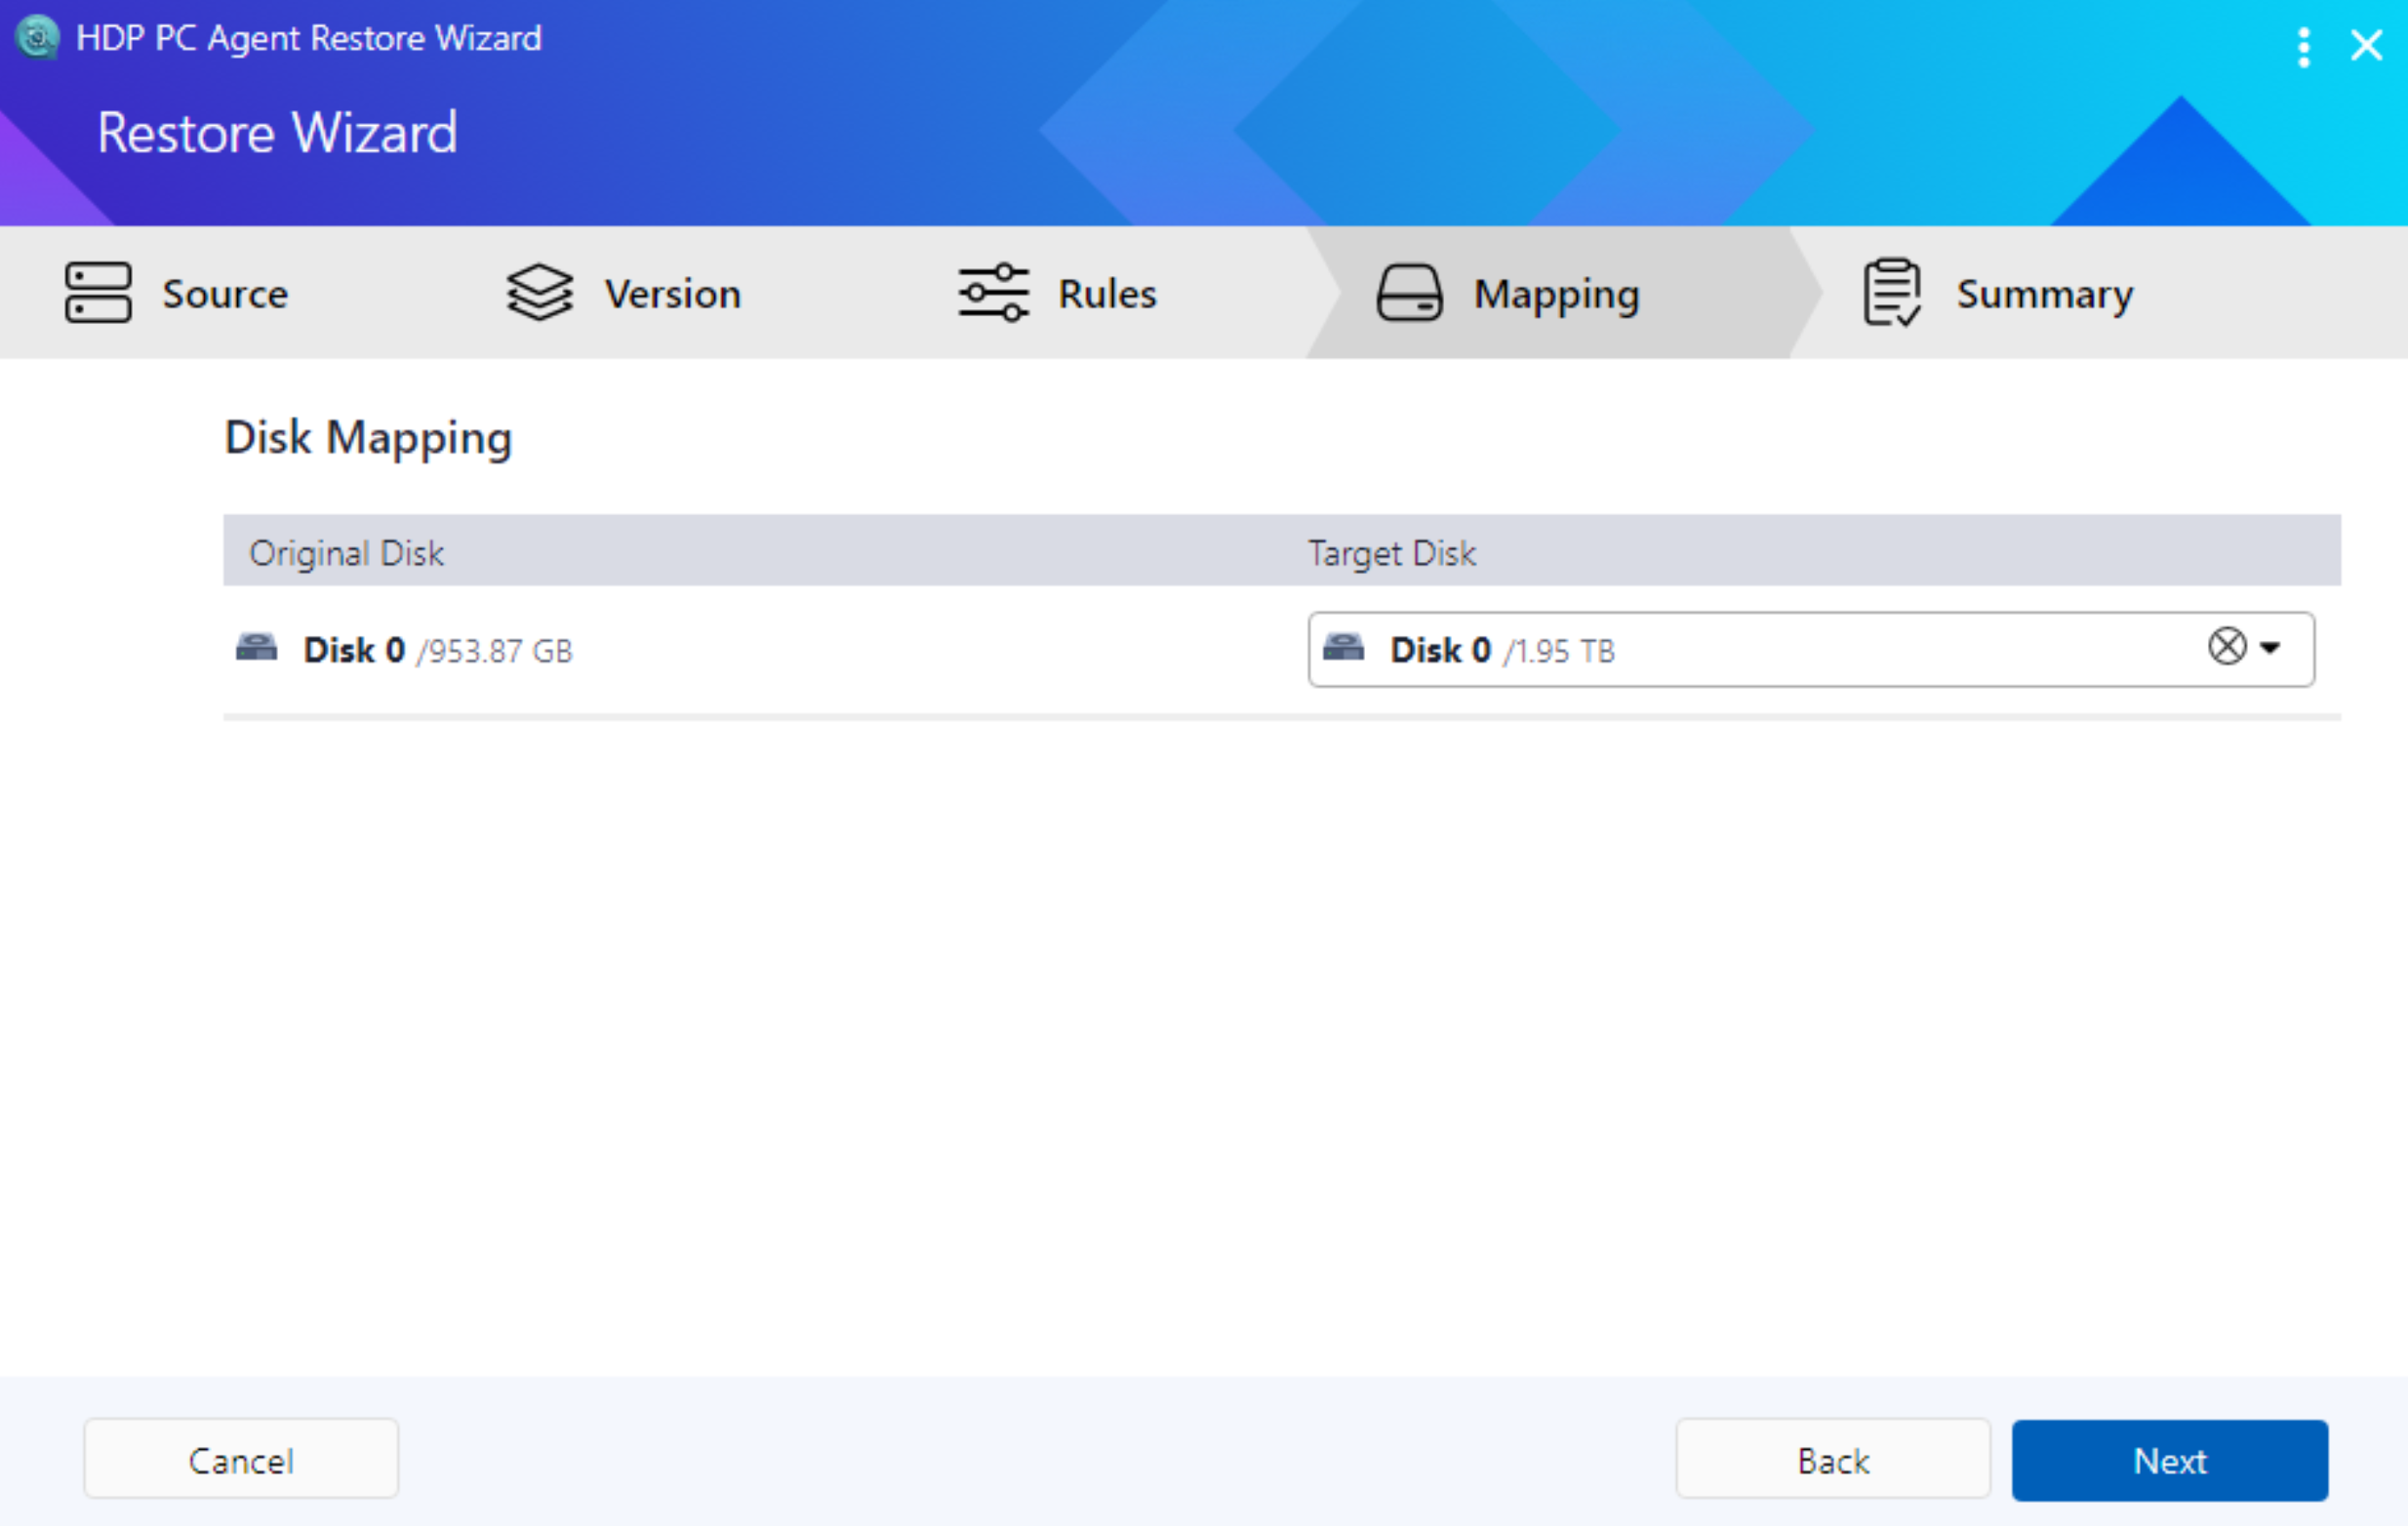
Step 7:
Configure Disk Mapping and Start Restore
Check the mapping relationship from source disks to target disks;
you can change it by clicking the dropdown menu if needed
Review the restore summary (Inventory, backup date, restore type,
disk mapping)
After confirming everything is correct, click Restore to start the restore
Step 8: Complete the Restore
Wait for the restore to complete (the wizard displays progress
percentage and estimated time)
After the restore is complete, remove the recovery media
Choose to restart or shut down
After the system restarts, it should display the desktop, settings,
and data from the restore point