Important
In response to recent Claude Desktop updates, we are greatly streamlining the current workflow of MCP installation to enhance your experience. You will soon be able to complete the MCP setup with just a few clicks. We plan to add this enhancement in the next release of MCP Assistant. Please stay tuned.
Applicable Products
- QNAP NAS devices running QTS 5.2, QuTS hero h5.2, or later versions
- MCP Assistant
Introduction
This tutorial guides you through the process of setting up QNAP's MCP Assistant to work with Claude Desktop, which enables seamless integration between your QNAP NAS and Claude's AI capabilities. You can then use natural language commands to operate your NAS.
Prerequisites
Before your start, ensure that you have the following setup:
- QNAP NAS device with QTS 5.2, QuTS hero h5.2, or later versions
- Computer with internet connection (Windows or macOS; Claude Desktop is not available for Linux)
- Administrator access to your QNAP NAS
- Default MCP Assistant ports: 8442 and 8443
Procedure
- Install MCP Assistant (beta) from App Center.
- If your NAS runs QTS/QuTS hero 5.2.1 or later versions:
- Log in to your QNAP NAS.
- Go to the App Center.
- On the top-right corner, click

- Select Join the QNAP App Beta Program and click Apply.
- In the search bar, search for MCP Assistant.
- Click Install.
- If your NAS runs QTS/QuTS hero 5.2.0:
- Go to the webpage of App Center.
- Search for MCP Assistant.
- Click MCP Assistant from the search result.
- Select your NAS model.
- Download the installation file.
- Log in to your QNAP NAS.
- Go to App Center.
- On the right-top corner, click

- Select Install Manually.
- Click Browse and upload the installation file that you just downloaded from the QNAP website.
- Click Install.
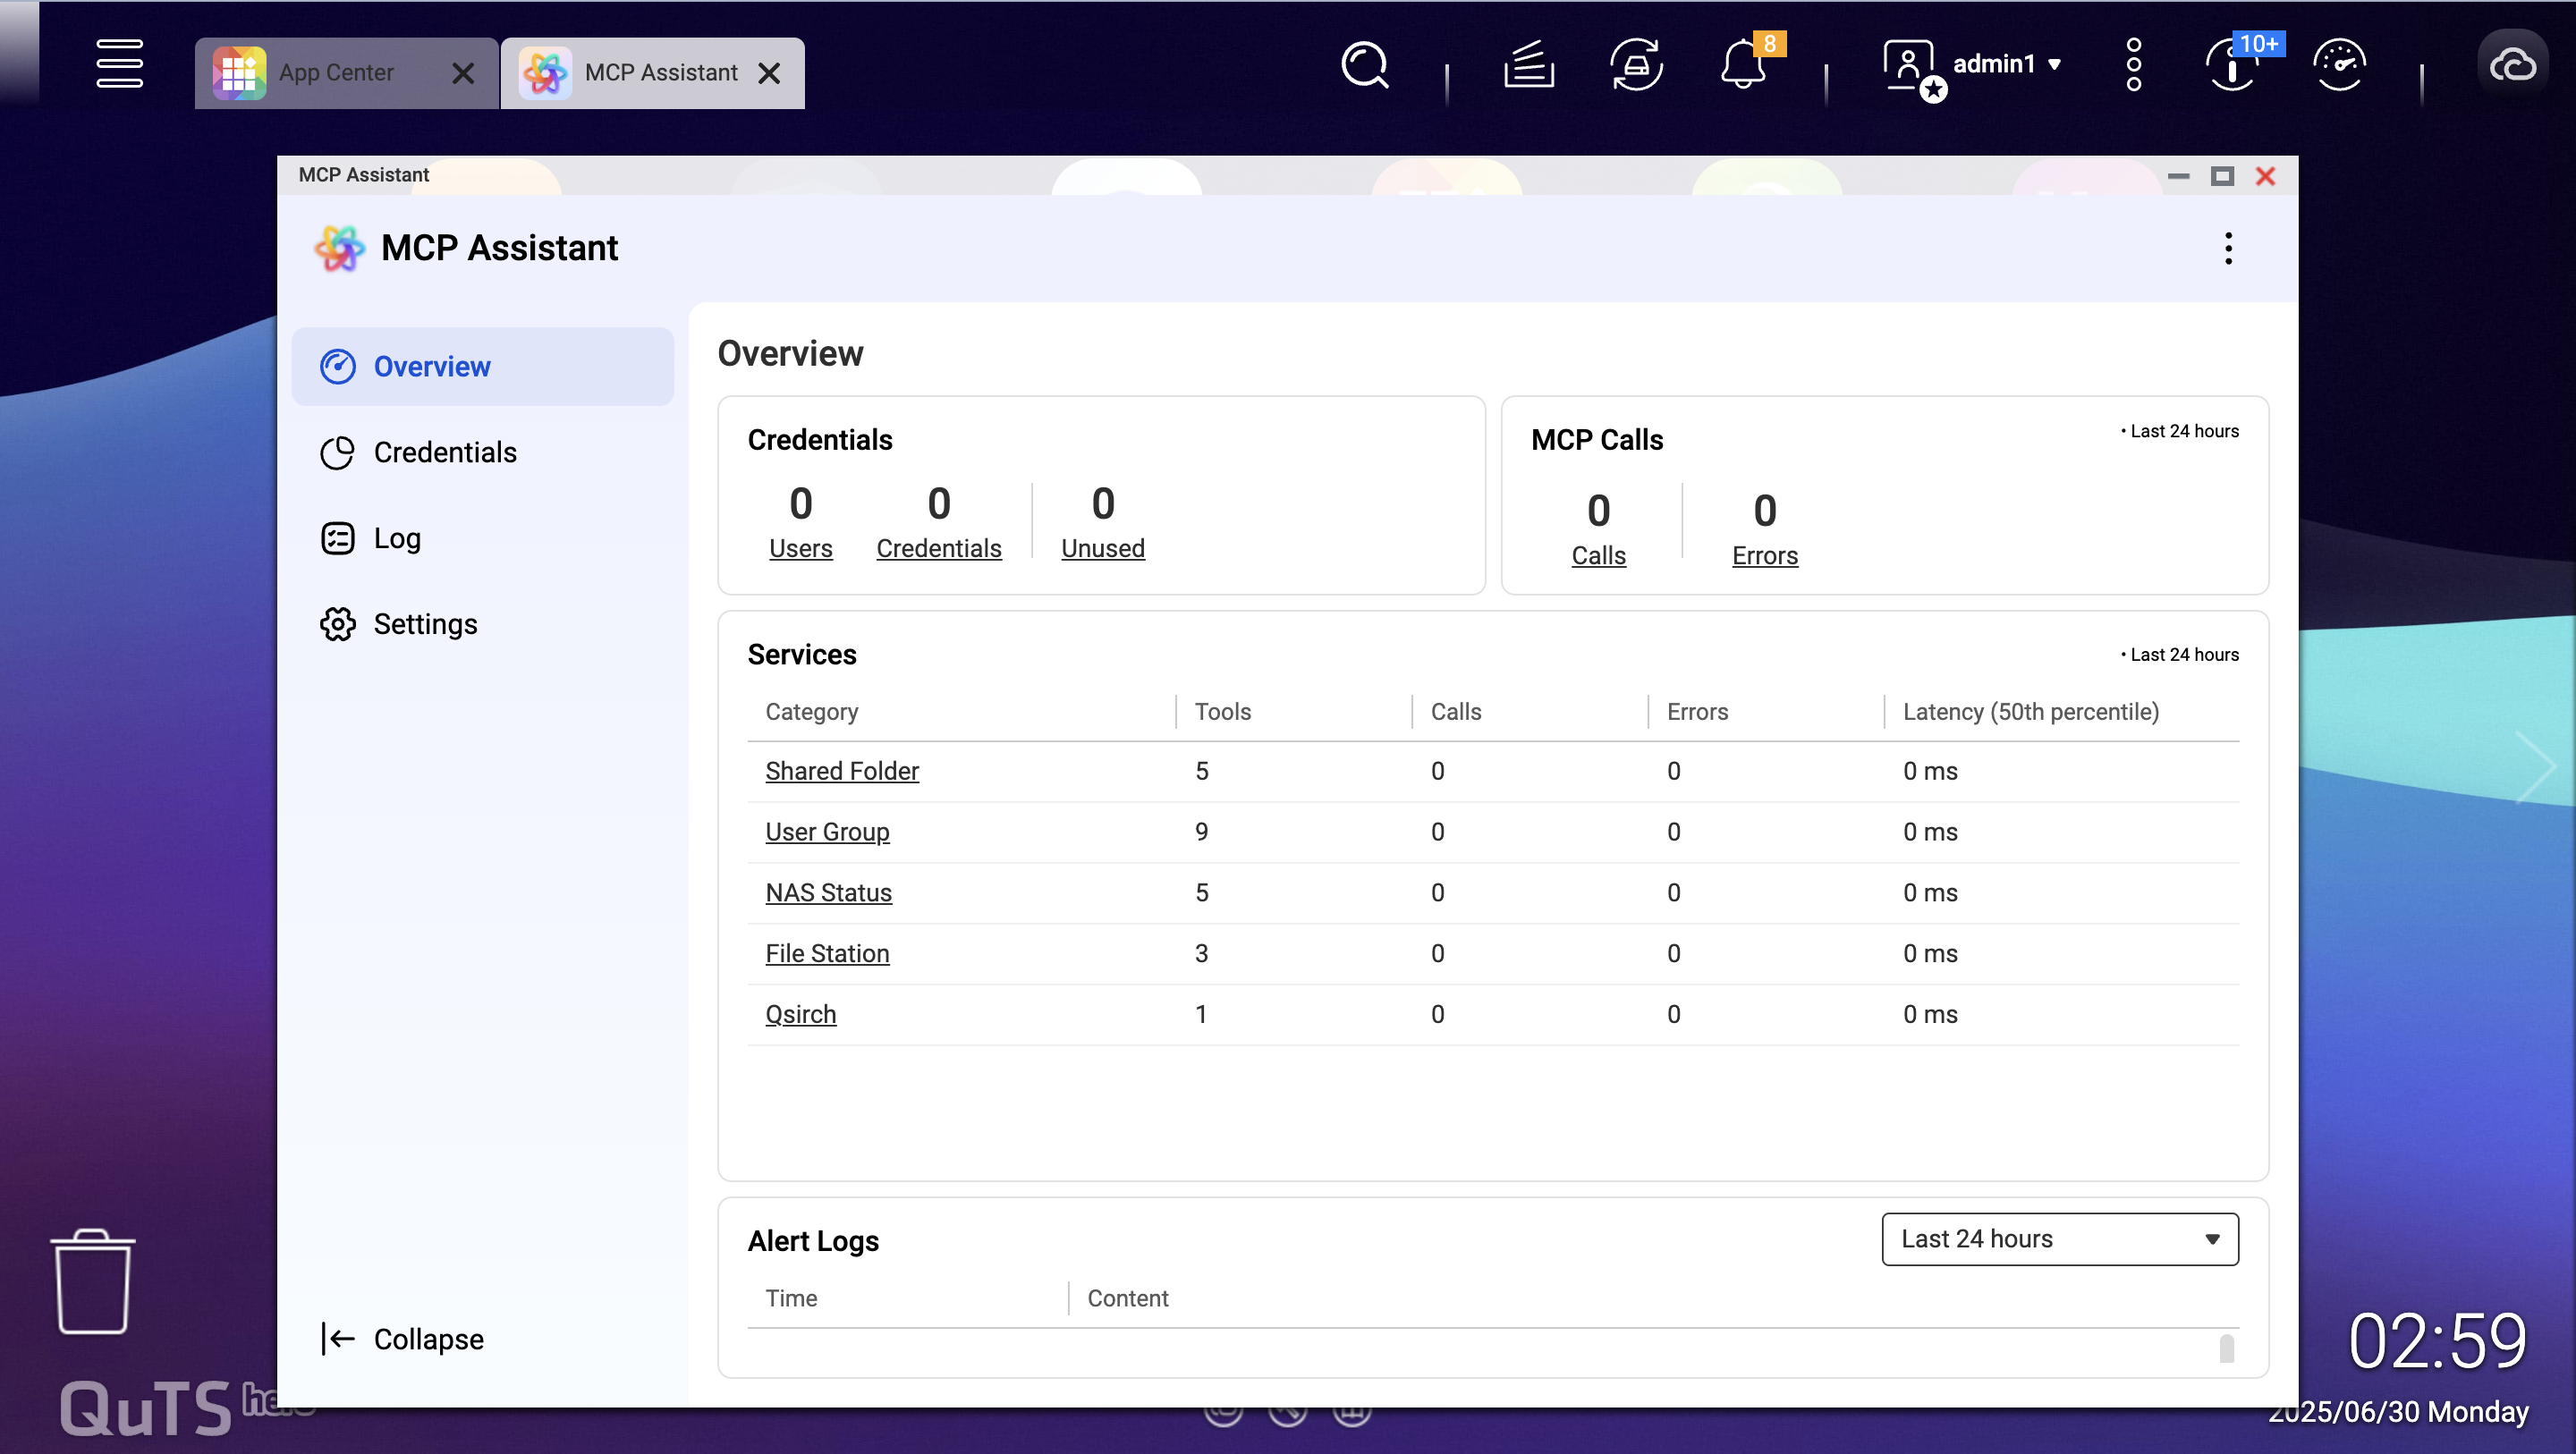
- Open MCP Assistant.
- Locate the MCP Assistant from the Main Menu.
- Launch MCP Assistant.
- Create credentials and download MCP Server.
- In the MCP Assistant, go to the Credentials tab.
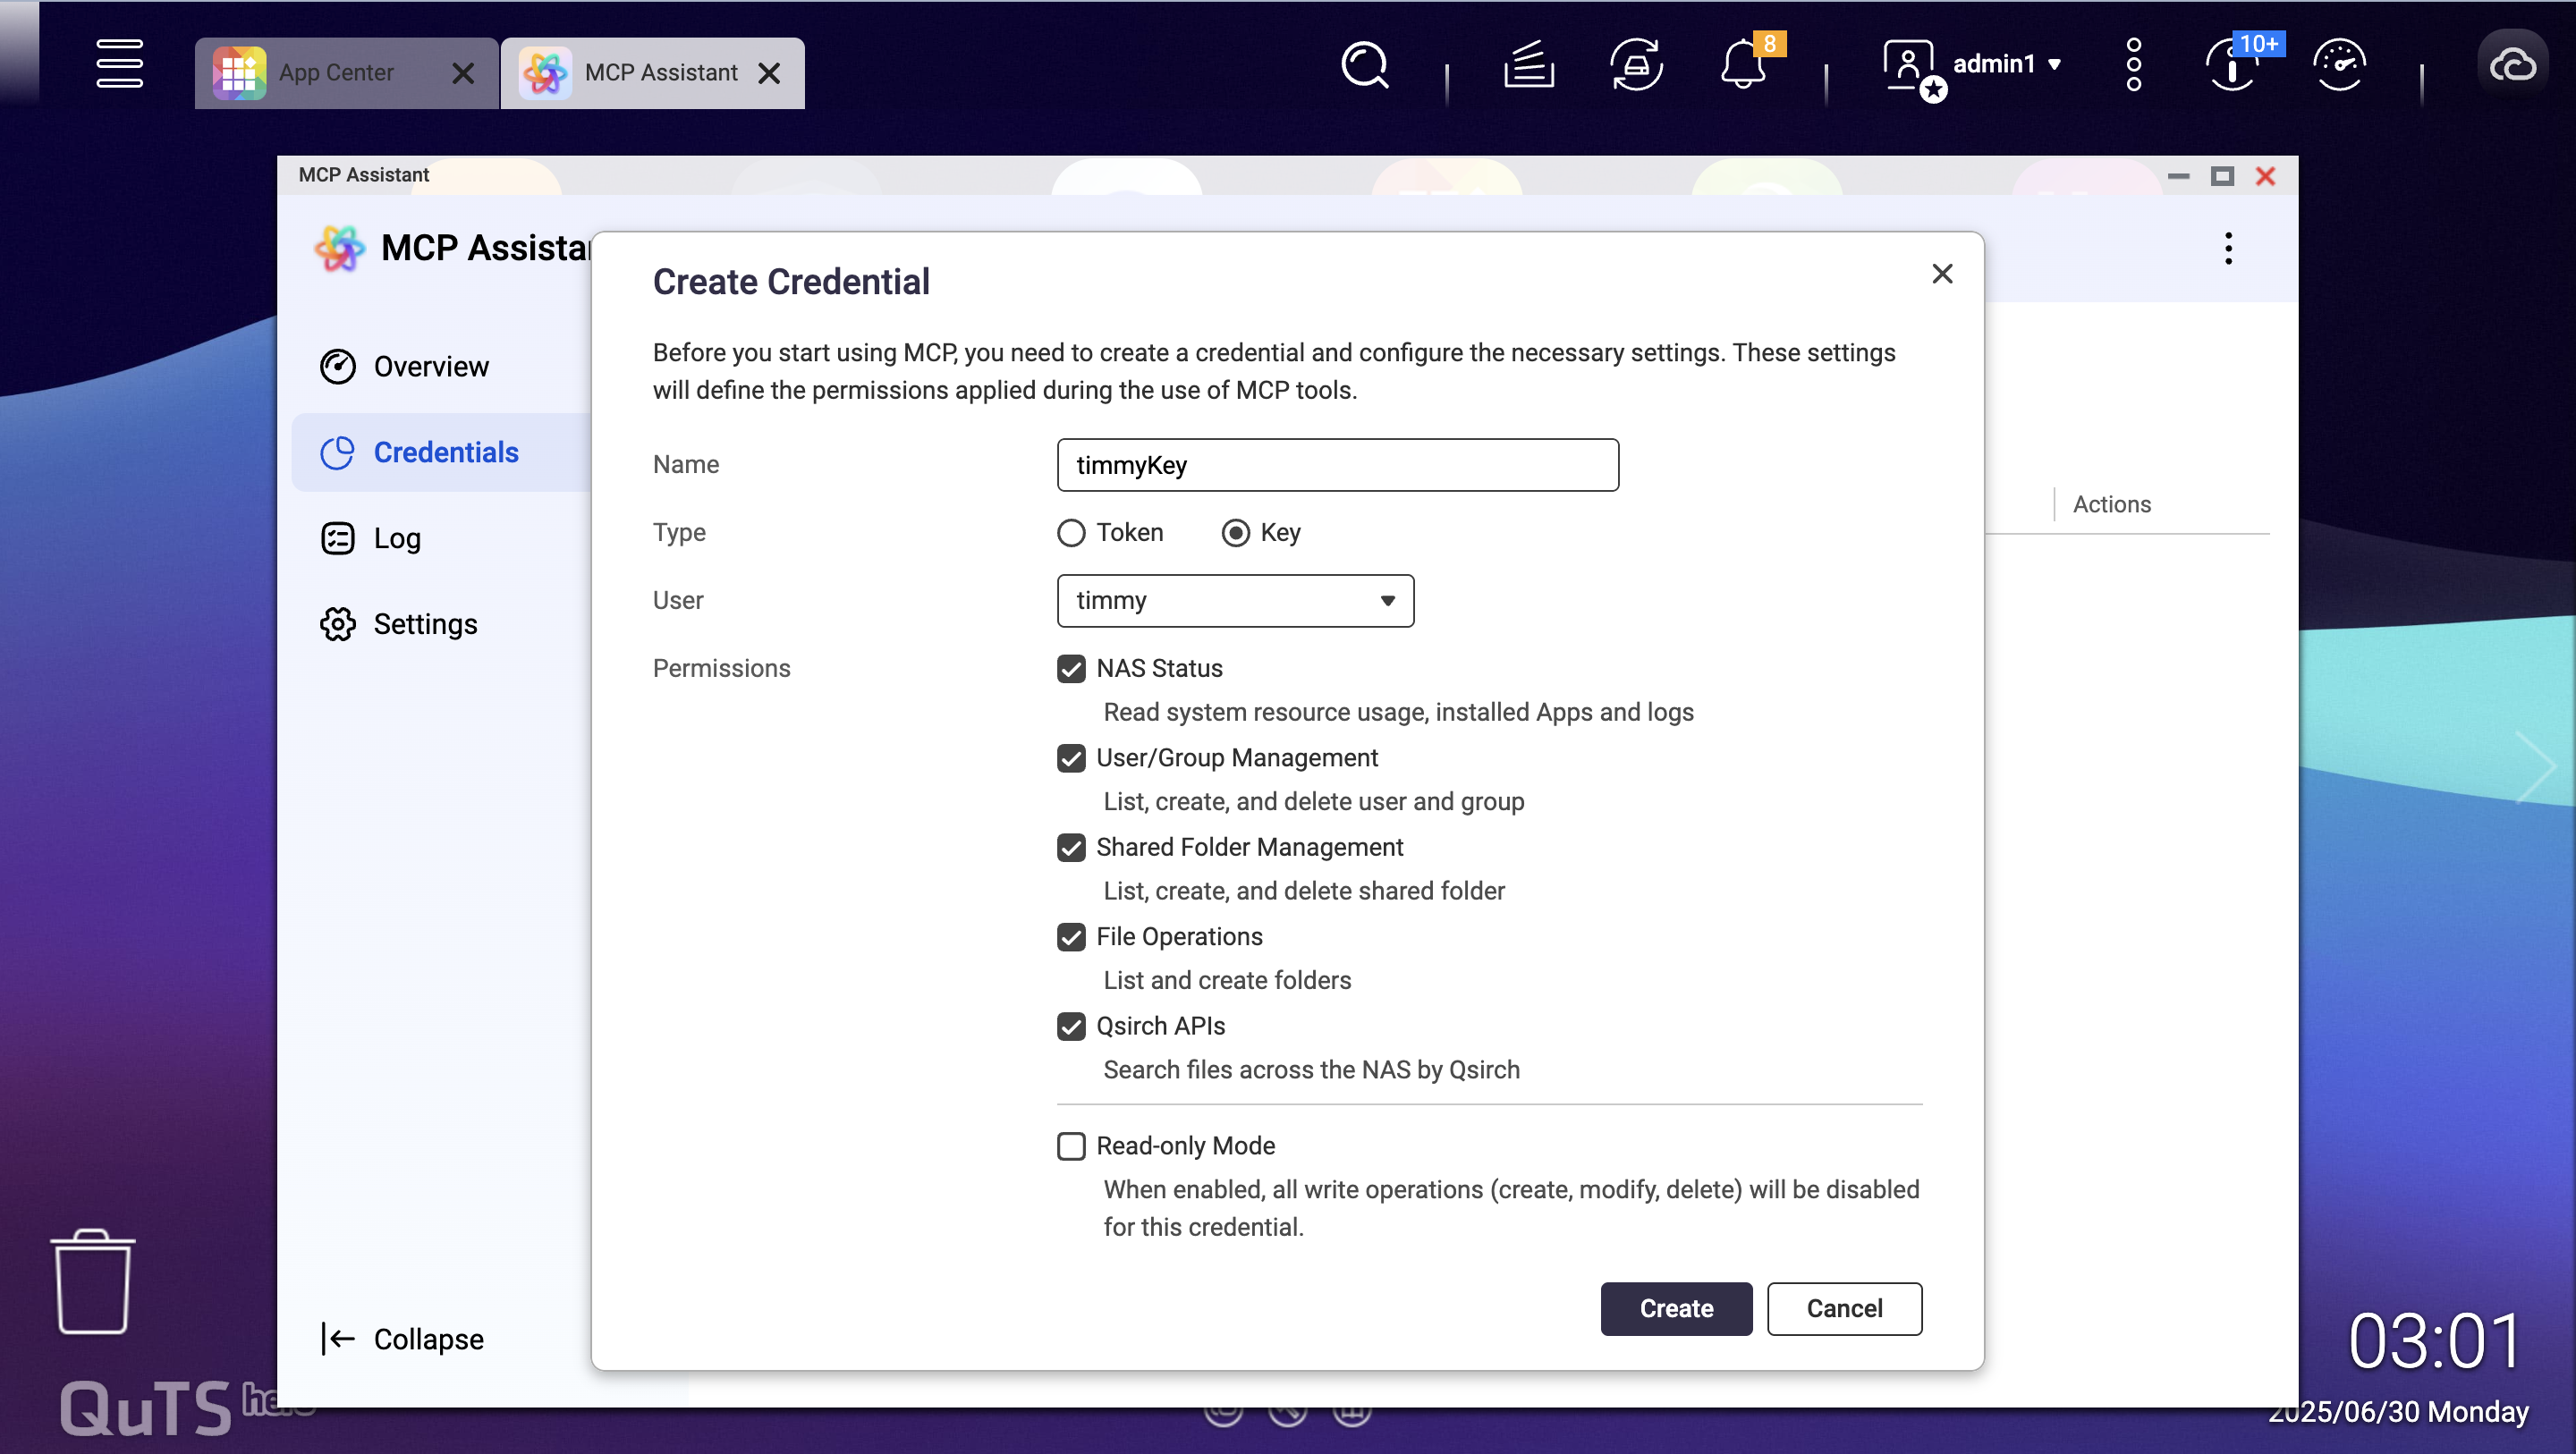
- Click Create to generate a new key.
- Enter a descriptive name for the key, select the key type, and choose the user account to associate with this key.
Tip
By default, Read-only Mode is enabled. To grant more privileges to a trusted user, you may uncheck this option.
- Specify which MCP tools the user can access.
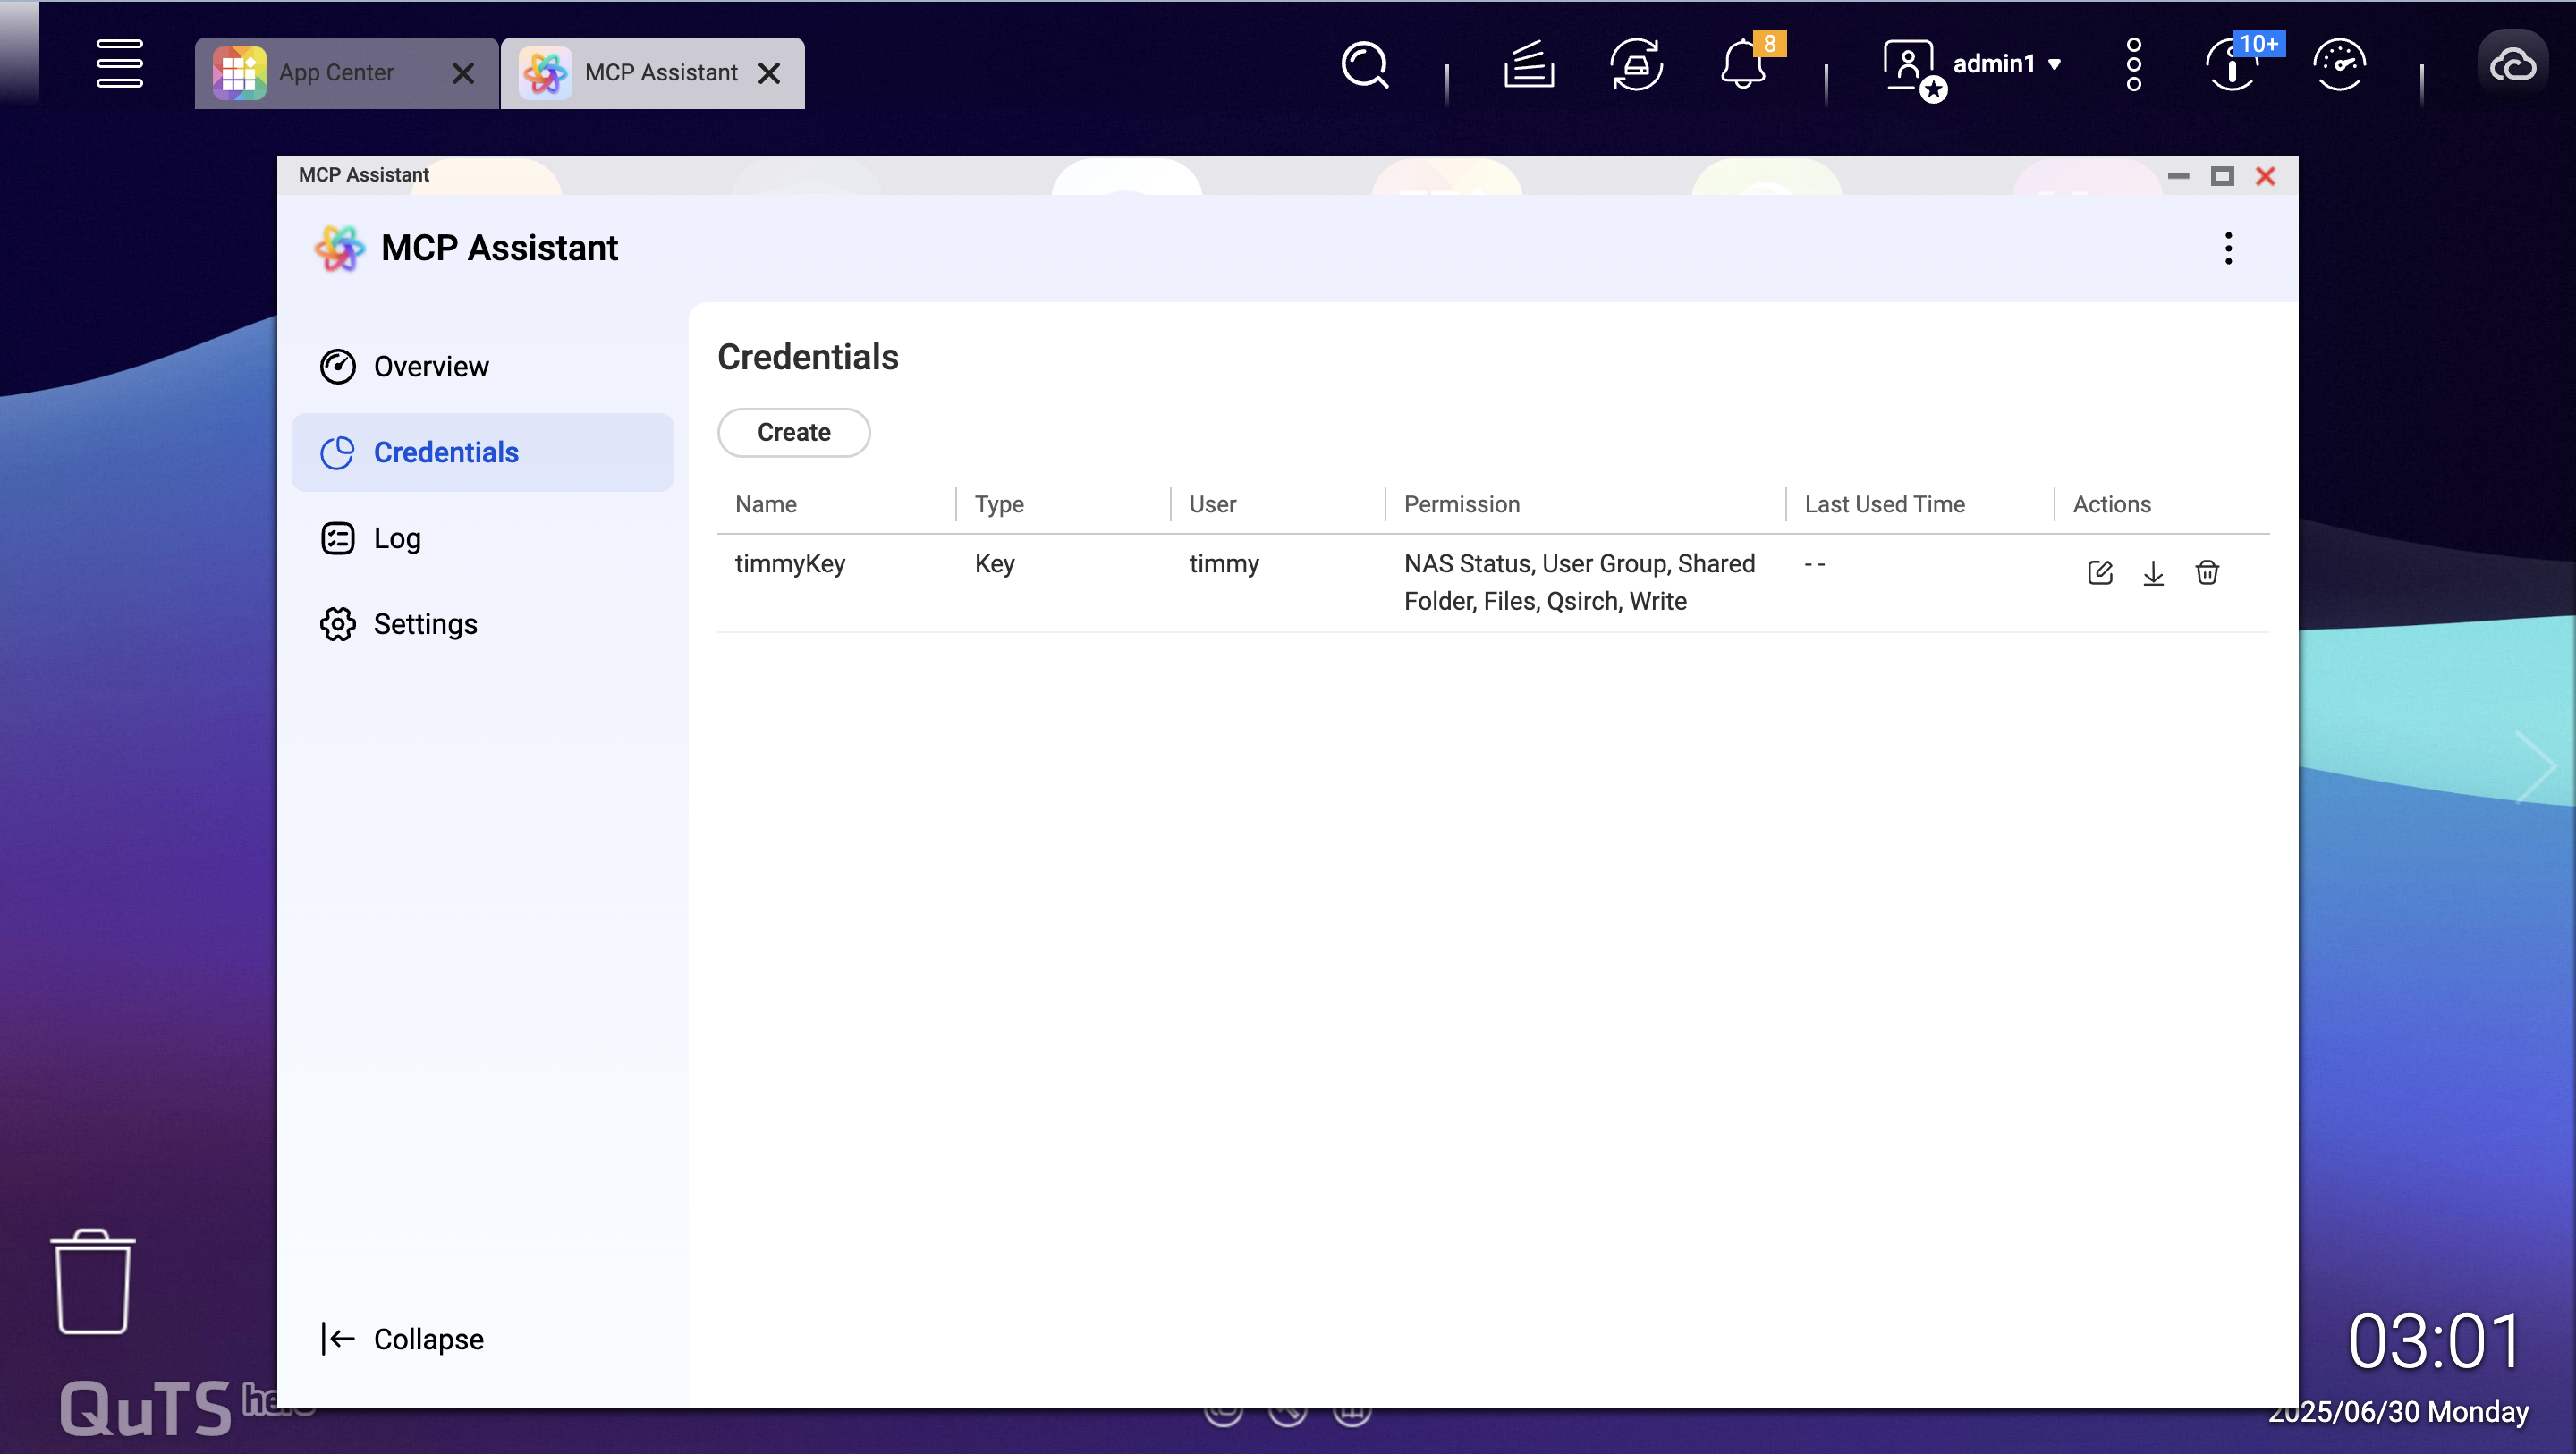
- Click Create to complete key creation.
- After the key is created, click the download arrow under Actions.
- The Download Key and MCP Server dialog will appear, which allows you to download the authentication key and MCP Server files to your computer.
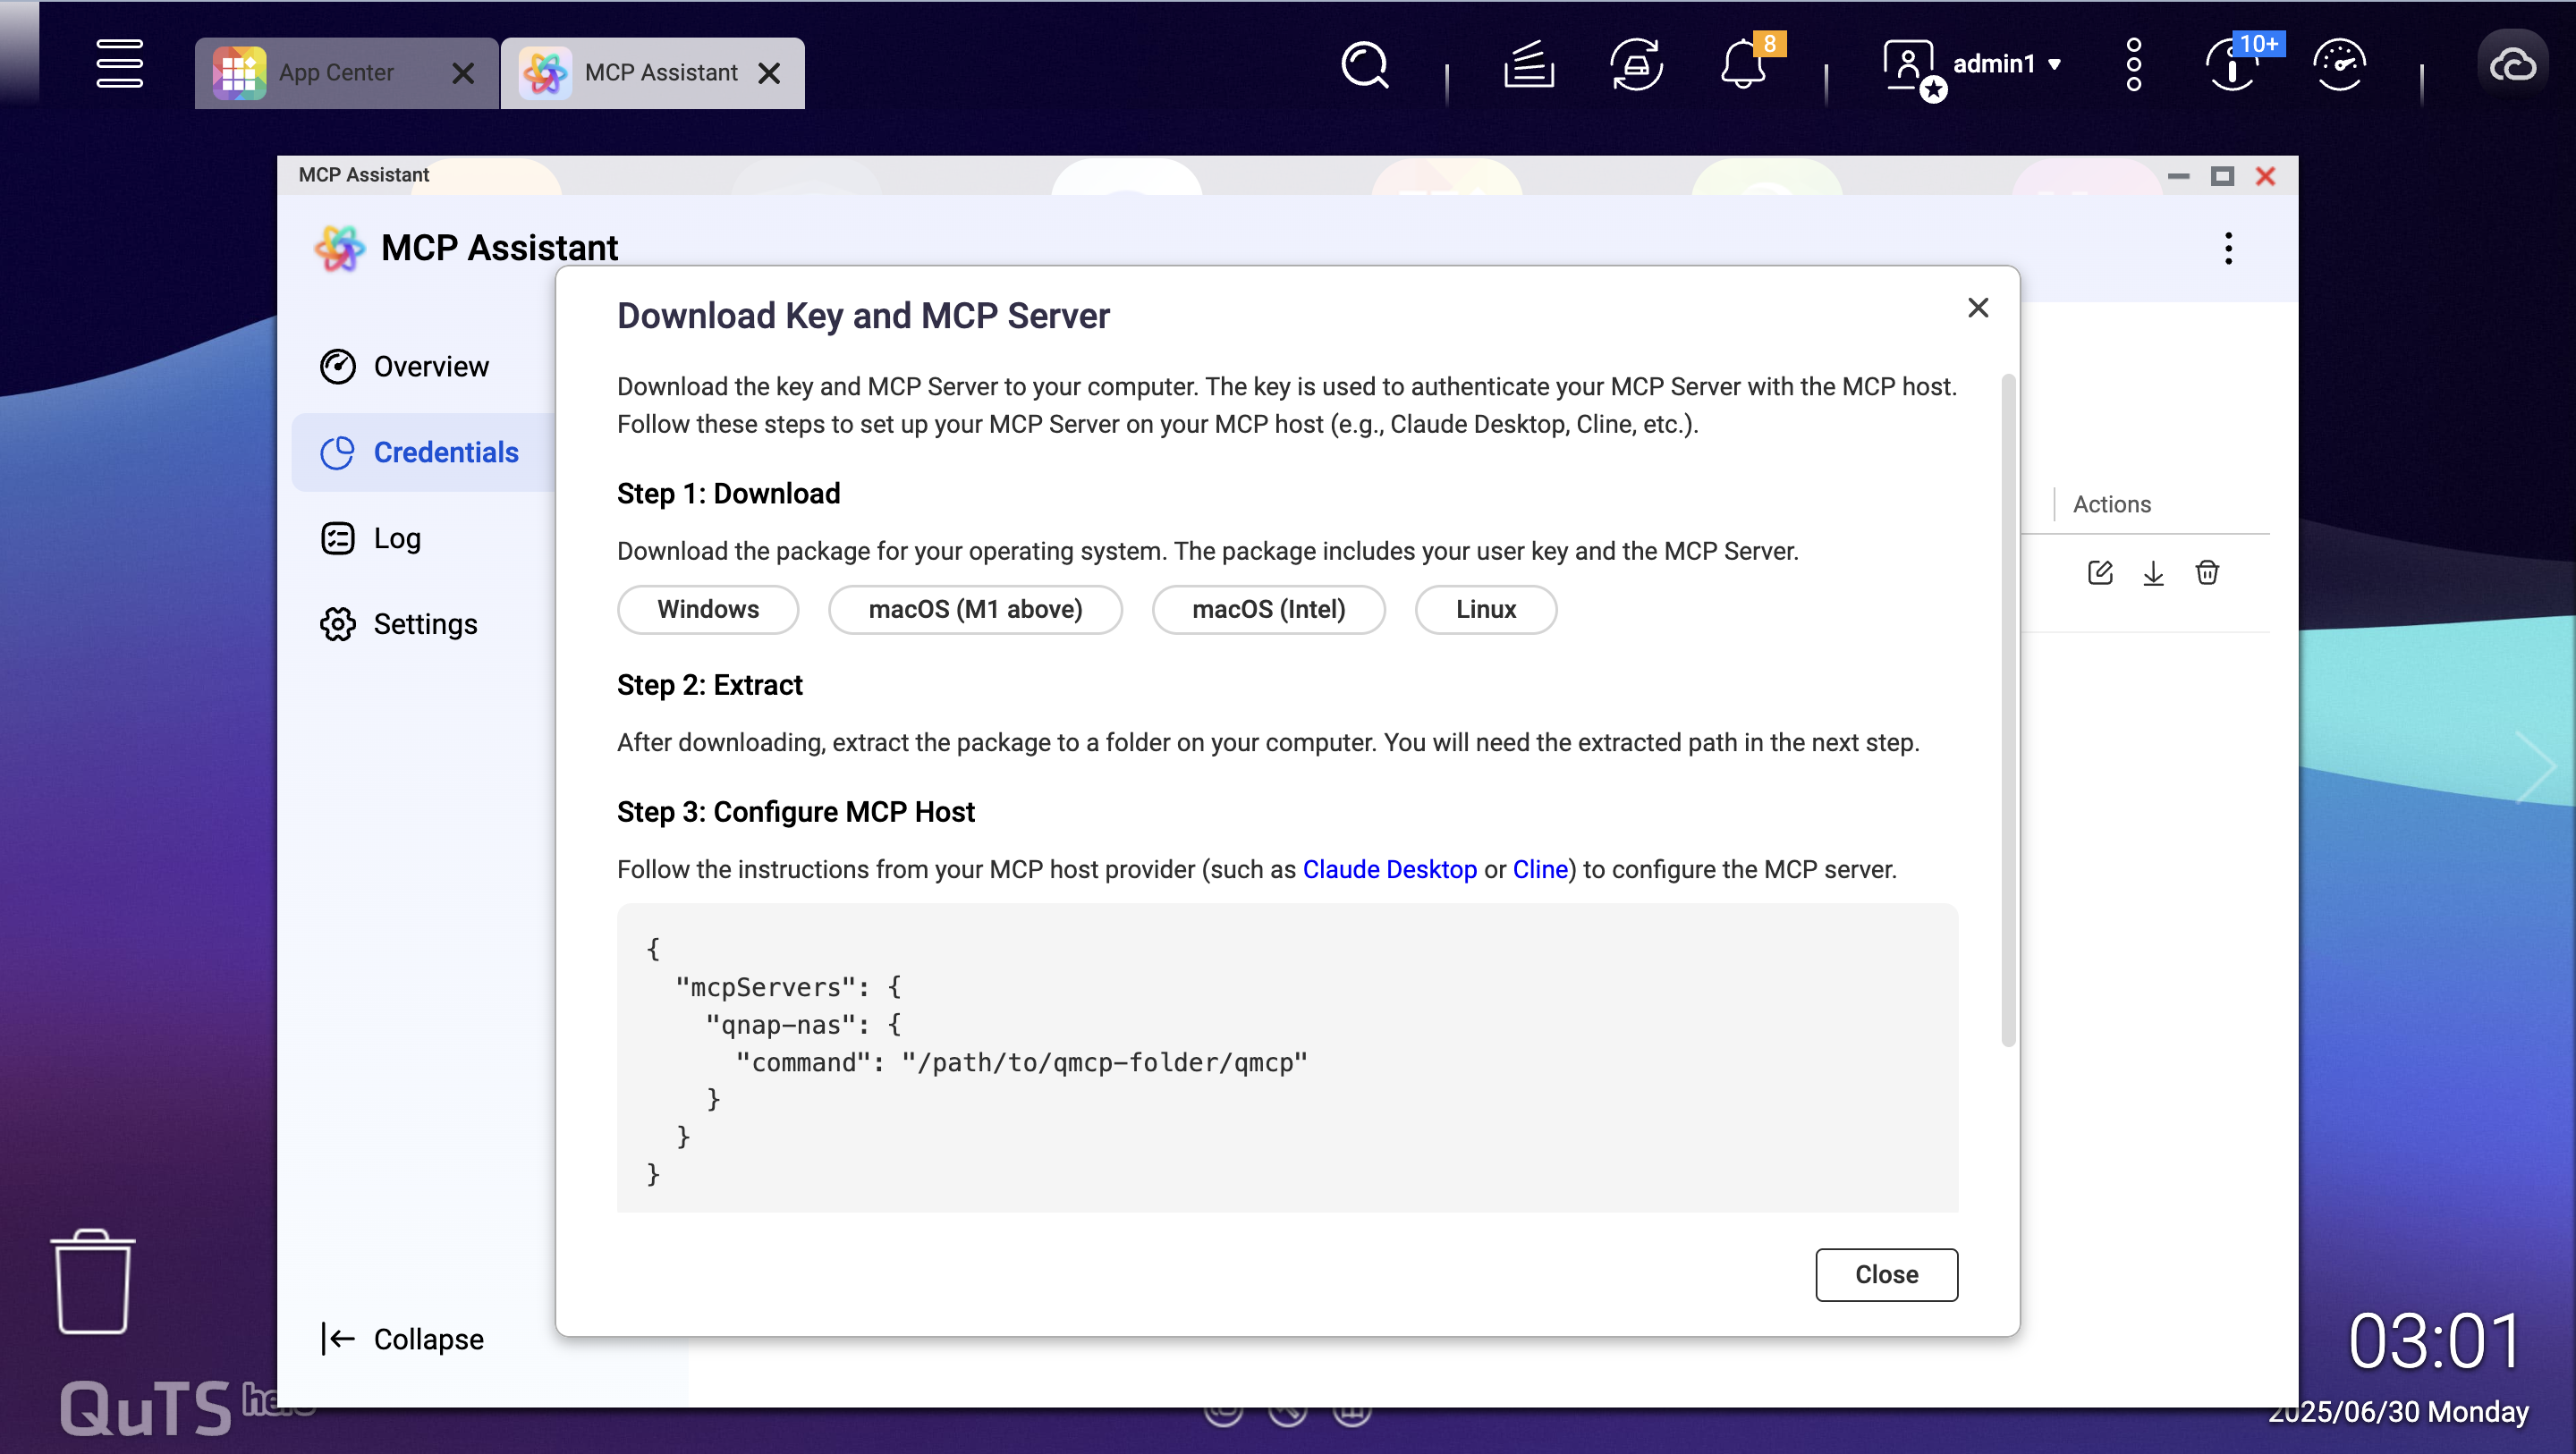
- Select your operating system:
- Windows – For Windows-based computers
- macOS (M1 and above) – For Apple Silicon Macs
- macOS (Intel) – For Intel-based Macs
- Linux – Claude Desktop is not available for Linux; use other MCP hosts.
- Click the button matching your OS to download the package, which includes both your user key and the MCP Server files.
- Extract the MCP Server ZIP package.
- Locate the downloaded file:
- The filename will vary (e.g., qmcp-darwin-arm64-250630_1502.zip).
- Check your Downloads folder or the location you selected.
- Extract the ZIP file:
- Windows: Right-click the ZIP file and select Extract All or use your preferred extraction tool.
- macOS: Double-click the ZIP file to extract it automatically or use a tool like The Unarchiver.
- Verify extraction:
- You should see a folder containing the MCP Server executable and configuration files.
- Note the folder path; you will need it for Claude Desktop configuration.
Important
Keep track of the extracted folder location for later configuration steps.
- Download Claude Desktop.
- Visit the official Anthropic website at claude.ai.
- Navigate to the Claude Desktop download section.
- Download the appropriate installer for your operating system:
- Windows: Download the .exe installer.
- macOS: Download the .dmg installer.
- Install Claude Desktop.
- Windows:
- Run the downloaded .exe installer.
- Follow the installation wizard prompts and accept the license agreement.
- Choose the installation location and complete the process.
- macOS:
- Open the downloaded .dmg file.
- Drag Claude Desktop to the Applications folder.
- If prompted, go to System Preferences > Security & Privacy and allow the application to run.
- Open Claude Desktop.
- Launch Claude Desktop from your desktop shortcut.
- If this is your first time launching Claude:
- Sign in with your Anthropic account.
- Complete any initial setup procedures.
- Accept terms of service if prompted.
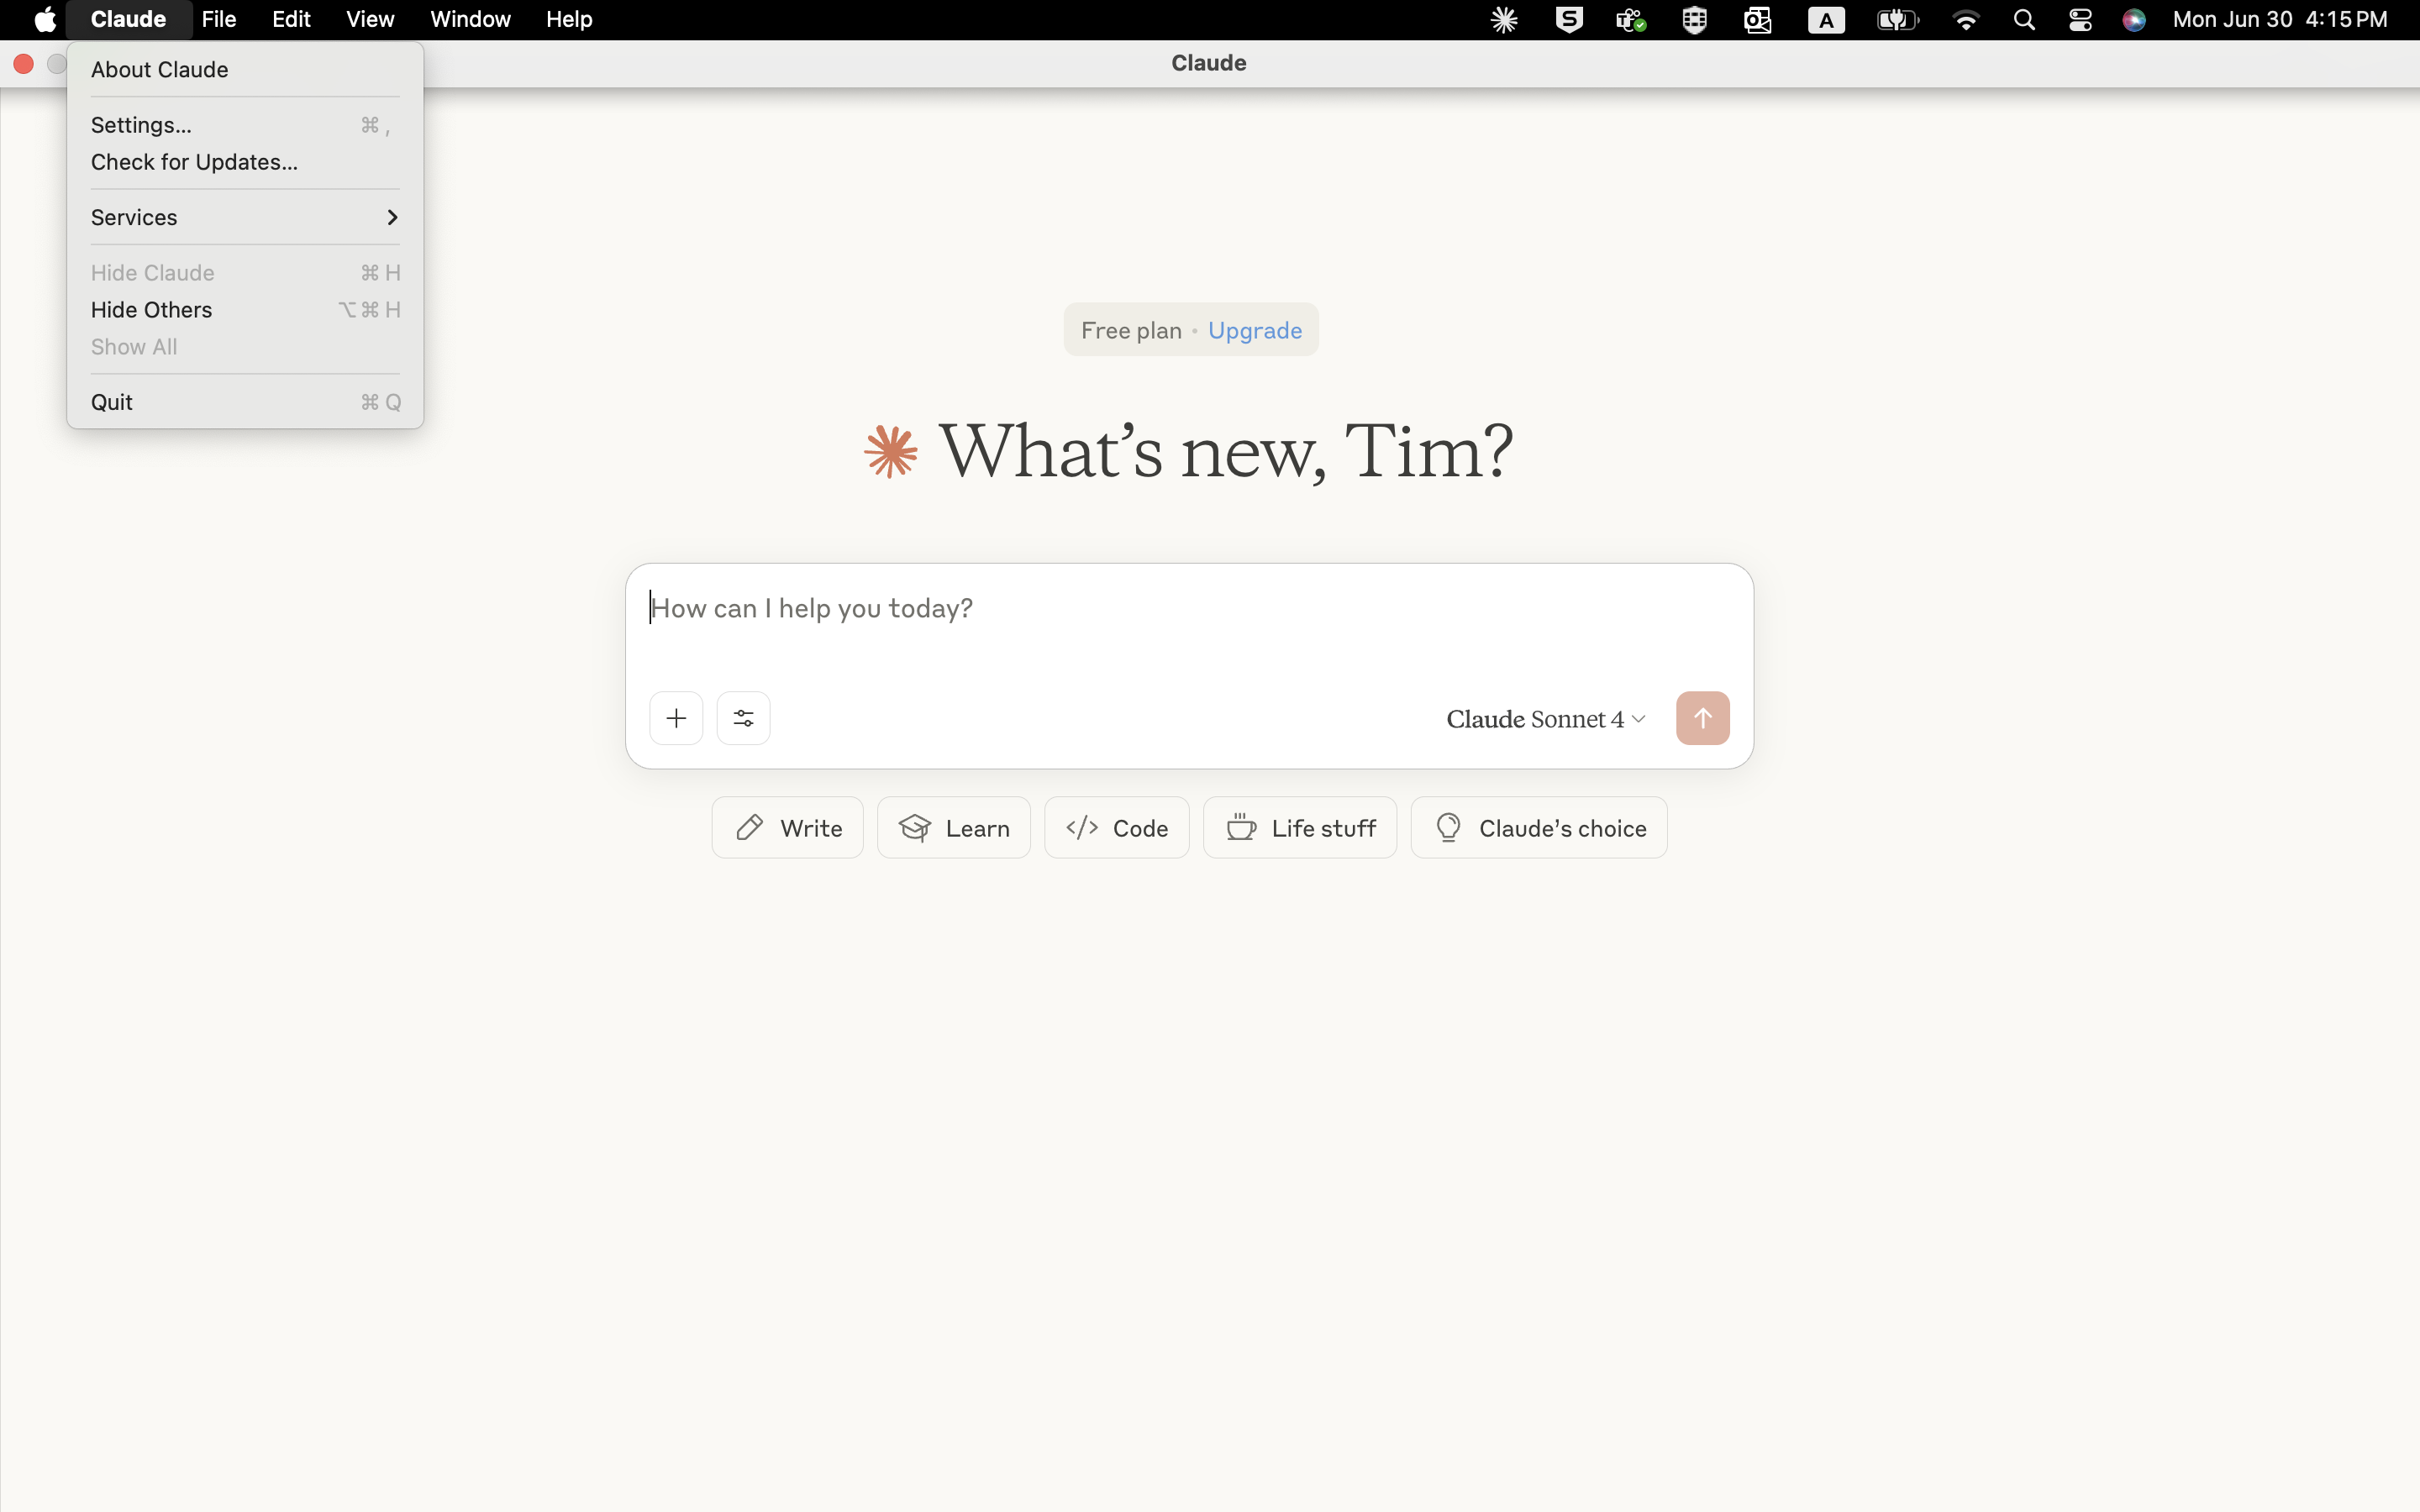
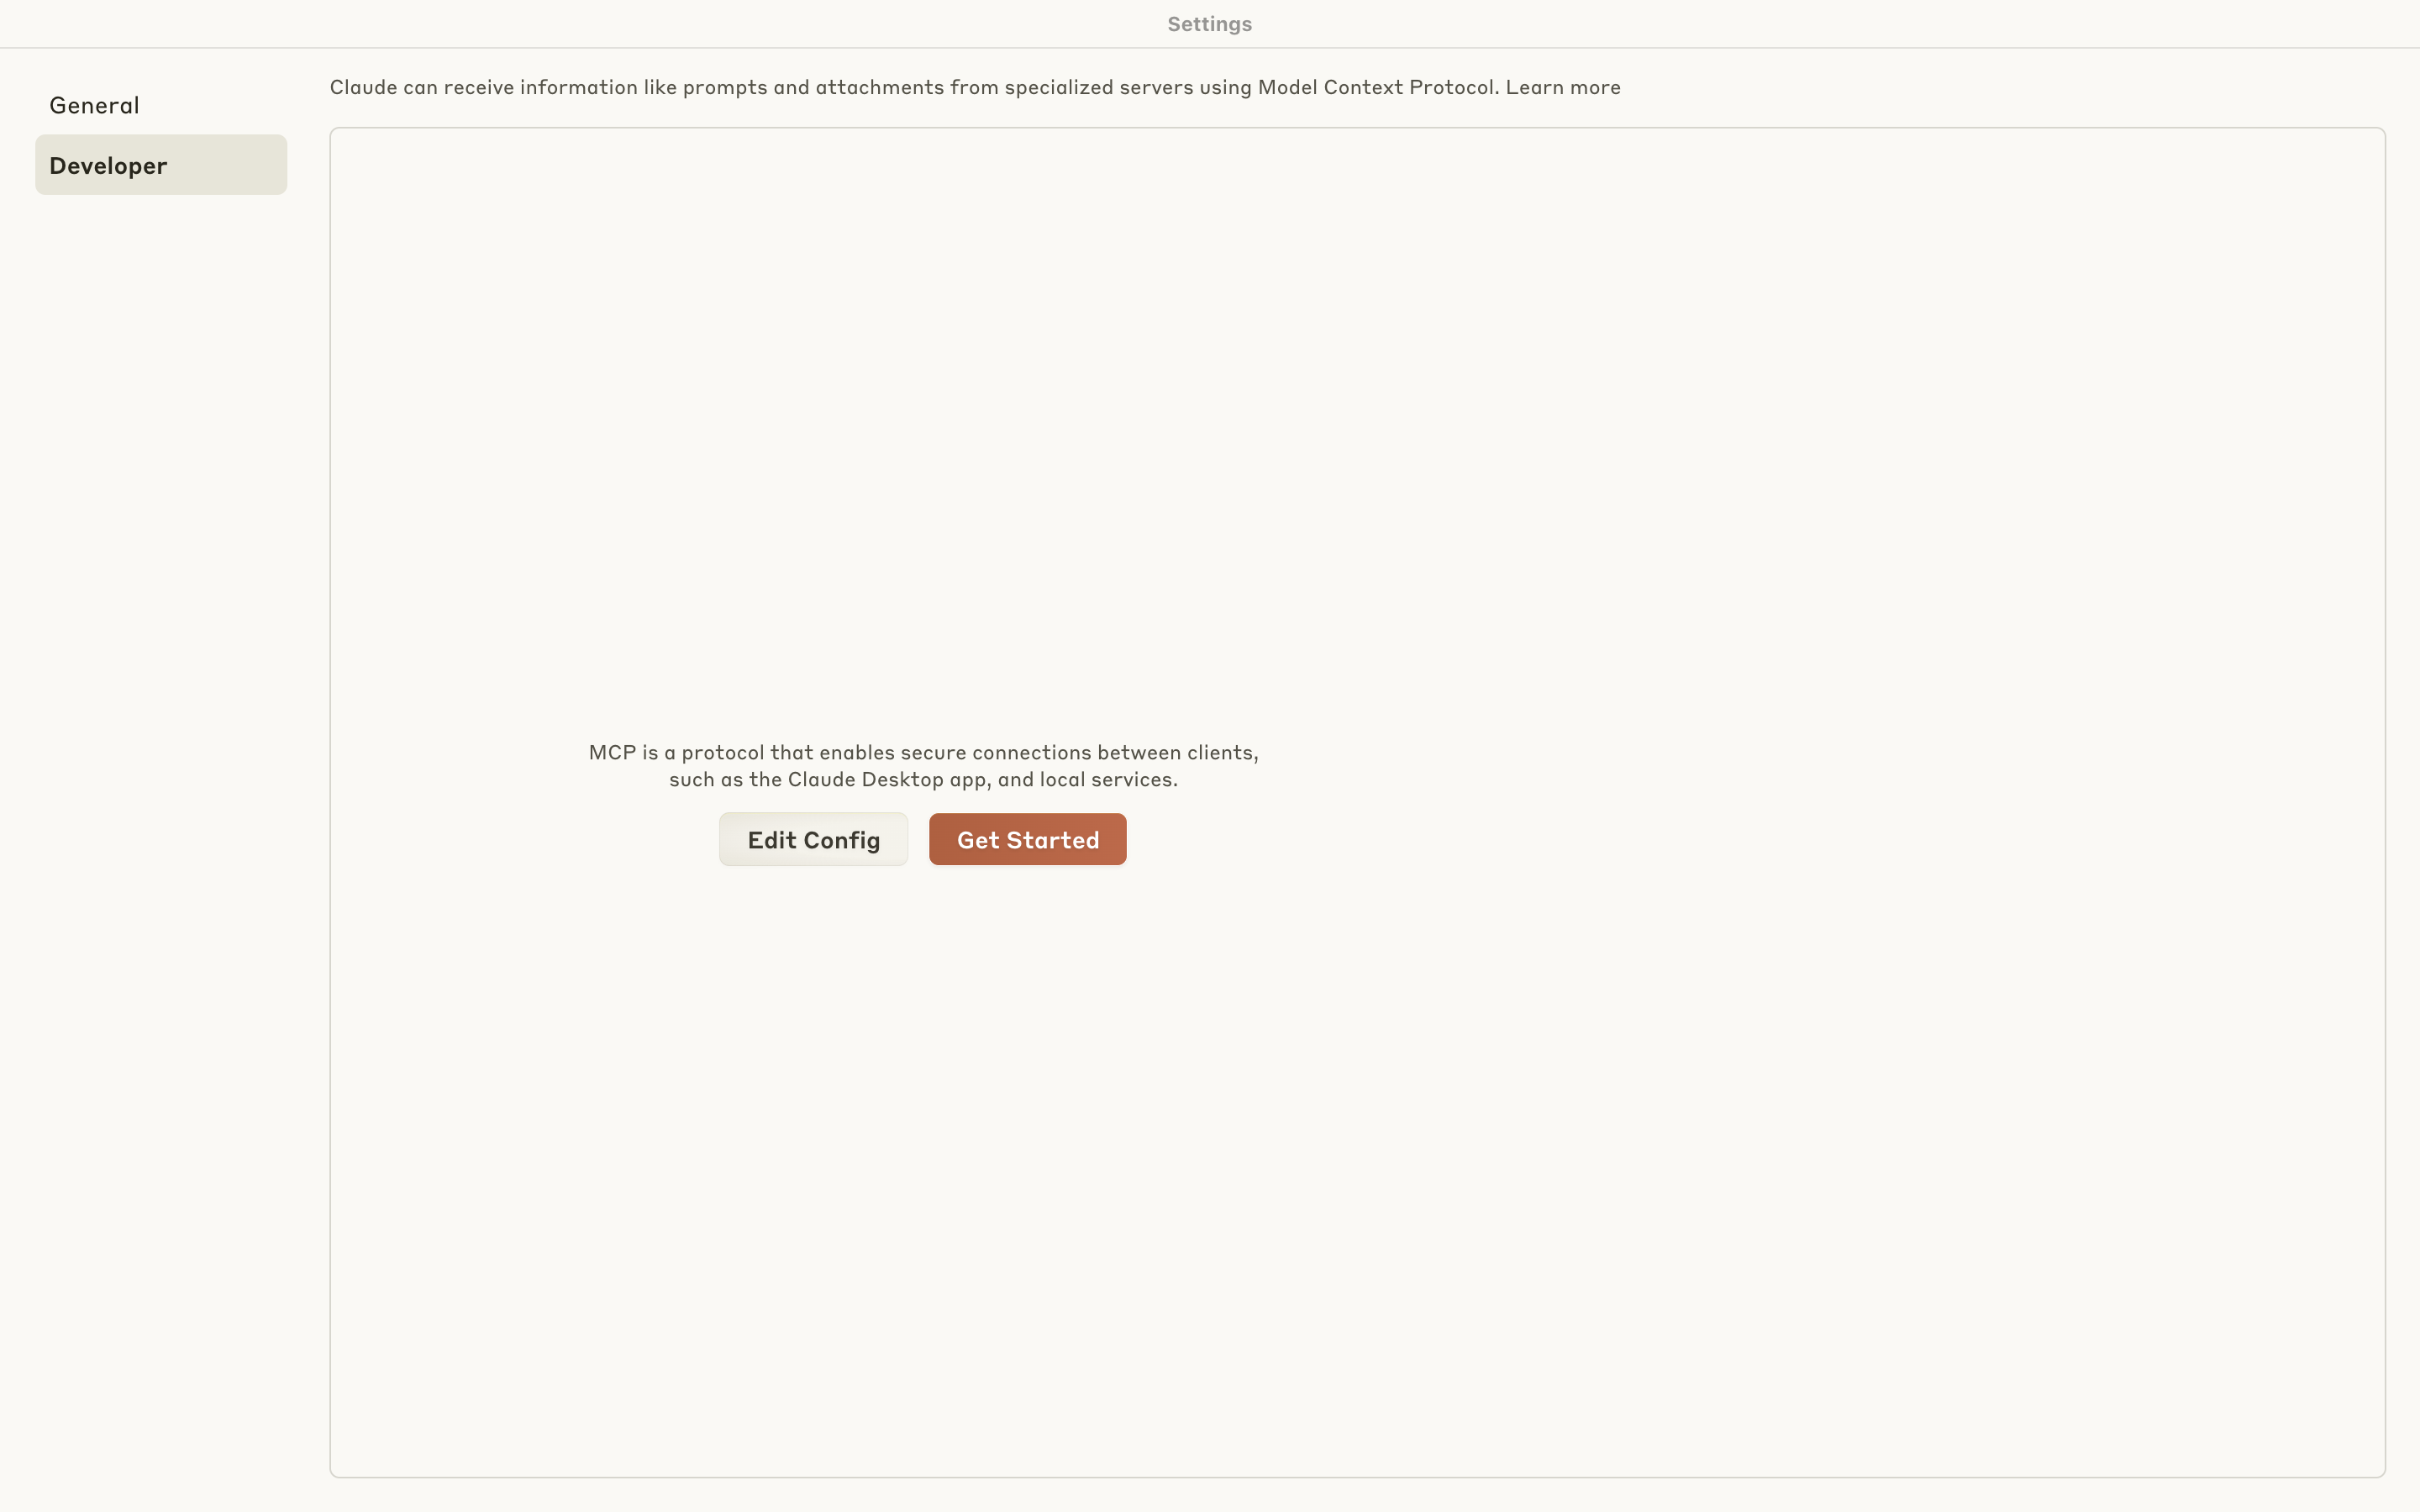
Edit the configuration of Claude Desktop.
- Locate the configuration file:
- Use Claude Desktop UI: Menu (top left) > Settings > Developer > Edit Config.
- You may also find the configuration file here:
- Windows: %APPDATA%\Claude\claude_desktop_config.json
- macOS: ~/Library/Application Support/Claude/claude_desktop_config.json
Edit the file:
- Open in a text editor (e.g., Notepad++, VS Code, TextEdit).
Add the MCP Server configuration as shown in the MCP Assistant dialog. For example:
{
  "mcpServers": {
    "qnap-nas": {
      "command": "/path/to/qmcp-folder/qmcp"
    }
  }
}
Replace /path/to/qmcp-folder/qmcp with the actual path to your extracted MCP Server executable.
- On Windows, use double backslashes (\\) instead of single backslashes (\). For example:
C:\\Users\\YourName\\Downloads\\qmcp-folder\\qmcp.exe.
Save the configuration file.
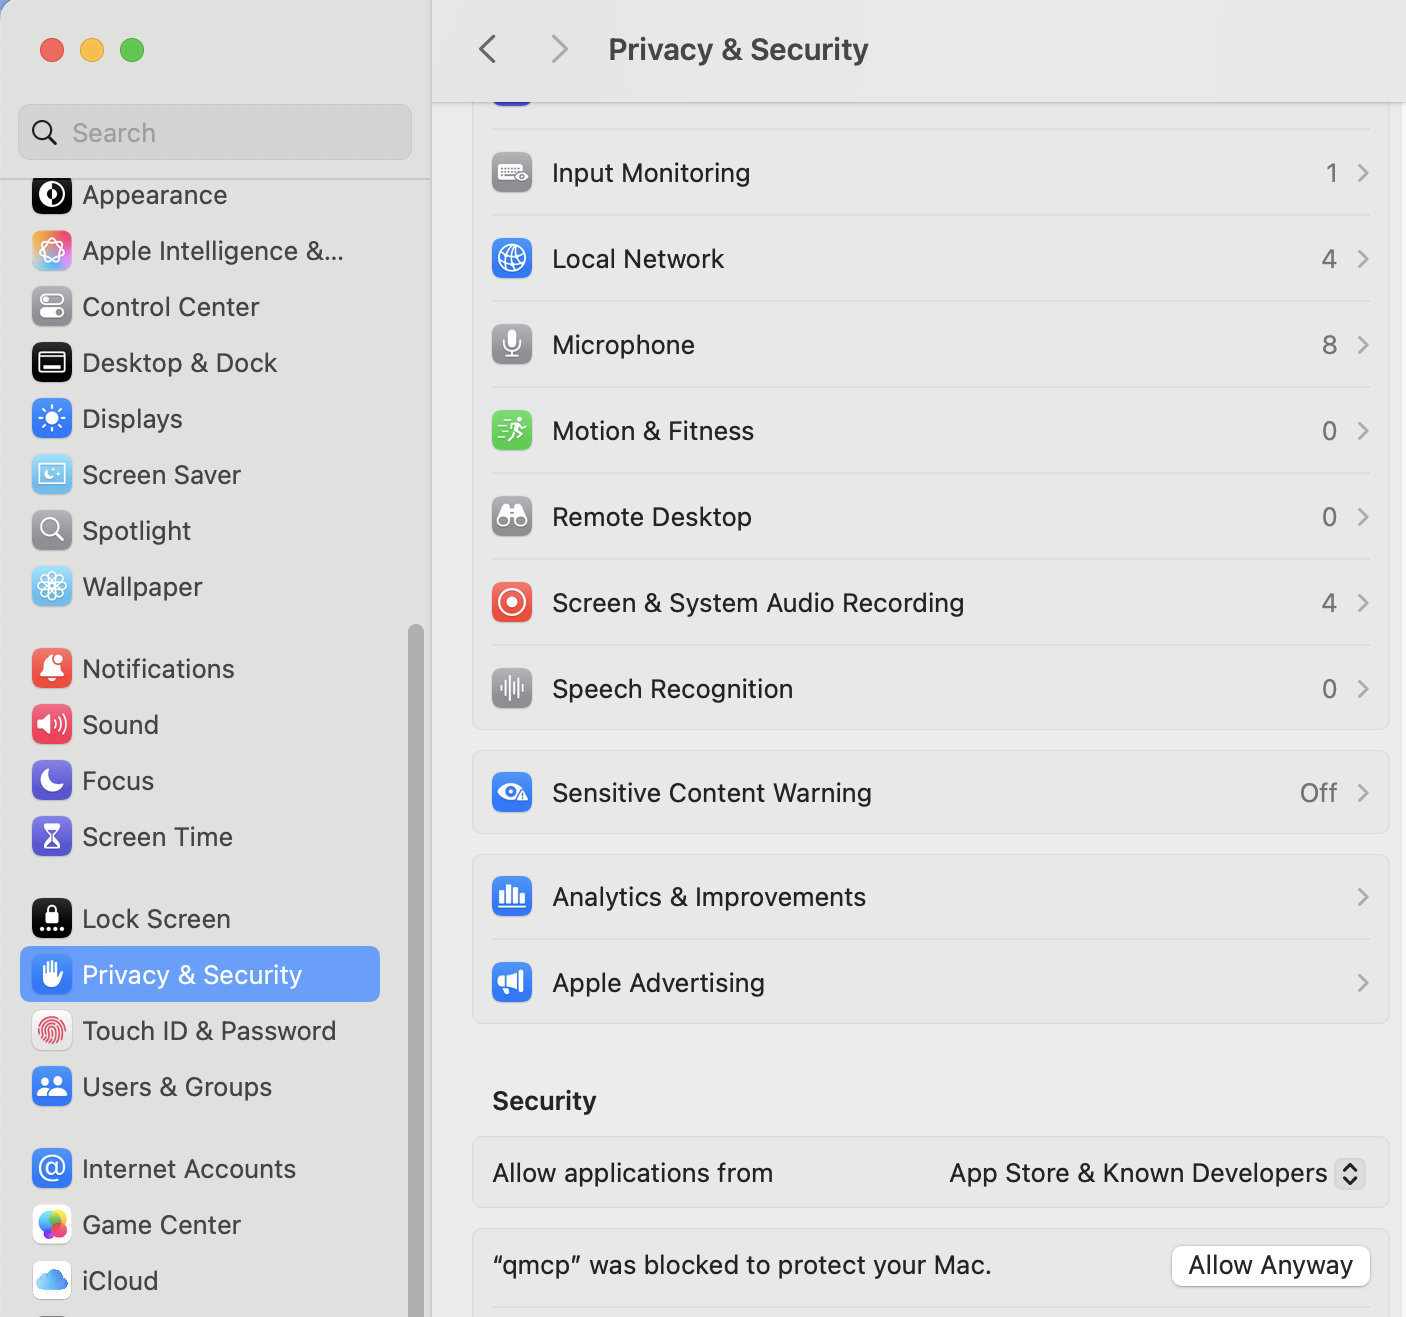
Allow execution of the MCP Server.
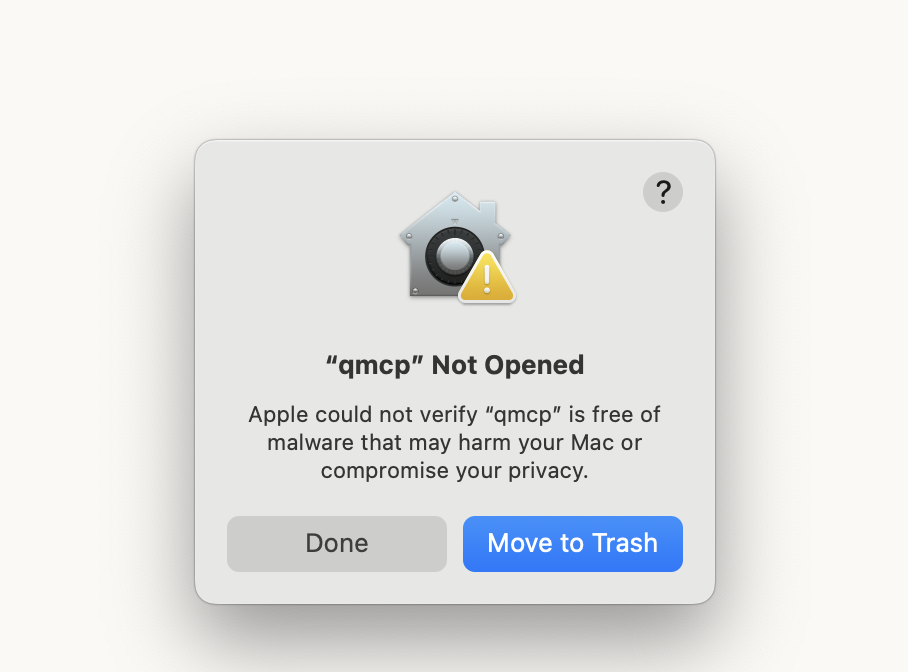
- macOS users:
- You may see a security warning when running the MCP Server executable. Click Done to close the warning.
- Go to Apple Menu > System Settings > Privacy & Security > Security.
- Click Allow Anyway next to the blocked qmcp executable.
- Only allow executables from trusted sources to avoid risks.
- Windows users:
- Ensure antivirus or firewall software does not block the MCP Server executable.
- Add exceptions if necessary.
- Re-open Claude Desktop and test the setup.
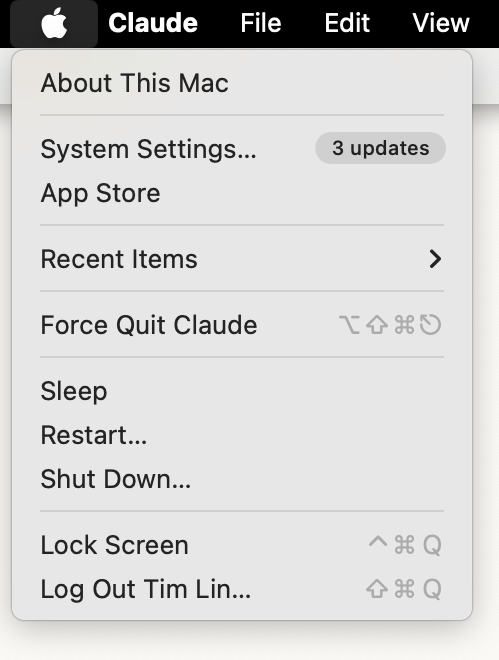
- To load your previous configuration, completely quit Claude Desktop and reopen it.
- macOS: Force Quit the app or close the app in Activity Monitor.
- Windows: open Task Manager, locate the app, and select End task.
If this does not work, restart your computer.
- Test with prompts such as:
- Can you access my QNAP NAS?
- Show me the status of my NAS storage.
- List the files in my shared folders.
- Verify Claude responds with successful interactions related to your NAS.
- If errors appear, check the user interface for details.
Troubleshooting Tips
Below are tips for quickly troubleshooting common issues.
- Connection issues: Ensure that the MCP Server path in the configuration file is correct.
- Permission errors: Ensure that the MCP Server executable has appropriate permissions.
- Authentication problems: Ensure that the authentication key from MCP Assistant is in the correct location.
- Firewall blocking: Ensure that your firewall allows MCP Server communication.
Conclusion
You have successfully set up QNAP MCP Assistant with Claude Desktop. You can now leverage Claude's AI capabilities to interact with your QNAP NAS through natural language commands, including file management and system monitoring.
重要
为了响应较近的 Claude Desktop 更新,我们正在大幅简化 MCP 安装的当前工作流程,以提升您的体验。您将很快能够通过几次点击完成 MCP 设置。我们计划在下一个 MCP Assistant 版本中添加此增强功能。请继续关注。
适用产品
- QNAP NAS devices running QTS 5.2, QuTS hero h5.2, or later versions
- MCP Assistant
介绍
本教程将指导您设置 QNAP 的 MCP Assistant 以与 Claude Desktop 配合使用,从而实现 QNAP NAS 与 Claude 的 AI 功能之间的无缝集成。然后,您可以使用自然语言命令操作您的 NAS。
先决条件
在开始之前,请确保您已进行以下设置:
- QNAP NAS 设备,运行 QTS 5.2、QuTS hero h5.2 或更高版本
- 具有互联网连接的计算机(Windows 或 macOS;Claude Desktop 不支持 Linux)
- 管理员访问您的 QNAP NAS
- 默认 MCP Assistant 端口:8442 和 8443
步骤
- 从 App Center 安装 MCP Assistant(测试版)。
- 如果您的 NAS 运行 QTS/QuTS hero 5.2.1 或更高版本:
- 登录到您的 QNAP NAS。
- 转到App Center。
- 在右上角,点击
- 选择加入 QNAP 应用测试计划 并点击 申请。
- 在搜索栏中,搜索MCP Assistant。
- 点击安装。
- 如果您的 NAS 运行 QTS/QuTS hero 5.2.0:
- 转到应用中心网页。
- 搜索MCP Assistant。
- 从搜索结果中点击MCP Assistant。
- 选择您的 NAS 型号。
- 下载安装文件。
- 登录到您的 QNAP NAS。
- 转到 App Center。
- 在右上角,点击
- 选择手动安装。
- 点击浏览并上传您刚从 QNAP 网站下载的安装文件。
- 点击安装。
- 打开 MCP 助手。
- 从主菜单中找到 MCP 助手。
- 启动MCP 助手。
- 创建凭证并下载 MCP 服务器。
- 在 MCP 助手中,进入凭证选项卡。
- 点击创建以生成新密钥。
- 为密钥输入描述性名称,选择密钥类型,并选择要与此密钥关联的用户账户。
提示
默认情况下,只读模式已启用。要为受信任用户授予更多权限,可以取消选中此选项。
- 指定用户可以访问的 MCP 工具。
- 点击创建以完成密钥创建。
- 密钥创建后,点击操作下的下载箭头。
- 将出现下载密钥和 MCP 服务器对话框,允许您将认证密钥和 MCP 服务器文件下载到计算机。
- 选择您的操作系统:
- Windows – 适用于基于 Windows 的计算机
- macOS (M1 及以上) – 适用于 Apple Silicon Mac
- macOS (Intel) – 适用于基于 Intel 的 Mac
- Linux – Claude 桌面不支持 Linux;请使用其他 MCP 主机。
- 点击与您的操作系统匹配的按钮以下载包含用户密钥和 MCP 服务器文件的包。
- 解压 MCP 服务器 ZIP 包。
- 找到下载的文件:
- 文件名会有所不同(例如,qmcp-darwin-arm64-250630_1502.zip)。
- 检查您的下载文件夹或您选择的位置。
- 提取 ZIP 文件:
- Windows:右键单击 ZIP 文件并选择全部提取或使用您喜欢的解压工具。
- macOS:双击 ZIP 文件以自动提取,或使用像 The Unarchiver 这样的工具。
- 验证提取:
- 您应该会看到一个包含 MCP 服务器可执行文件和配置文件的文件夹。
- 记下文件夹路径;您将在 Claude Desktop 配置中需要它。
重要提示
记录提取文件夹的位置,以便后续配置步骤使用。
- 下载 Claude Desktop。
- 访问官方 Anthropic 网站claude.ai。
- 导航到 Claude Desktop 下载部分。
- 下载适合您操作系统的安装程序:
- Windows:下载 .exe 安装程序。
- macOS:下载 .dmg 安装程序。
- 安装 Claude Desktop。
- Windows:
- 运行下载的 .exe 安装程序。
- 按照安装向导提示并接受许可证协议。
- 选择安装位置并完成安装过程。
- macOS:
- 打开下载的 .dmg 文件。
- 将 Claude Desktop 拖动到应用程序文件夹。
- 如果出现提示,请前往系统偏好设置 > 安全性与隐私并允许应用程序运行。
- 打开 Claude Desktop。
- 从桌面快捷方式启动 Claude Desktop。
- 如果这是您较高次启动 Claude:
- 使用您的 Anthropic 账户登录。
- 完成任何初始设置程序。
- 如果出现提示,接受服务条款。
编辑 Claude Desktop 的配置。
- 找到配置文件:
- 使用 Claude Desktop UI:菜单(左上角)> 设置 > 开发者 > 编辑配置。
- 您也可以在此处找到配置文件:
- Windows: %APPDATA%\Claude\claude_desktop_config.json
- macOS: ~/Library/Application Support/Claude/claude_desktop_config.json
编辑文件:
- 在文本编辑器中打开(例如,Notepad++、VS Code、TextEdit)。
按照 MCP Assistant 对话框中显示的方式添加 MCP 服务器配置。例如:
{
  "mcpServers": {
    "qnap-nas": {"command": "/path/to/qmcp-folder/qmcp"}
  }
}
将 /path/to/qmcp-folder/qmcp 替换为实际的 MCP 服务器可执行文件路径。
- 在 Windows 上,使用双反斜杠(\\)代替单反斜杠(\)。例如:
C:\\Users\\YourName\\Downloads\\qmcp-folder\\qmcp.exe。
保存配置文件。
允许执行 MCP 服务器。
- macOS 用户:
- 运行 MCP 服务器可执行文件时,您可能会看到安全警告。点击完成以关闭警告。
- 前往Apple 菜单 > 系统设置 > 隐私与安全 > 安全性。
- 点击仍然允许,在被阻止的 qmcp 可执行文件旁边。
- 仅允许来自可信来源的可执行文件以避免风险。
- Windows 用户:
- 确保杀毒软件或防火墙软件不会阻止 MCP 服务器可执行文件。
- 如有必要,添加例外。
- 重新打开 Claude Desktop 并测试设置。
- 要加载以前的配置,请退出 Claude Desktop 并重新打开。
- macOS:强制退出应用程序或在活动监视器中关闭应用程序。
- Windows:打开任务管理器,找到应用程序,然后选择结束任务。
如果这不起作用,请重启计算机。
- 测试提示,例如:
- 你能访问我的 QNAP NAS 吗?
- 显示我的 NAS 存储的状态。
- 列出我共享文件夹中的文件。
- 验证 Claude 是否成功响应与您的 NAS 相关的交互。
- 如果出现错误,请检查用户界面以获取详细信息。
故障排除提示
以下是快速解决常见问题的提示。
- 连接问题:确保配置文件中的 MCP 服务器路径正确。
- 权限错误:确保 MCP 服务器可执行文件具有适当的权限。
- 身份验证问题:确保 MCP 助手的身份验证密钥位于正确的位置。
- 防火墙阻止:确保您的防火墙允许 MCP 服务器通信。
结论
您已成功设置 QNAP MCP 助手与 Claude 桌面版。现在,您可以利用 Claude 的 AI 功能,通过自然语言命令与您的 QNAP NAS 进行交互,包括文件管理和系统监控。


