Applicable Products
- HDP for Business
- HDP for Business Agent 1.0.0.1697 and later
- Windows 10 (64-bit, version 1607 or later), Windows 11
- Windows Server 2016 / 2019 / 2022 / 2025
Purpose
This tutorial shows you how to install HDP for Business Agent on a Windows computer, connect it to your Management Server with a Join Key, and confirm that the assigned backup policy is running.
Prerequisites
- HDP for Business is installed and initialized on a QNAP NAS that acts as the Management Server.
- A Backup Server and a protection policy are ready, so that you can bind them to a Join Key.
- The Windows computer runs a supported 64-bit operating system. ARM-based devices such as ARM64 Windows are not supported.
- The computer has internet access during the first installation. The installer automatically installs the .NET 10.0 runtime components that the agent requires. If the computer has no internet access, install these components manually first. See Note: Installing on a Computer Without Internet Access.
- NetBak PC Agent is not installed on the computer. The two products cannot coexist, and the installer asks you to remove the other product before it continues.
Procedure
Step 1: Create a Join Key on the Management Server
The Join Key defines which Backup Server and which policy the computer is bound to. The agent applies them automatically once it connects.
- In HDP for Business, go to Physical Device and click Add.
- Click Download Agent to download the installer, and copy the file to the Windows computer.
- Click Manage Join Key > Create.
- Select the Backup Server and the Policy to bind, then click Create.
- In the Join Key table, click Copy. The key is 64 alphanumeric characters long.
Step 2: Install the agent on the Windows computer
- Run the installer on the Windows computer.
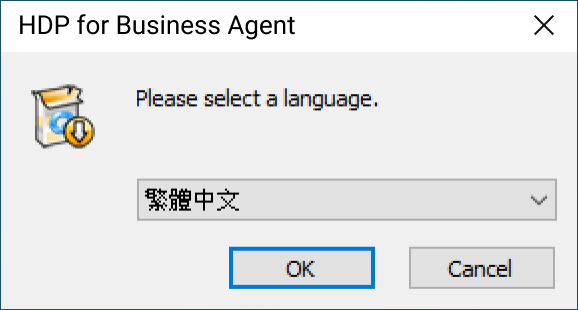
- Select the installation language. Your system language is selected by default.
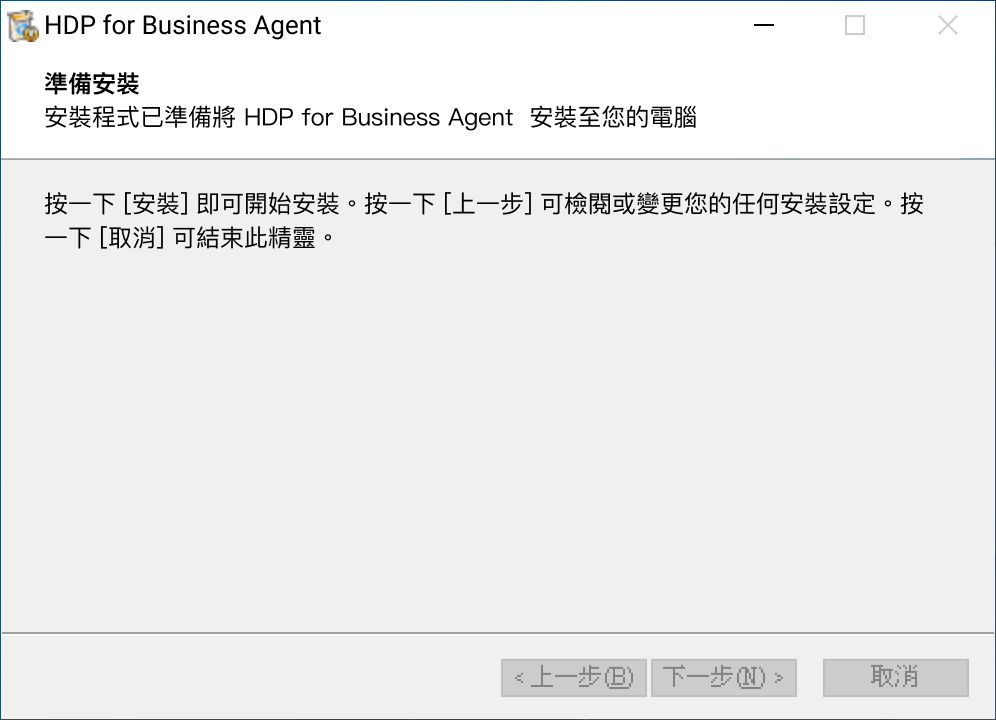
- Confirm that you want to install HDP for Business Agent, and wait for the files to be extracted to
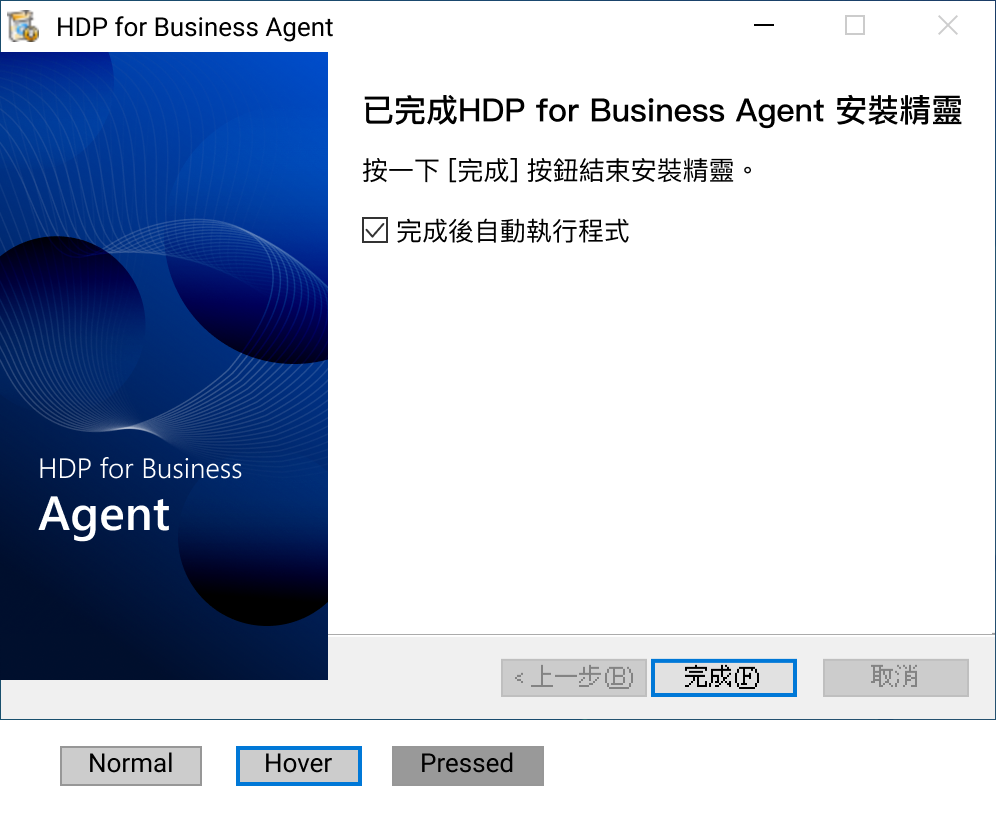
C:\Program Files\QNAP. - When the installation finishes, keep the option to run the application selected, and close the installer.

You can only upgrade an existing installation. Reinstalling the same version and downgrading to an earlier version are not supported.
Step 3: Connect to the Management Server
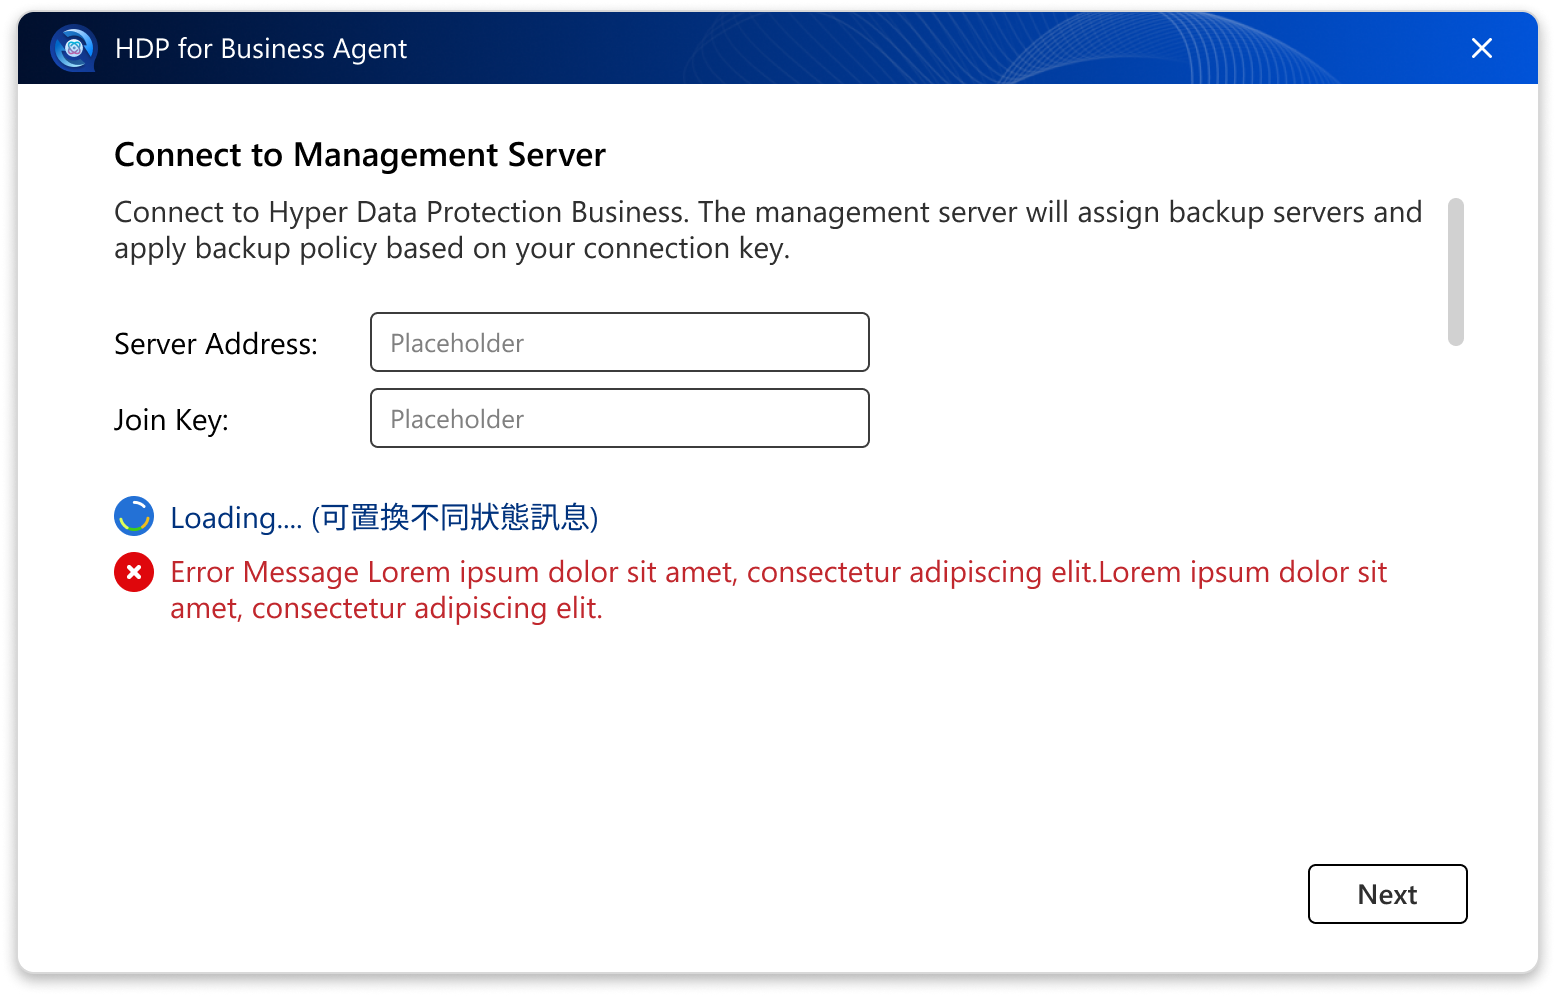
The agent opens the Connect to Management Server screen on its first run.
- In Server Address, enter the host name or IP address of the Management Server, with an optional port number, for example
nas-01, 10.77.216.185, or 10.77.216.185:11443. Do not include http:// or https://. - In Join Key, paste the key you copied in Step 1.
- Click Next.
- If a certificate confirmation window appears, click Continue.
Connecting over HTTPS
If you do not specify a port number, the agent tries HTTPS on port 443 first, and then HTTP on port 8080. QNAP NAS devices use a configurable HTTPS port that is often not 443, so to make sure the connection is encrypted, enter the HTTPS port of your NAS explicitly. To find the port, go to Control Panel > System > General Settings > Secure Connection (HTTPS).
Because most NAS devices use a self-signed certificate, the agent shows a certificate confirmation window when it connects over HTTPS. This is expected. Click Continue to proceed. Your choice also applies to the Backup Server that the agent connects to afterwards.
If you enter a Join Key that belongs to a Backup Server instead of a Management Server, the agent asks you to connect to the Management Server instead.
Step 4: Review the assigned policy
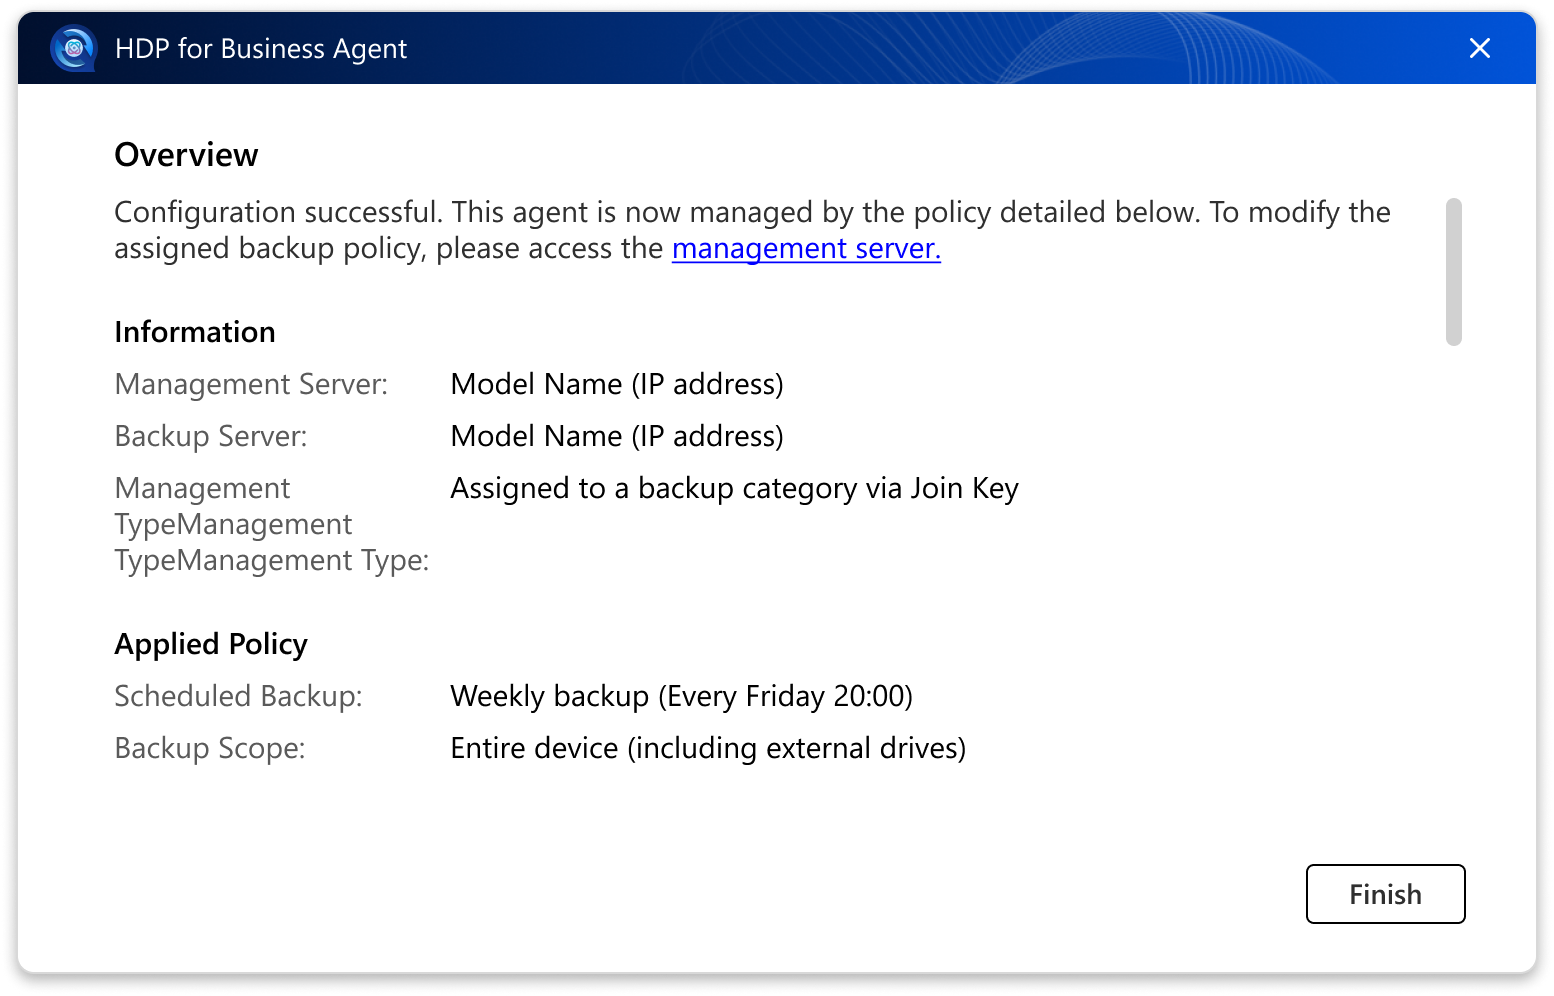
After the connection succeeds, the Overview page shows what the computer is now protected by:
- The Management Server and the Backup Server, each with its name and IP address.
- The applied policy, its backup schedule, and its backup scope.
Click Finish to close the wizard.
Step 5: Check the backup status from the system tray
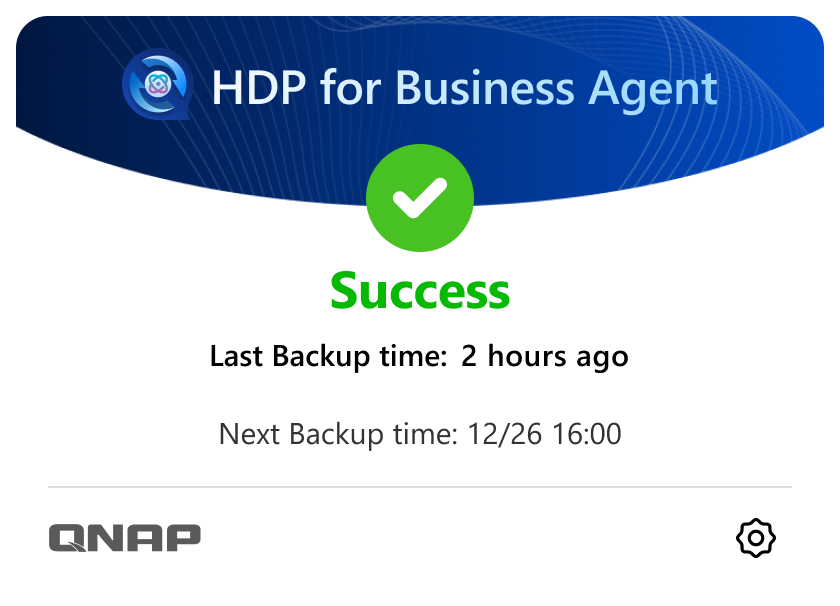
After setup, the agent adds an icon to the Windows system tray and starts automatically when the computer boots. Click the icon to open the status panel.
| Status | What the panel shows |
|---|
| Not started yet | No backup has run yet. The next backup time is shown. |
| Running | A backup is in progress, with a progress bar. The panel shows Finalizing after the data transfer completes. |
| Success | The backup completed. The last and next backup times are shown. |
| Warning | The backup completed with warnings. |
| Error | The backup failed. Open the Logs page for details. |
| Queued | The backup is waiting to run. |
| Stopped | The backup was stopped. The last backup time is shown. |
| Disabled | The backup job is disabled. Enable it again on the Management Server. |
| Network Reconnecting | The network connection was lost. The agent reconnects automatically. |
Note: Installing on a Computer Without Internet Access
HDP for Business Agent runs on the .NET 10.0 runtime. The installer downloads the required components from Microsoft during installation. If the computer has no internet access, install the following components manually before you run the agent installer.
- ASP.NET Core Runtime 10.0
- .NET Runtime 10.0
- .NET Desktop Runtime 10.0
- On a computer with internet access, download the three x64 installers for Windows from the Microsoft .NET 10.0 download page.
- Copy the installers to the offline computer and install all three components.
- Run the HDP for Business Agent installer. When the installer asks whether the .NET runtime components are already installed, click OK to continue.
Install all three components. The agent service requires ASP.NET Core Runtime and .NET Runtime, and the agent user interface requires .NET Desktop Runtime. If .NET Desktop Runtime is missing, the installation still finishes, but the agent prompts you to update .NET when it starts.
Result
The Windows computer is now a protected workload in HDP for Business. To confirm this:
- The computer appears on the Physical Device page of the Management Server, bound to the Backup Server and the policy of the Join Key.
- The system tray panel shows the next backup time, and shows Success after the first backup completes.
- The backup appears in Activities on the Management Server.
What's Next
适用产品
- HDP for Business
- HDP for Business Agent 1.0.0.1697 and later
- Windows 10 (64-bit, version 1607 or later), Windows 11
- Windows Server 2016 / 2019 / 2022 / 2025
目的
本教程向您展示如何在 Windows 计算机上安装 HDP for Business Agent,将其连接到您的管理服务器,并确认分配的备份策略正在运行。
先决条件
- HDP for Business 已安装并在作为管理服务器的 QNAP NAS 上初始化。
- 备份服务器和保护策略已准备好,以便您可以将它们绑定到一个加入密钥。
- Windows 计算机运行支持的 64 位操作系统。不支持基于 ARM 的设备,例如 ARM64 Windows。
- 计算机在安装时需要有互联网连接。安装程序会自动安装代理所需的 .NET 10.0 运行时组件。如果计算机没有互联网连接,请先手动安装这些组件。请参阅注意:在无互联网访问的计算机上安装。
- 计算机上未安装 NetBak PC Agent。这两个产品不能共存,安装程序会要求您在继续之前移除其他产品。
步骤
步骤 1:在管理服务器上创建加入密钥
加入密钥定义了计算机绑定到哪个备份服务器和哪个策略。代理在连接后会自动应用它们。
- 在 HDP for Business 中,转到物理设备并点击添加。
- 点击下载代理以下载安装程序,并将文件复制到 Windows 计算机。
- 点击管理加入密钥 > 创建。
- 选择要绑定的备份服务器和策略,然后点击创建。
- 在加入密钥表中,点击复制。密钥是 64 个字母数字字符长。
步骤 2:在 Windows 计算机上安装代理
- 在 Windows 计算机上运行安装程序。
- 选择安装语言。默认选择您的系统语言。
- 确认您要安装 HDP for Business Agent,并等待文件提取到
C:\Program Files\QNAP。 - 安装完成后,保持运行应用程序的选项选中,并关闭安装程序。
您只能升级现有安装。不支持重新安装相同版本或降级到早期版本。
步骤 3:连接到管理服务器
代理程序运行时会打开连接到管理服务器界面。
- 在服务器地址中,输入管理服务器的主机名或 IP 地址,并可选输入端口号,例如
nas-01、10.77.216.185或10.77.216.185:11443。不要包含http://或https://。 - 在加入密钥中,粘贴您在步骤 1 中复制的密钥。
- 点击下一步。
- 如果出现证书确认窗口,点击继续。
通过 HTTPS 连接
如果您未指定端口号,代理程序会先尝试使用端口 443 的 HTTPS,然后是端口 8080 的 HTTP。QNAP NAS 设备使用的 HTTPS 端口通常不是 443,因此为了确保连接加密,请明确输入 NAS 的 HTTPS 端口。要查找端口,请转到控制台 > 系统 > 常规设置 > 安全连接 (HTTPS)。
由于大多数 NAS 设备使用自签名证书,代理程序通过 HTTPS 连接时会显示证书确认窗口。这是预期的。点击继续以继续。您的选择也适用于代理程序随后连接的备份服务器。
如果您输入的加入密钥属于备份服务器而不是管理服务器,代理程序会要求您连接到管理服务器。
步骤 4:查看分配的策略
连接成功后,概览页面显示计算机当前受保护的内容:
- 管理服务器和备份服务器,各自的名称和 IP 地址。
- 应用的策略、备份计划和备份范围。
点击完成以关闭向导。
步骤 5:从系统托盘检查备份状态
设置完成后,代理会在 Windows 系统托盘中添加一个图标,并在计算机启动时自动启动。点击图标打开状态面板。
| 状态 | 面板显示的内容 |
|---|
| 尚未开始 | 尚未运行备份。显示下次备份时间。 |
| 正在运行 | 备份正在进行中,带有进度条。数据传输完成后,面板显示正在完成。 |
| 成功 | 备份已完成。显示上次和下次备份时间。 |
| 警告 | 备份完成,但有警告。 |
| 错误 | 备份失败。打开日志页面查看详情。 |
| 已排队 | 备份正在等待运行。 |
| 已停止 | 备份已停止。显示上次备份时间。 |
| 已禁用 | 备份任务已禁用。请在管理服务器上重新启用。 |
| 网络重新连接中 | 网络连接已丢失。代理会自动重新连接。 |
注意:在无互联网访问的计算机上安装
HDP for Business Agent 运行在 .NET 10.0 运行时上。安装程序在安装过程中从微软下载所需组件。如果计算机没有互联网访问权限,请在运行代理安装程序之前手动安装以下组件。
- ASP.NET Core Runtime 10.0
- .NET Runtime 10.0
- .NET Desktop Runtime 10.0
- 在有互联网访问的计算机上,从Microsoft .NET 10.0 下载页面下载三个适用于 Windows 的 x64 安装程序。
- 将安装程序复制到离线计算机并安装所有三个组件。
- 运行 HDP for Business Agent 安装程序。当安装程序询问 .NET 运行时组件是否已安装时,点击确定继续。
安装所有三个组件。代理服务需要 ASP.NET Core Runtime 和 .NET Runtime,代理用户界面需要 .NET Desktop Runtime。如果缺少 .NET Desktop Runtime,安装仍会完成,但代理启动时会提示您更新 .NET。
结果
Windows 计算机现在是 HDP for Business 中的受保护工作负载。要确认这一点:
- 计算机出现在管理服务器的物理设备页面上,绑定到备份服务器和加入密钥的策略。
- 系统托盘面板显示下次备份时间,并在备份完成后显示成功。
- 备份出现在管理服务器的活动中。
接下来是什么


